 kiduverse
How to draw a kitten: three levels
Learn to draw a seated kitten with simple masses, eye placement and tail overlap. Three levels, paired pencil studies, eraser practice and printable PDFs.
- 3 detail levels
- Paper, HB/2B pencil, eraser
- 12 parts
Tap a drawing below to choose your level. The other levels hide and the “trial → after checking” pairs get bigger.
Draw a seated kitten with a gently turned head, paws together and a tail in front. Begin with two pale masses; check eye placement and hidden edges before details. Choose one route and continue your own drawing.
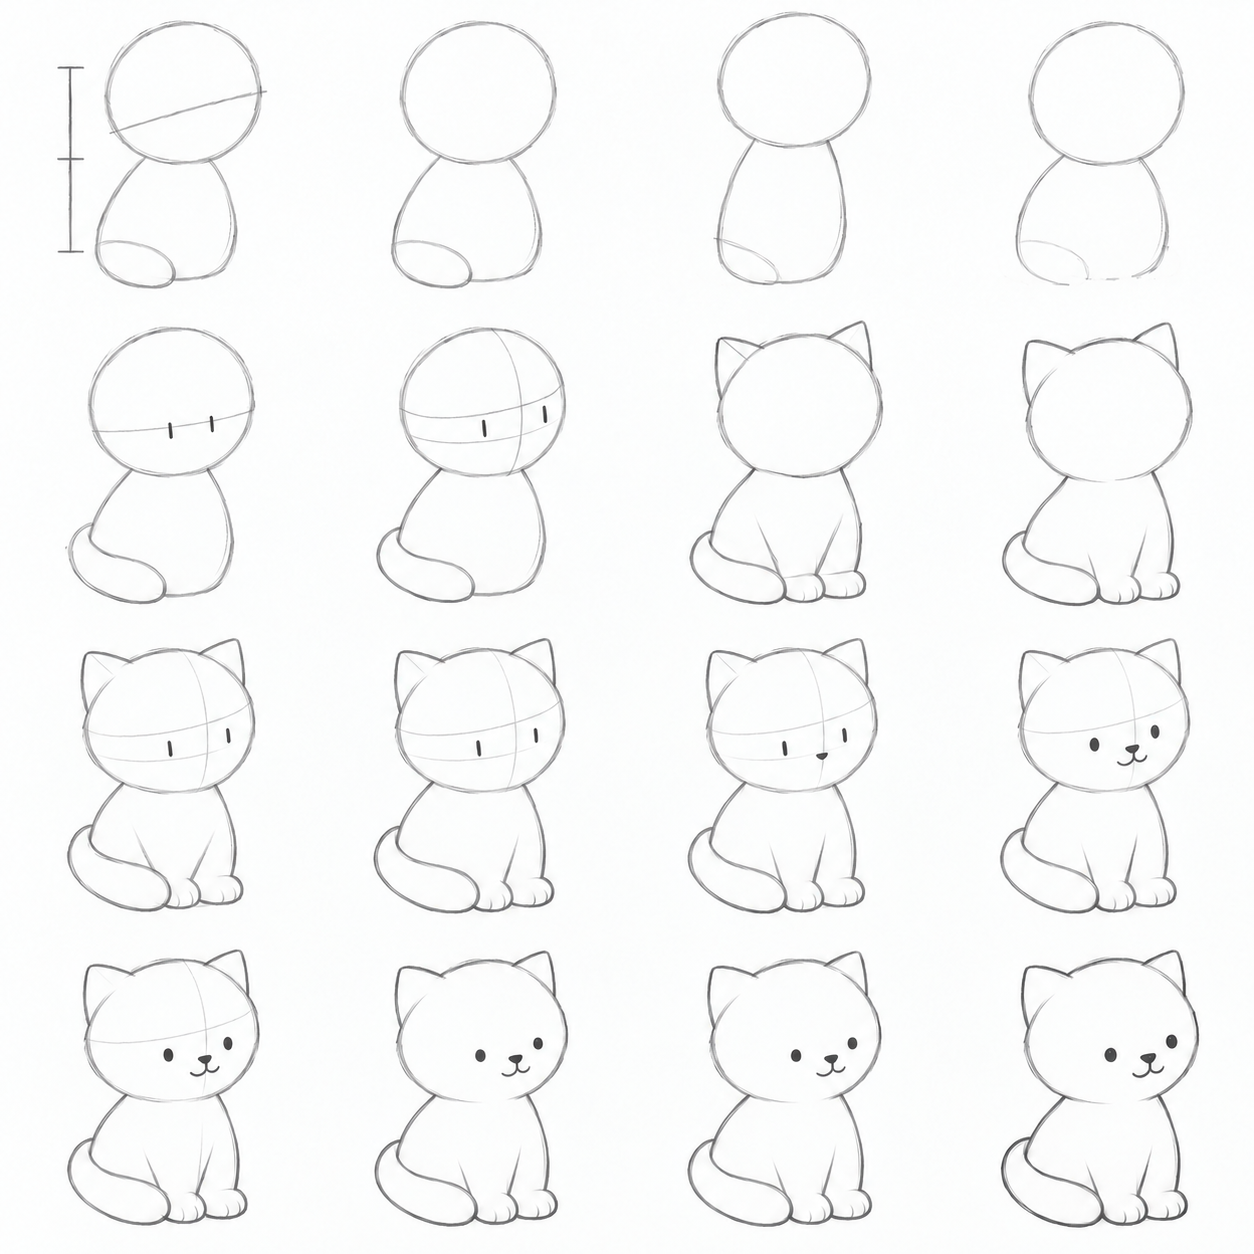
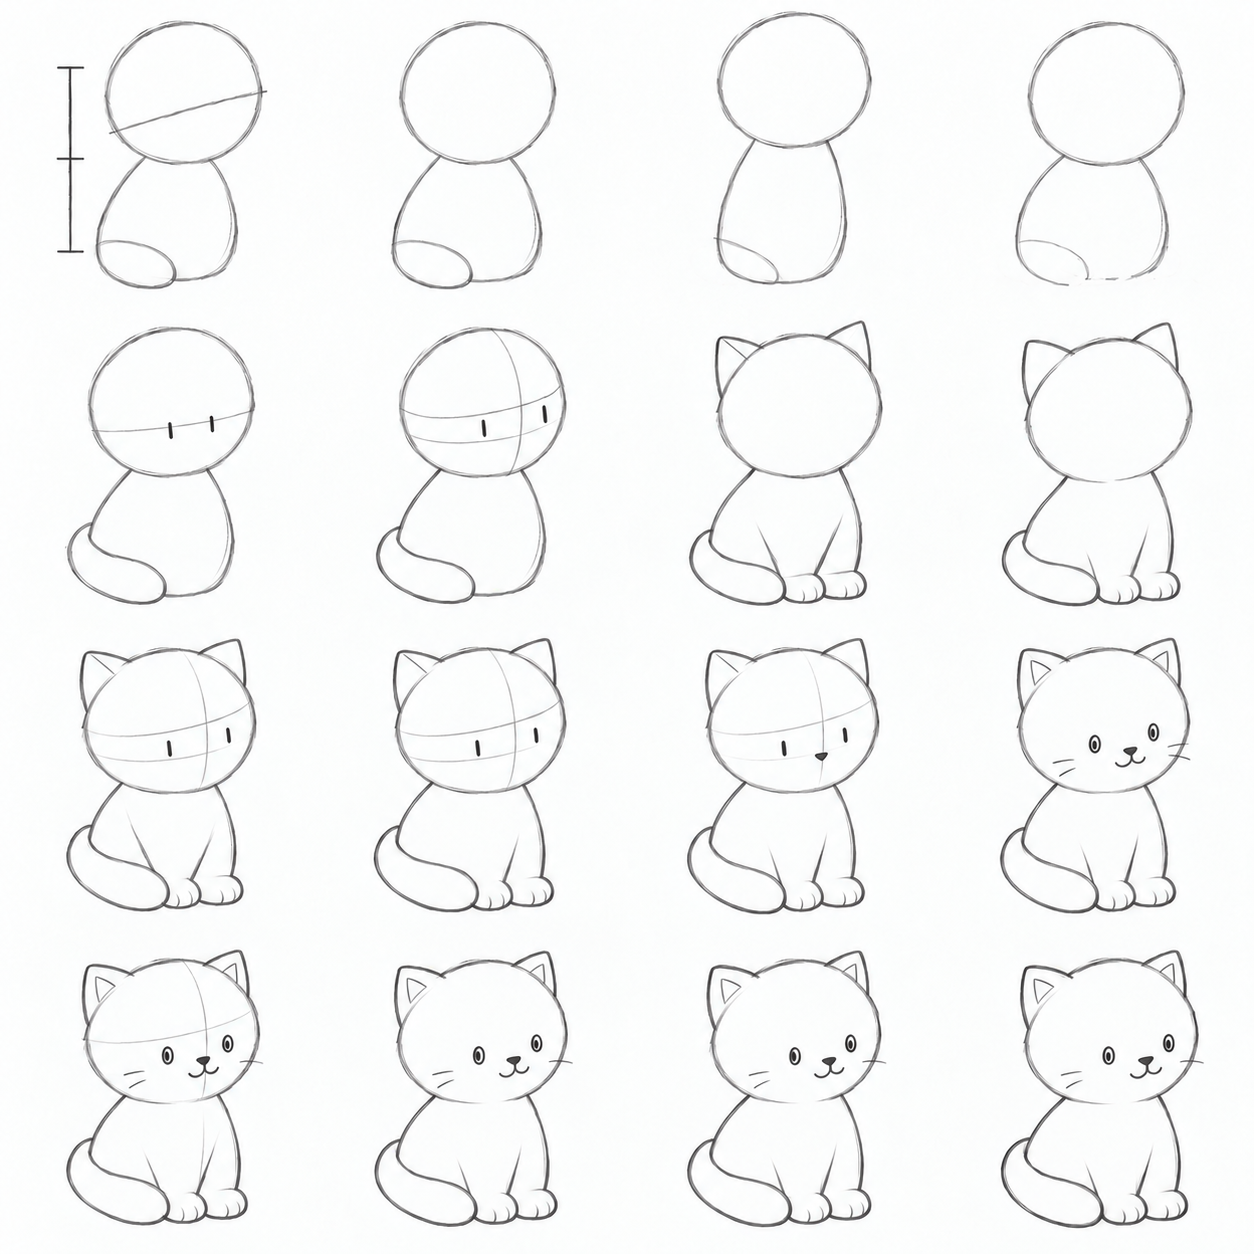
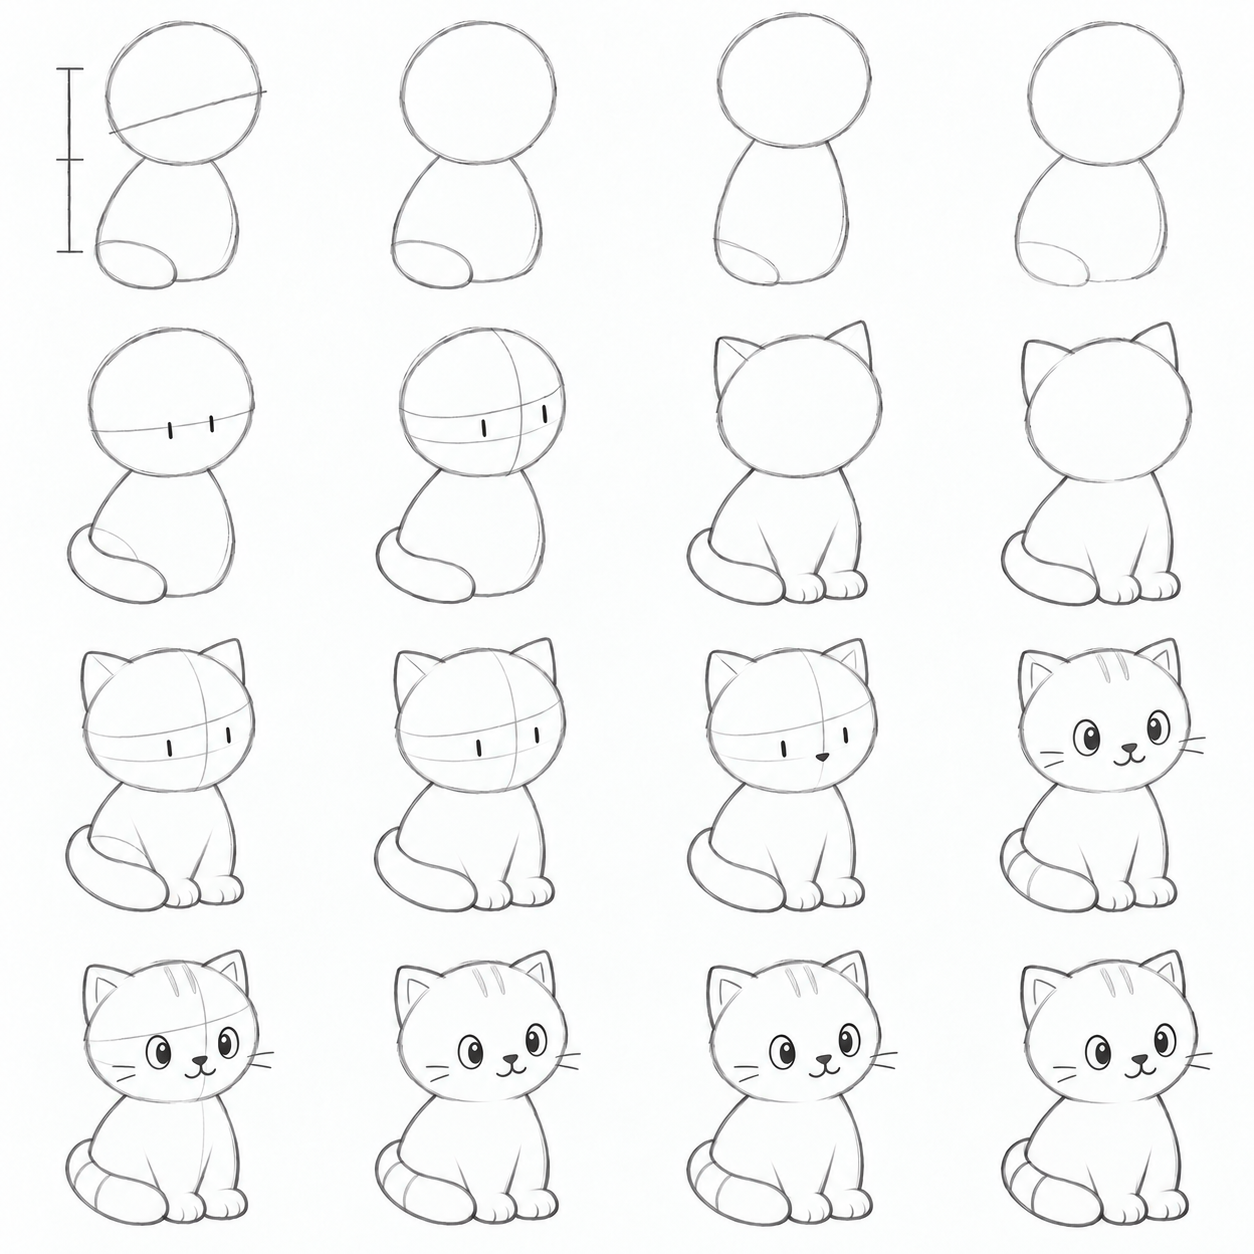
Simplest: dot eyes, no whiskers or stripes. A little more detail: oval eyes and short whiskers. Best version: expressive eyes and a few soft accents. Best names this lesson’s detail ceiling; the other routes are complete drawings too.
Read the pairs: “Trial” shows a search or diagnostic error; “After checking” shows the chosen form. Do not copy a wrong line on purpose. Check your drawing and repair only what needs changing. Left panels are comparisons, not mandatory states between steps.
Your goal and materials
Build a seated kitten and explain two decisions: where an eye belongs on a turning head, and why a paw or body edge disappears behind the tail. Use paper, an HB or 2B pencil and soft eraser; start with light circles, eggs and curves. Allow about 25–45 minutes with breaks. This teaches a simple character rather than realistic cat anatomy.
Surface line. Imagine a ribbon around the round head. It connects eyes to one turn, while an axis marks the face centre. In a slight turn the visible far side is narrower. Choose a ribbon position and check it against the axis instead of treating every curve as a universal rule.
Overlap. An opaque foreground form hides a rear edge. Here the tail sits in front of paws, so a paw edge stops at it. Choose the foreground form before erasing only the covered segment. This also works for ears or two objects on a table.
Warm up with two small trials
On a spare corner draw a round head, ribbon and axis; place eye ticks on either side. On a second head shift the axis and place ticks again from the new guide. Then draw an egg behind a broad curved ribbon. Choose the foreground ribbon and erase the covered egg edge; swap the order in a fresh trial. Check: explain the head turn and why that edge disappeared. These trials prepare the two main drawing decisions.
Step 1. Leave space and place two large masses
Trial
After checking
Trial
After checking
Trial
After checking
Simplest: Mark head top and paw bottom; place a pale head circle and body egg beneath it.
A little more detail: Compare head tilt with body placement; begin with circle and broad egg, without eyes or fur.
Best version: Find the movement from head to paws; lightly overlapping masses will become the short neck.
Why: Large relationships connect the animal before small details hold them in place.
Check: Is there room for ears above and paws below? Does the head belong to one body?
Erase / repair: Lighten endpoint ticks and move both masses together instead of suddenly shrinking the paws.
Step 2. Shorten the body while keeping the head
Trial
After checking
Trial
After checking
Trial
After checking
Simplest: Move the bottom of an overlong egg closer to the head, leaving the head in place.
A little more detail: Compare head and body height; their heights are close in this compact kitten, without a long column.
Best version: Find the broad lower seated body; shorten a narrow long egg and widen it a little.
Why: This is a local proportion repair, not a restart. The relationship belongs to this seated kitten, not every cat.
Check: Does the repaired kitten look more compact, with room for front paws?
Erase / repair: Lighten the old lower boundary and mark a new one higher. A slimmer kitten is fine if its paws still have space.
Step 3. Place eye marks on a turning head
Trial
After checking
Trial
After checking
Trial
After checking
Simplest: Wrap a pale ribbon around the head and add a face axis; put eye ticks on either side.
A little more detail: Compare the straight trial with a surface ribbon; the axis shifts toward the turn and the far tick sits nearer it.
Best version: Choose the head turn first; both eye ticks belong to one ribbon, not the nose.
Why: The surface line connects both eyes to one turn. Its visible curve depends on the ribbon position and viewing direction.
Check: Are ticks on opposite sides of one axis and on one ribbon? Will the nose sit below them?
Erase / repair: Erase a wrong tick near the nose and replace it on the side. Lighten the flat trial, keeping useful guides until you check features.
Step 4. Find the kitten over circles and eggs
Trial
After checking
Trial
After checking
Trial
After checking
Simplest: Search for soft cheeks, two ears, shoulders and round paws with short light strokes, without tracing the whole head circle.
A little more detail: Connect cheek to neck, shoulder to flank and lower body to paws; ears are soft triangles, not sharp stickers.
Best version: Compare where the silhouette is wider or narrower than its support; find a short neck and smooth seated body, without tiny fur.
Why: Simple masses support a living surface rather than remain outlined parts of the animal.
Check: Does one kitten silhouette emerge? Does the head circle still cross its neck? Do paws touch the same ground?
Erase / repair: Lighten inner construction arcs and a rejected duplicate edge, keeping the chosen contour and useful eye guide.
Step 5. Make the tail opaque: choose a hidden edge
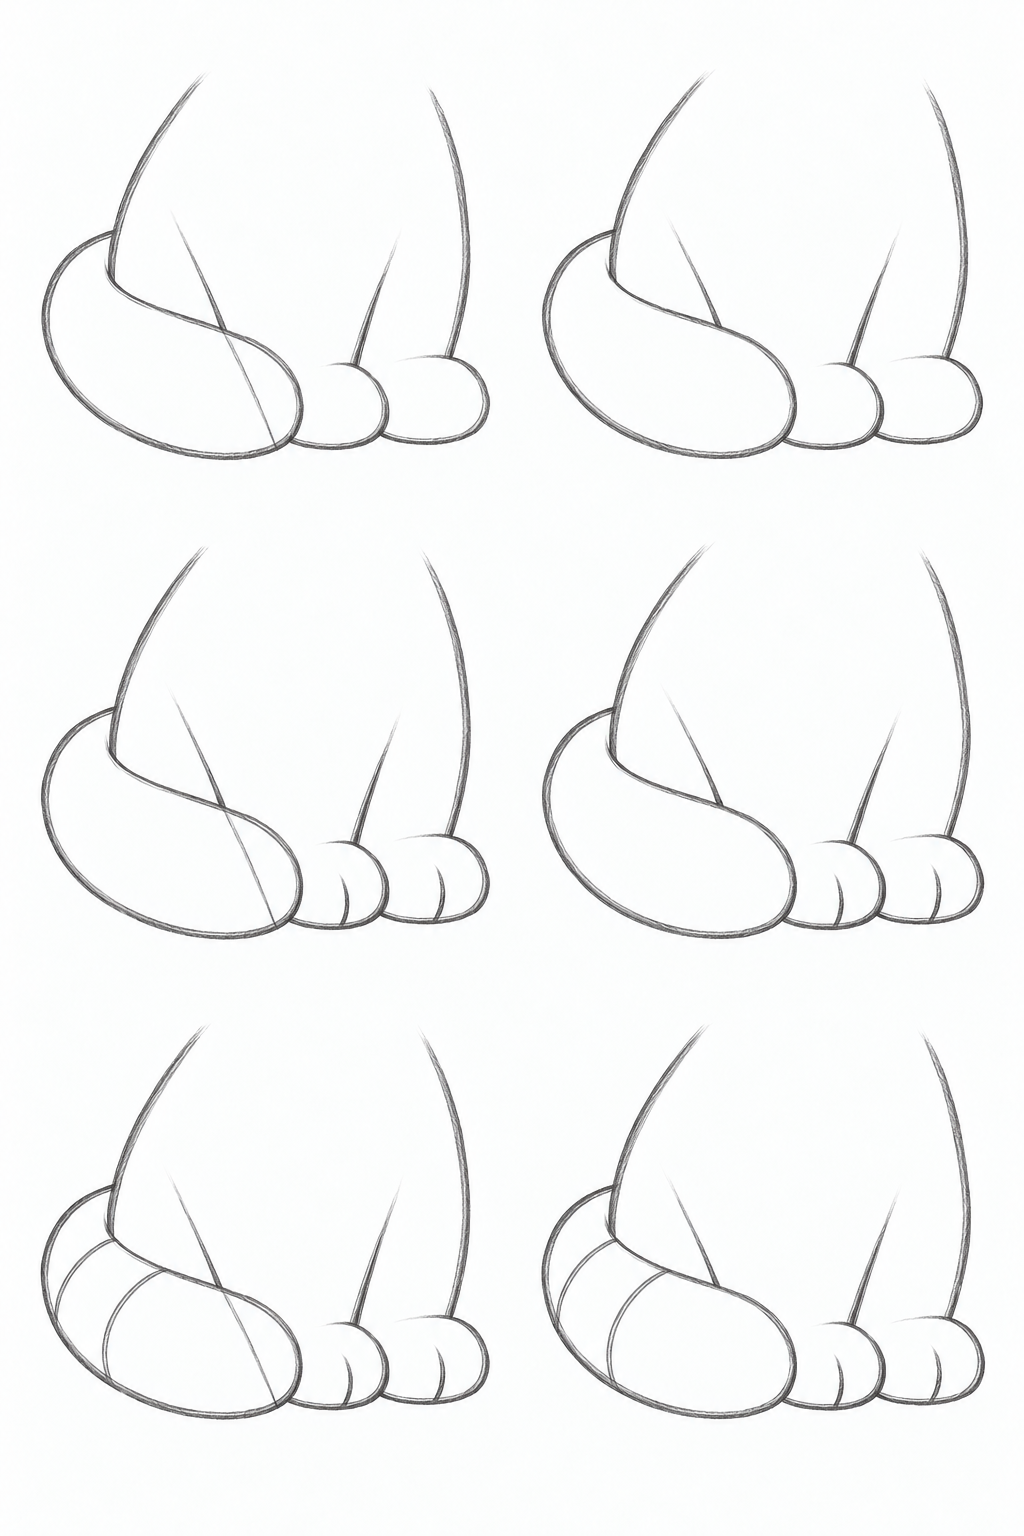
This is a close-up of paws and tail. Find the thin line inside the left tail: only that segment disappears on the right, while the visible line above remains. Make the same local repair in your drawing.
Trial
After checking
Trial
After checking
Trial
After checking
Simplest: Place a broad tail in front of the lower body and paws; choose the short edge it covers.
A little more detail: Draw both tail edges along one gentle movement, then remove the covered paw or belly segment.
Best version: At the overlap, tail is in front and lower body or paw base behind; do not darken every crossing.
Why: Overlap makes the rear contour stop where an opaque foreground tail hides it, showing depth without shading.
Check: Can you point to a rear edge stopping at the tail? Does the tail read in front rather than as a transparent ribbon?
Erase / repair: Erase only the rear body or paw line inside the foreground tail. Preserve the tail and visible rear edge; restore only a short useful segment if needed.
Step 6. Add the face at checked positions
Trial
After checking
Trial
After checking
Trial
After checking
Simplest: Use two dot eyes, a small nose and quiet mouth; skip whiskers, stripes and toes.
A little more detail: Use two plain oval eyes with pupils, nose and mouth; one short whisker each side is enough.
Best version: Use expressive plain oval eyes and two short whiskers each side; a few broad forehead or tail accents are optional, without fur texture.
Why: Features belong to the checked mass. Whiskers cannot fix a head turn, so compare eyes with their guide first.
Check: Are eyes on the ribbon, nose below and between them on the face axis? Has the far eye slipped onto the edge?
Erase / repair: Erase a pale misplaced eye and replace it before darkening. Remove decoration if the face is crowded.
Step 7. Put down the pencil and erase the supports
Trial
After checking
Trial
After checking
Trial
After checking
Simplest: Remove head circle, body egg, axis and ribbon while keeping eyes and chosen visible edges.
A little more detail: Work from ears to paws, removing scaffolding and any forgotten hidden tail edge, without erasing the whole contour.
Best version: Lighten repeated cheek and flank search marks; keep the selected edge and erase guides after checking the face.
Why: The eraser removes scaffolding after its work is finished and clarifies form without adding details.
Check: Which guides disappear within this pair? Do eyes and visible paws stay while circle and axis go?
Erase / repair: Dab unwanted strokes with a soft eraser. Restore just a short useful edge if lost; stop if paper begins to wear.
Step 8. Choose a few stronger pencil accents
Trial
After checking
Trial
After checking
Trial
After checking
Simplest: Strengthen eyes, nose and a short front tail edge, keeping the flank light.
A little more detail: Accent pupils and one overlap instead of creating an equally dark border everywhere.
Best version: Use a few accents at eyes, nose and front tail, without adding fur or filling the drawing to finish it.
Why: Varied pressure selects a focus. A full lighting study belongs in another lesson.
Check: Do the face and clear overlap stand out? Have head circle or crossing tail edge returned?
Erase / repair: Lighten one heavy secondary edge, then restore one useful stroke instead of tracing everything.
Repair a small problem
| What you notice | Possible cause | Small repair |
|---|---|---|
| Head and body look like stickers | Masses were traced completely | Lighten inner arcs and connect cheek to short neck |
| An eye sits on the nose | Its tick ignored ribbon and axis | Erase the tick and move it onto the side surface |
| Transparent tail | Rear contour crosses foreground tail | Remove only the covered paw or body edge |
| Kitten looks stretched | Large masses were not compared | Lighten the body egg bottom and move it closer to head |
| Every edge is equally dark | One pressure was used everywhere | Lighten a secondary edge, preserving the face accent |
Three ideas: draw the kitten in a new position
Choose one task and keep your route’s detail. Each card shows supports above and a refined example below. Change head position or side view while keeping a simple seated pose. Build your own version first; matching the example exactly is not required.
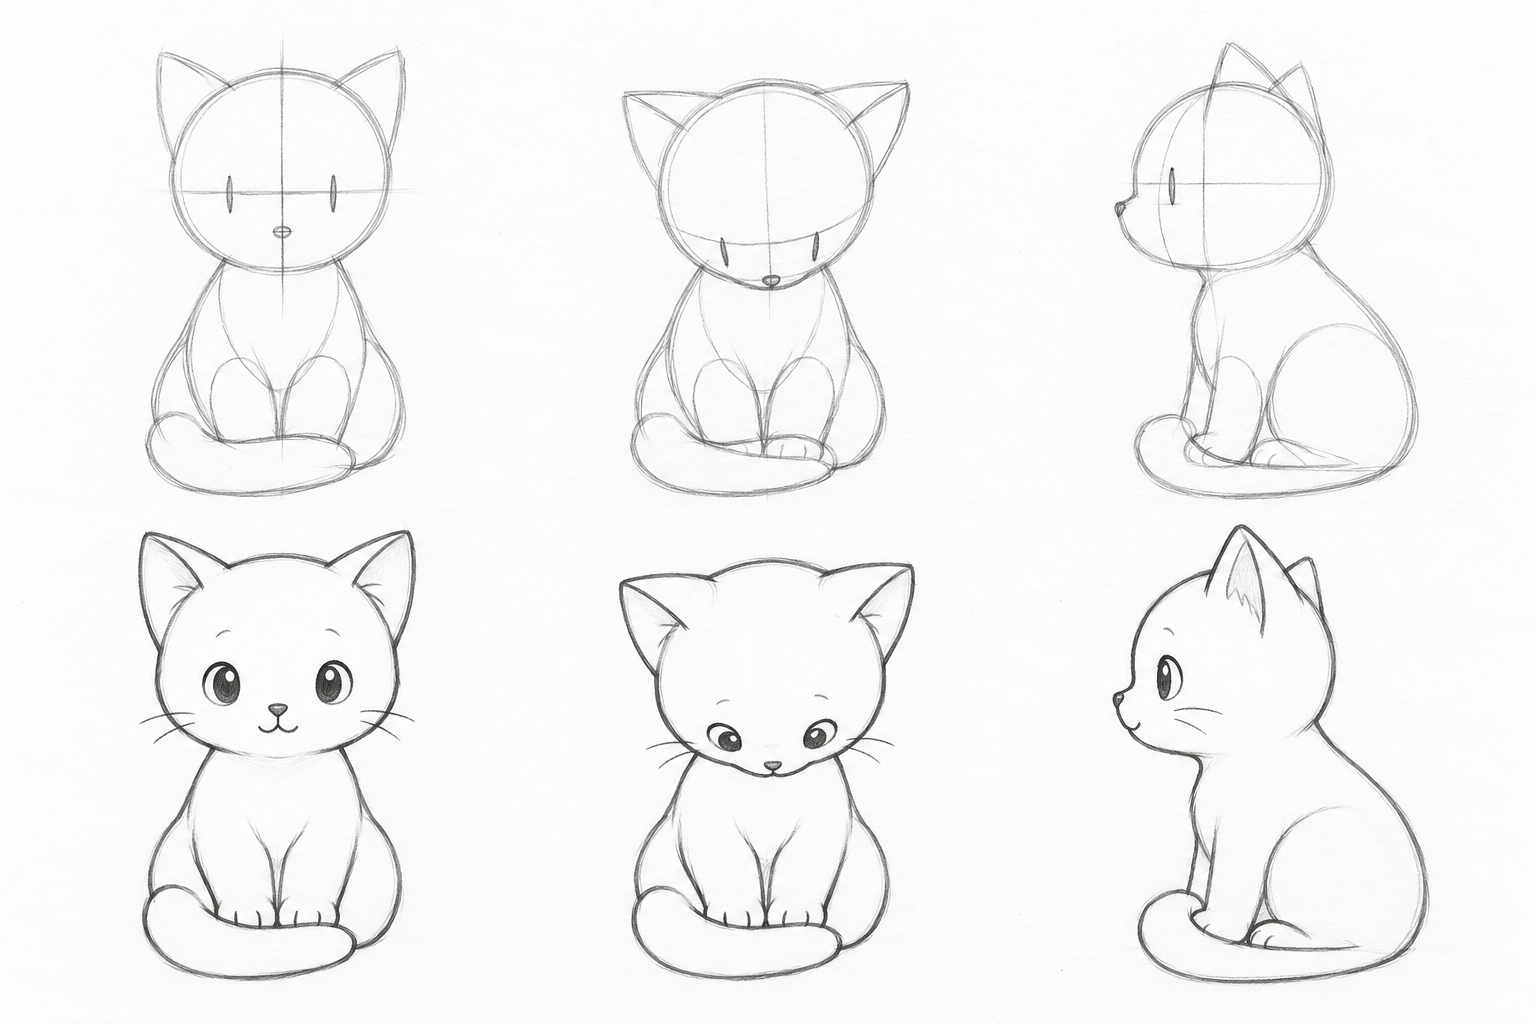
1. Look straight at you
What changes: The head axis moves toward the centre and both sides of the face show; keep the seated body.
Try: Place head and body, add a central axis and one ribbon; mark two eyes at similar distances from the axis before details. Keep the tail in front of paws.
Why: The same surface guide connects both eyes, while overlap makes paw edges stop at the tail.
Check: Are eyes on opposite sides of one axis? Is the tail opaque?
Repair: Move axis and eye ticks together if the face still turns sideways. Erase the old tick and the rear edge covered by tail.
2. Look down at the paws
What changes: The head tilts down independently of the seated body, without rotating the whole page.
Try: Keep the body seated. Tilt the head mass, its axis and ribbon together; mark the nose lower and eyes on the new ribbon. Choose which chest edge the chin covers.
Why: Guides belong to the head and move with its tilt; foreground head hides part of the rear chest.
Check: Is the nose lower while the body stays put? Are eyes on the new ribbon?
Repair: If you moved only the nose, erase pale eye marks and replace them from the tilted head. Remove the chest edge covered by the chin.
3. Sit strictly in profile
What changes: One eye is visible, muzzle projects sideways and far ear or paw hides partly behind nearer forms.
Try: Place head and seated body egg from the side. Mark a short muzzle projection and side eye guide; find one eye, near ear and visible front paw, then remove hidden edges.
Why: A surface guide locates the side eye and overlap chooses far ear/paw visibility; this is new construction, not a flipped outline.
Check: Is one eye visible and the muzzle clearly side-on? Can you point to a hidden rear edge?
Repair: Lighten the muzzle and find a side silhouette if the old three-quarter view returns; erase the second eye and only the covered far-paw segment.
Independent trial: choose a position and adjust its tilt slightly. Before eyes, point to axis and ribbon; before erasing, name the foreground form. Explain one eye placement and one removed edge.
Self-check question: can you lower only the nose while leaving eyes and ribbon in their old positions?
Self-check answer: tilt the head mass and guides first, then locate eyes and nose again from them. The body can stay seated. Moving only the nose disconnects features from one mass. Show your new ribbon and explain one erased rear edge.
Self-check: show where the ribbon helped place an eye and where the tail hid a rear edge. Explain what changed in your new head position and which line you erased.
What to draw next
All drawing lessons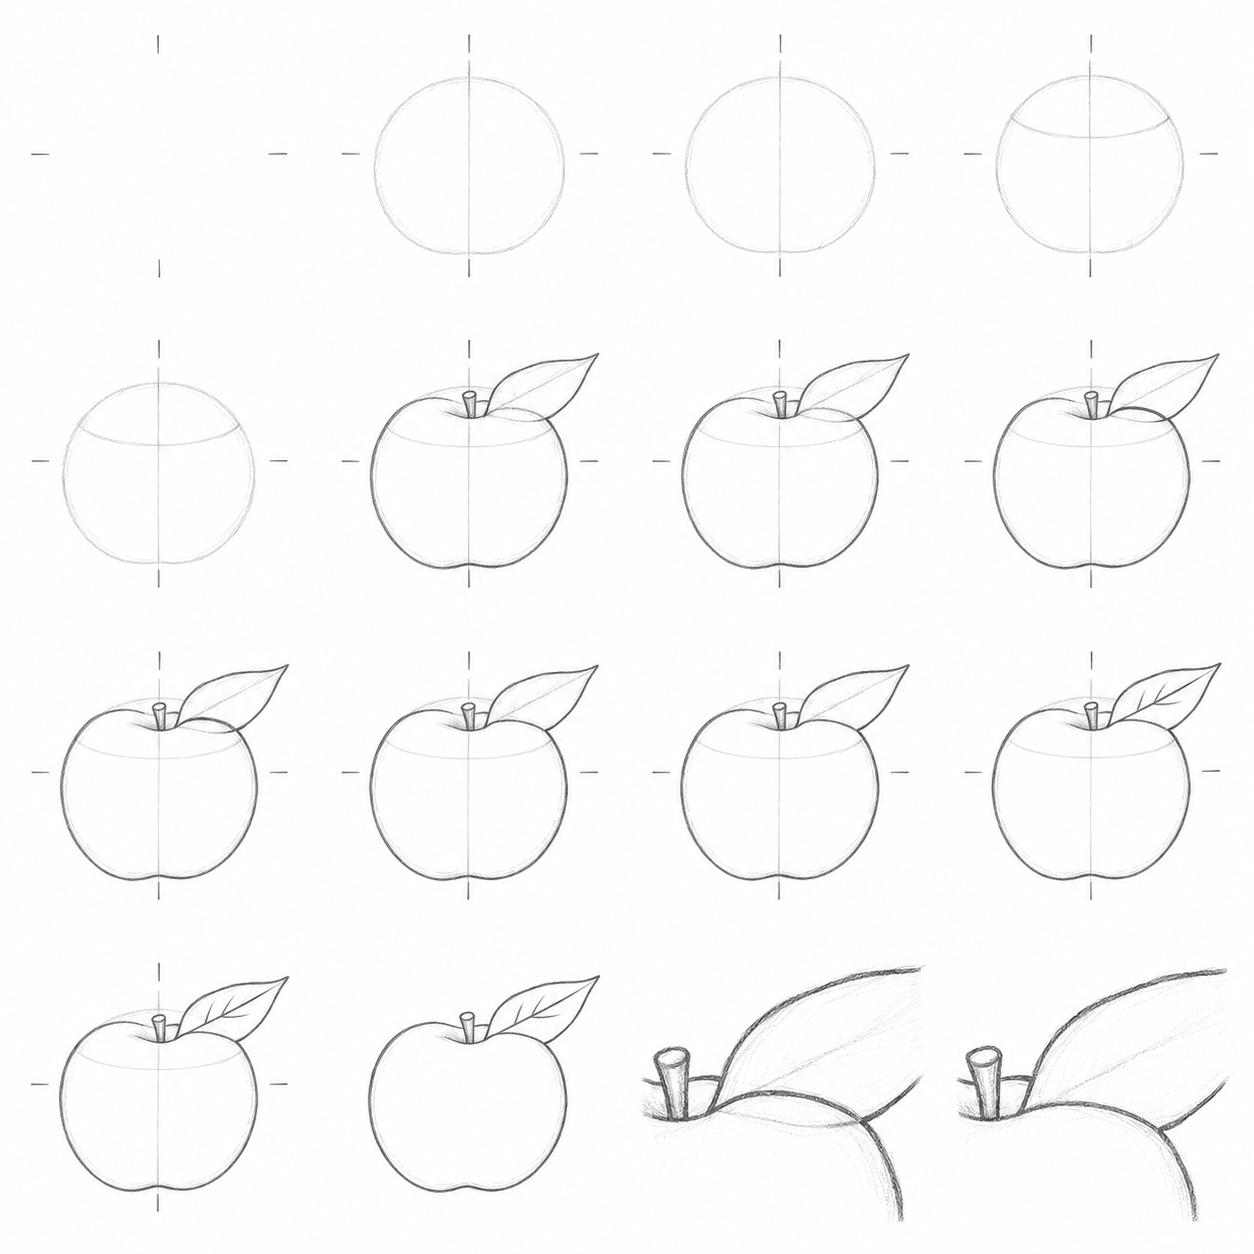 3 levels
How to draw an apple
A step-by-step lesson to draw an apple from simple forms: curves, overlap, erasing, warm-up, small repairs, independent tasks and printable A4/Letter PDFs.
 3 levels
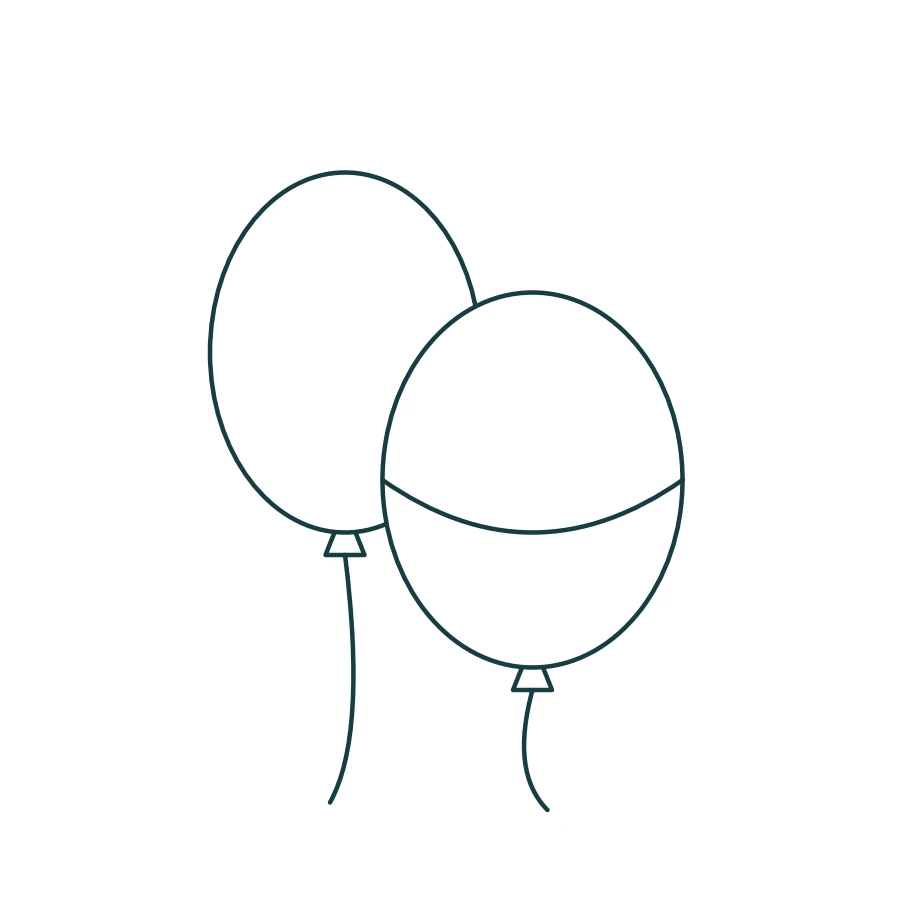
How to draw overlapping balloons
A step-by-step lesson to draw overlapping balloons from simple forms: curves, overlap, erasing, warm-up, small repairs, independent tasks and printable A4/Letter PDFs.
 3 levels
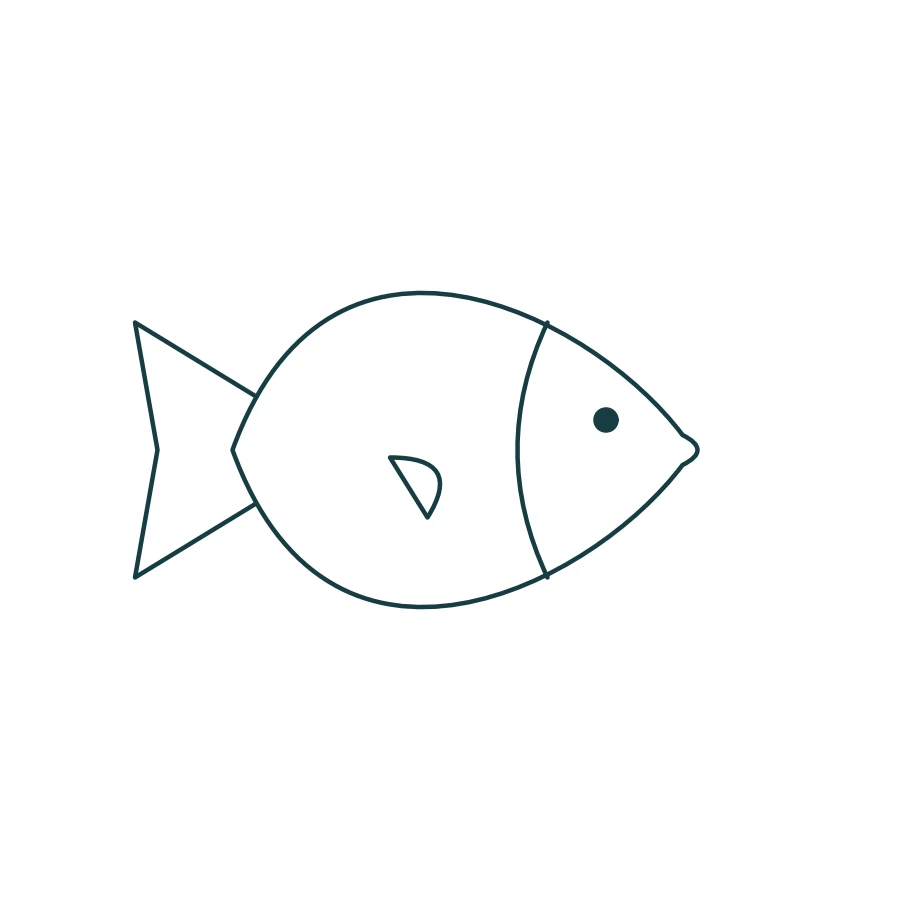
How to draw a fish
A step-by-step lesson to draw a fish from simple forms: curves, overlap, erasing, warm-up, small repairs, independent tasks and printable A4/Letter PDFs.