kiduverse
How to draw a mushroom: three levels and pencil shading
Draw a mushroom from simple forms: three levels, ten stages, rim thickness, gills and gradual pencil shading. Complete lesson and practice PDFs in A4/Letter.
- 3 detail levels
- Paper, HB/2B pencil, eraser
- 17 parts
Tap a drawing below to choose your level. The other levels hide and the “trial → after checking” pairs get bigger.
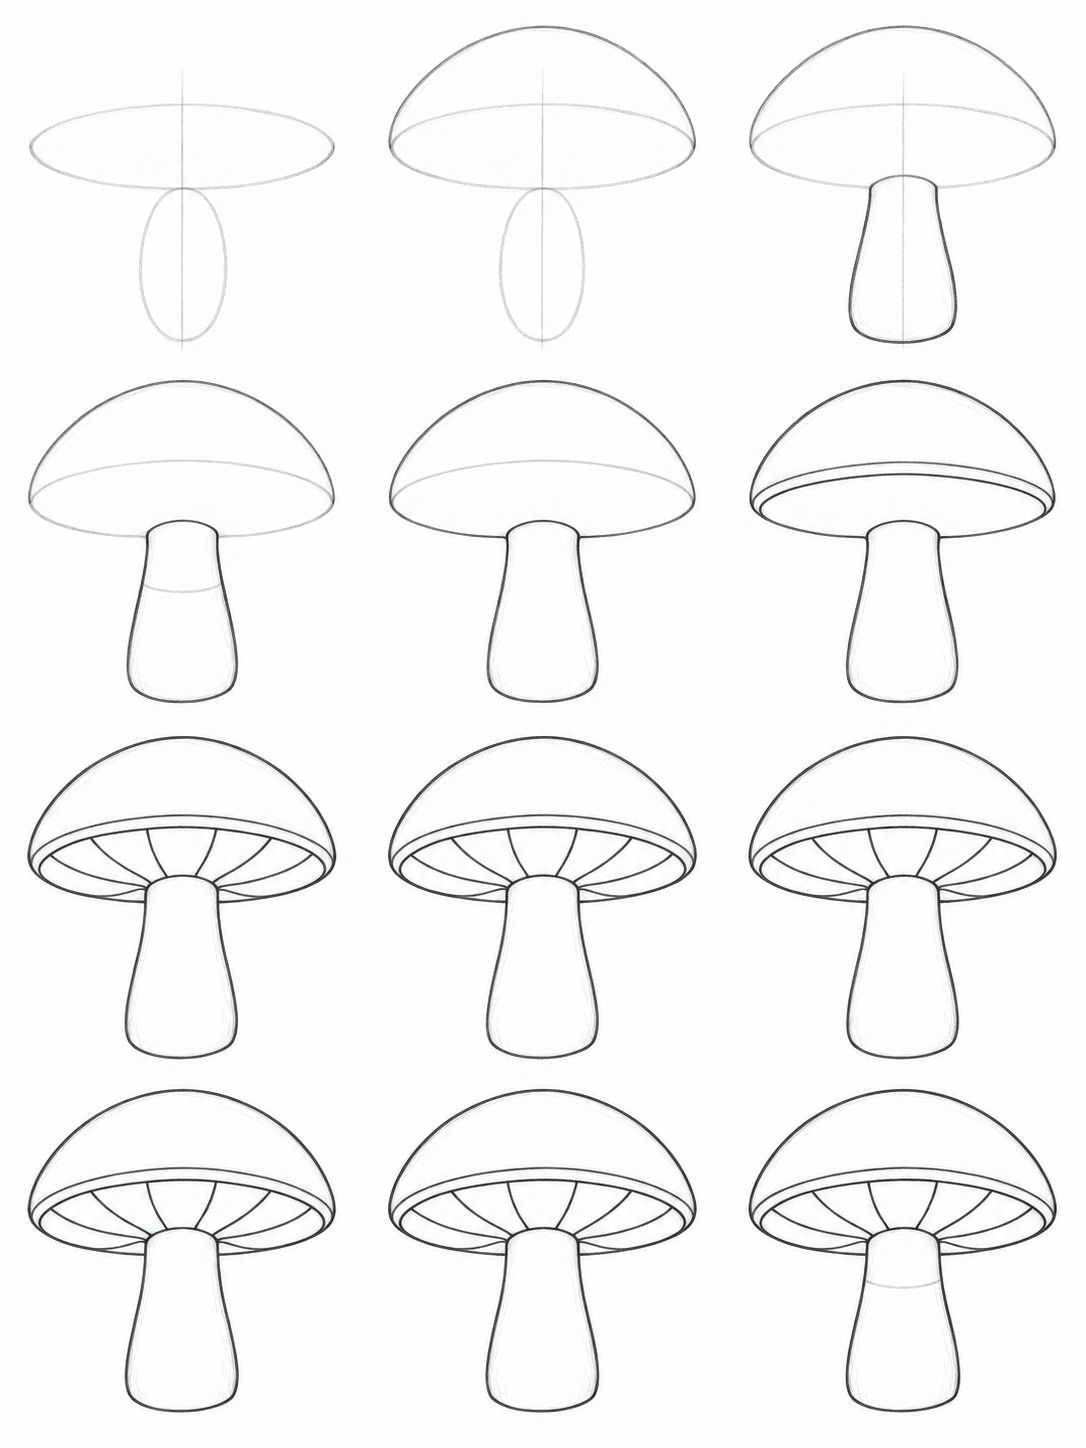
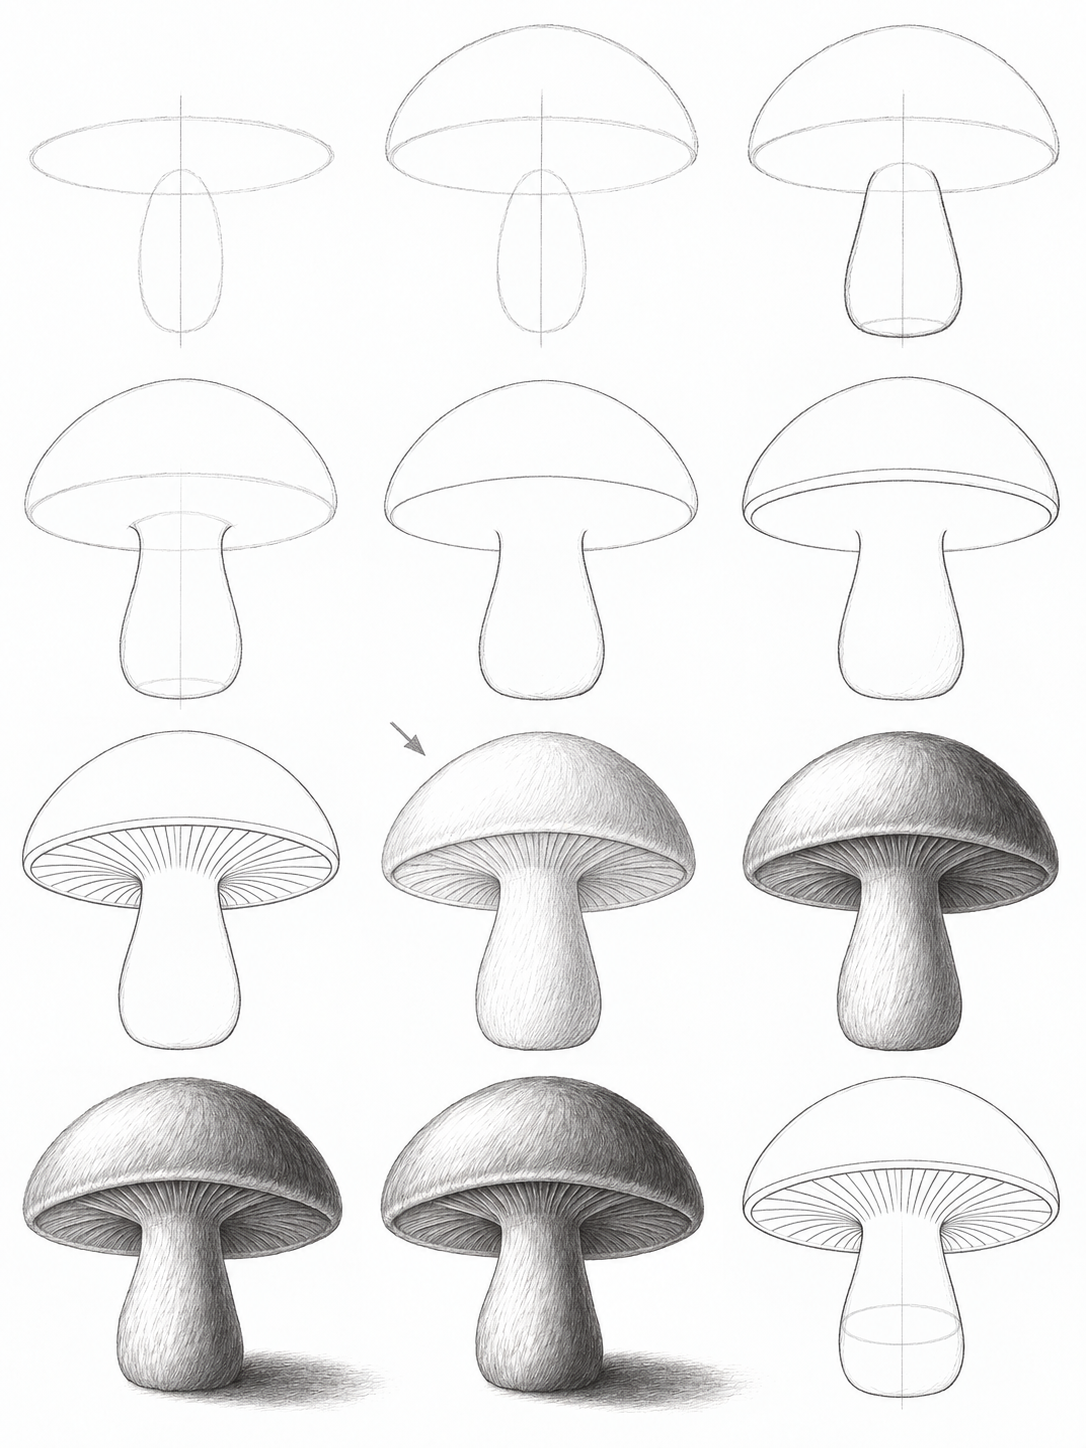
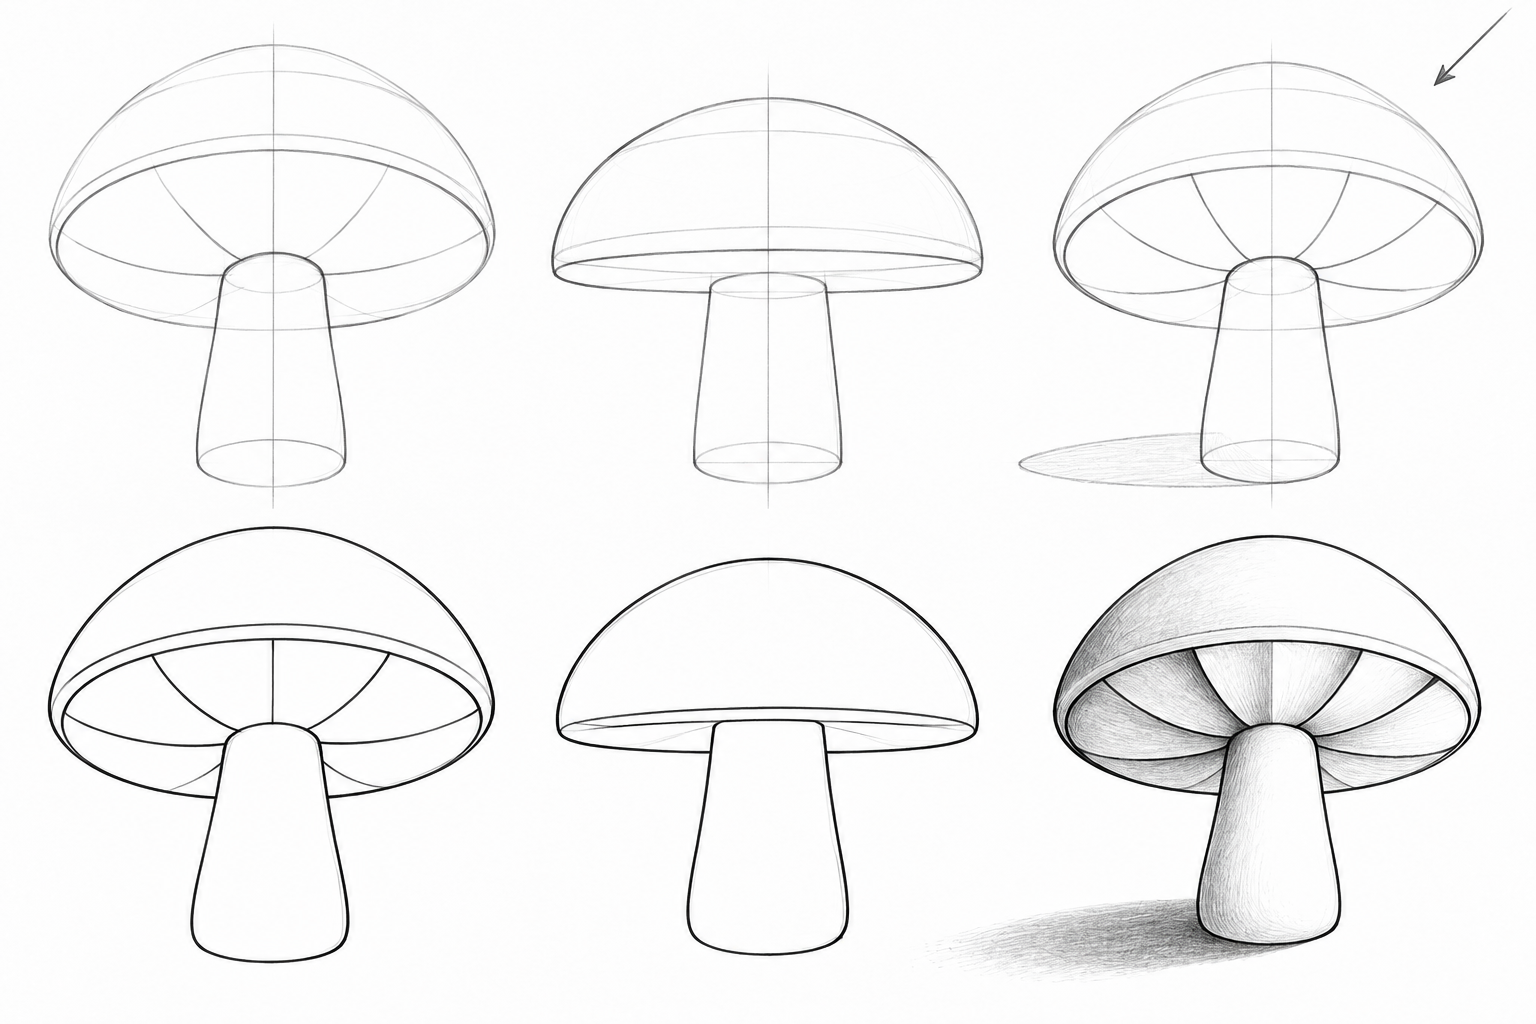
Choose a result and follow its route. The simplest finishes at step 5, a little more detail at step 7 and the best version at step 10. Later cards retain already completed simpler drawings. The view is slightly from below; your proportions may differ.
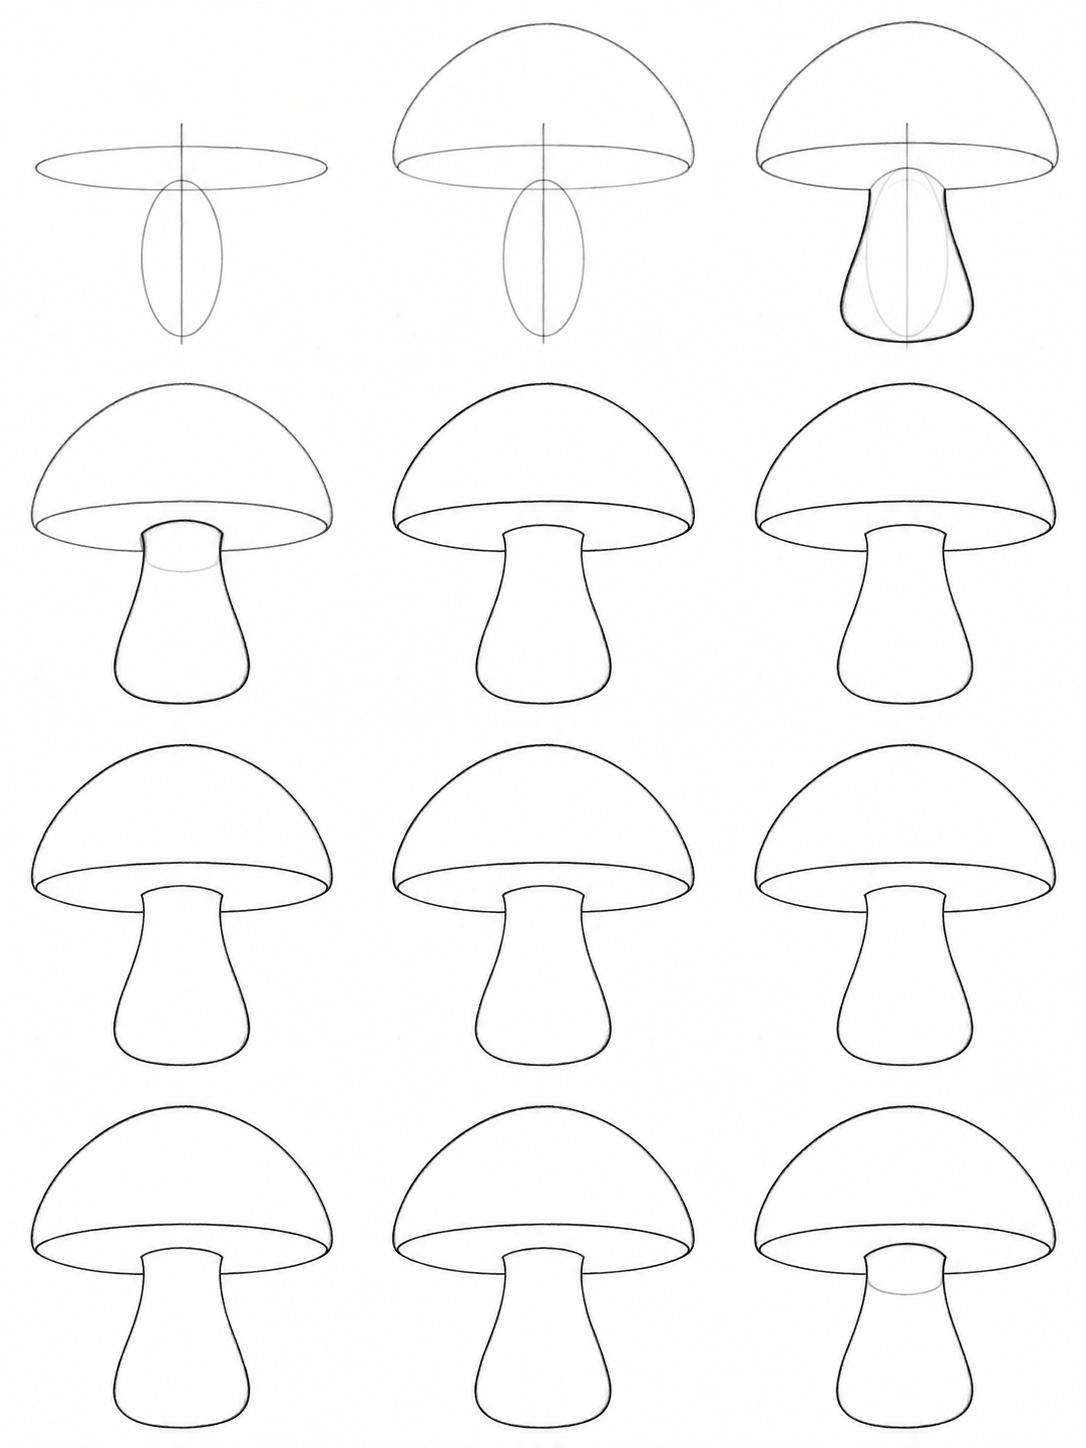
Simplest: Dome, underside ellipse and stem, without tone.
A little more detail: Rim thickness and gills on the underside.
Best version: Two tonal layers, own shadow and cast shadow.
What you will practise
Construct a dome over an ellipse, attach a stem and erase the hidden arc. More detailed routes add rim thickness and gill direction; the third describes volume under one light source. Start with a light oval, a curve and moderate pencil pressure. Use paper, an HB/2B pencil and eraser. Allow roughly 20–50 minutes depending on the route, with breaks as needed. Choose the first result to simplify or the third and a new condition below to extend the task.
Technique 1. Form construction
An oval locates a circular rim in this view; dome and stem refine the large masses. A narrow second curve shows thickness. Gills follow the underside towards the stem; erase the unwanted rim behind the stem. Try two ellipses of different depths; add a thickness arc to the second. Attach a small stem, identify and erase the covered lower arc. Check shared endpoints, an untwisted band and no stem seam. Repair only one wrong endpoint.
Technique 2. Pencil light
For the third route choose upper-left light. On a small dome and cylinder retain white on the left, lay a pale right-side layer, then a second layer in the darker region. Curve strokes around the surface and increase pressure gradually. Sketch a lower-right shadow from the base. Check white, midtone and own shadow, with cast shadow starting at the support. Lift excess graphite if white disappeared. For line routes you may practise this separately.
Warm-up
Try a shallow ellipse and a thickness band first. Compare the attachment with a seam and after erasing: you need not copy the error; locate the covered part in your own construction. Aim three gill curves into the stem attachment. For the third route practise first and second layers on a simple rounded form. Question: which shadow belongs to the object and which to the ground? Answer: own shadow sits on the object surface; cast shadow starts at its support and lies on the ground.
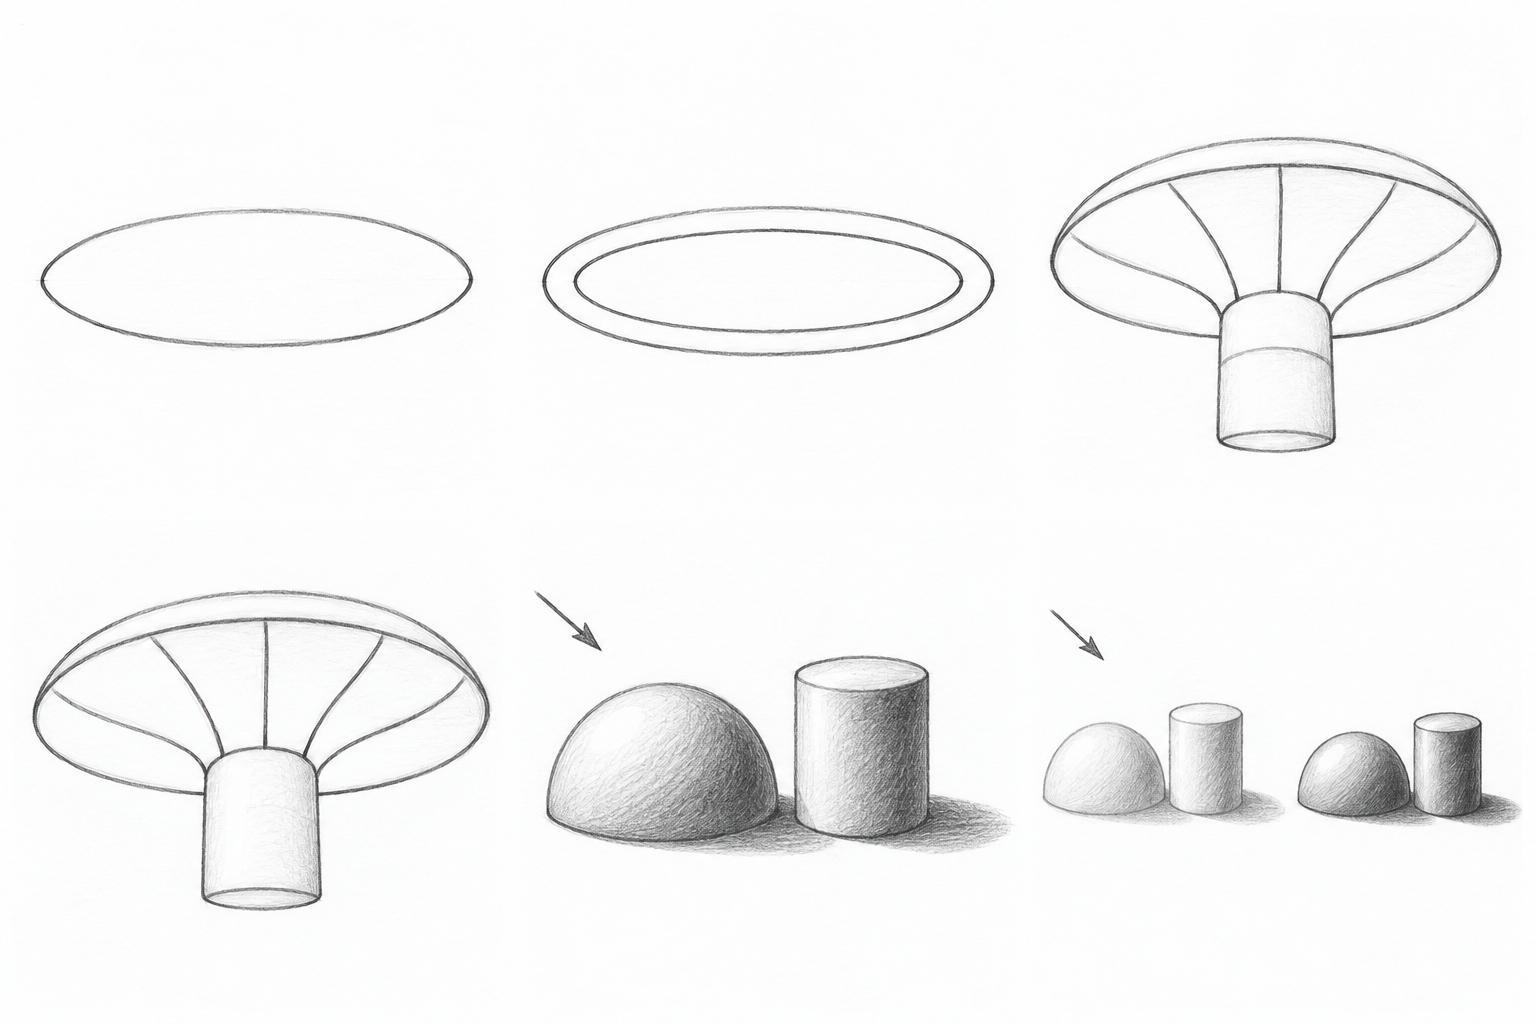
Step 1. Place the cap and stem
Lightly place a broad horizontal oval for the cap underside and a narrow upright stem oval below its centre. Add a short shared axis; reserve room above for the dome.
Why: Two masses establish cap width and stem height before details.
Check: Does the axis pass through both oval centres, with the stem top meeting the cap underside?
Repair: Move only the light stem oval or lighten one cap arc.
Step 2. Raise a dome above the oval
Trial
After checking
Trial
After checking
Trial
After checking
From the left end of the broad oval draw a rounded arch upward and back to its right end. Compare dome height with cap width; keep the oval and axis pale.
Why: The dome and elliptical rim describe the top and bottom of one cap.
Check: Does the arch meet both oval endpoints without sharp corners?
Repair: Lighten one overly high section and replace it with a shallower curve.
Step 3. Find the stem sides
Trial
After checking
Trial
After checking
Trial
After checking
Choose two gentle sides around the narrow oval, with a narrower top and broader base. Join them with a rounded lower edge. Keep the trial oval pale inside.
Why: A simple oval helps locate volume, but its outline need not become the finished silhouette.
Check: Does the stem broaden smoothly downward, with its base connecting both sides?
Repair: Erase a short sharp corner and restore a gentle join on that side.
Step 4. Check the attachment and trial edge
Construction
Trial edge inside the stem
Construction
Trial edge inside the stem
Construction
Trial edge inside the stem
Refine where the stem enters the cap underside. In the comparison find the pale crosswise arc inside the stem: it is an unwanted edge of the original oval, not a mushroom stripe. You need not draw the error deliberately.
Why: The visible stem hides this portion of the cap underside rim. A trial support should not become a seam across the stem.
Check: Can you identify both ends of the unwanted arc and distinguish it from the top attachment?
Repair: Trace the arc from the left cap edge; lighten only the section continuing through the stem.
Step 5. Erase guides and the hidden arc
Before erasing
After erasing
Before erasing
After erasing
Before erasing
After erasing
Erase the identified crosswise arc inside the stem, the axis and remaining oval supports. Keep the dome, both visible underside arcs and your chosen stem sides.
Why: Removing specific trial lines leaves a connected form without a transparent attachment.
Check: Is the stem free of a crosswise seam and axis, with its visible sides reaching the cap?
Repair: Restore only a short visible join if the eraser touched it; keep the hidden arc erased.
Simplest: Your drawing is finished. You may continue to the independent tasks.
Step 6. Build the rim thickness
Trial
After checking
Trial
After checking
Simplest: This route is already finished. Keep your clean line result; a more detailed route continues here. Check: Are guides removed and edges joined, without an unwanted stem seam? Repair: Repair only an accidental gap or remaining trial line.
A little more detail: For the two more detailed routes draw a narrow second arc beside the upper underside-oval arc. It follows the same rim and gently meets it at the side endpoints. Do not add gills yet. Why: The gap between aligned arcs describes the thickness of the cap rim. Check: Is the band narrow and curved the same way, without crossing arcs? Repair: Lighten only a cramped section of the second curve and move it away from the first.
Best version: For the two more detailed routes draw a narrow second arc beside the upper underside-oval arc. It follows the same rim and gently meets it at the side endpoints. Do not add gills yet. Why: The gap between aligned arcs describes the thickness of the cap rim. Check: Is the band narrow and curved the same way, without crossing arcs? Repair: Lighten only a cramped section of the second curve and move it away from the first.
Step 7. Place gills under the cap
Trial
After checking
Trial
After checking
Simplest: This route is already finished. Keep your clean line result; a more detailed route continues here. Check: Are guides removed and edges joined, without an unwanted stem seam? Repair: Repair only an accidental gap or remaining trial line.
A little more detail: From the inner band edge draw separated gentle curves towards the stem attachment. In the middle route leave a few broad spaces; in the detailed route place the curves more closely. Stop every curve at the stem; there are none on the dome. Why: The lines radiate across the underside from the attachment. Their direction, rather than an exact count, describes the structure. Check: Do gills stay under the cap without crossing the stem or continuing through the thickness band? Repair: Shorten one escaped endpoint; lighten a neighbouring curve if two have merged.
Best version: From the inner band edge draw separated gentle curves towards the stem attachment. In the middle route leave a few broad spaces; in the detailed route place the curves more closely. Stop every curve at the stem; there are none on the dome. Why: The lines radiate across the underside from the attachment. Their direction, rather than an exact count, describes the structure. Check: Do gills stay under the cap without crossing the stem or continuing through the thickness band? Repair: Shorten one escaped endpoint; lighten a neighbouring curve if two have merged.
A little more detail: The line drawing is finished. Only the third route adds tone.
Step 8. Choose light and lay a pale layer
Trial
After checking
Simplest: This route is already finished. Keep your clean line result; a more detailed route continues here. Check: Are guides removed and edges joined, without an unwanted stem seam? Repair: Repair only an accidental gap or remaining trial line.
A little more detail: This route is already finished. Keep your clean line result; a more detailed route continues here. Check: Are guides removed and edges joined, without an unwanted stem seam? Repair: Repair only an accidental gap or remaining trial line.
Best version: Only in the third route choose upper-left light, as the arrow shows. Reserve white at the upper left. Use pale curved strokes on the right dome, right stem and cap underside. Do not shade the ground yet. Why: The first layer establishes midtone on surfaces turned away from light and leaves room for a darker layer. Check: Is upper-left white clearly lighter than the first layer, with strokes following roundness? Repair: Lift excess tone from the light area with an eraser; avoid smudging the whole drawing.
Step 9. Build the own shadow
Trial
After checking
Simplest: This route is already finished. Keep your clean line result; a more detailed route continues here. Check: Are guides removed and edges joined, without an unwanted stem seam? Repair: Repair only an accidental gap or remaining trial line.
A little more detail: This route is already finished. Keep your clean line result; a more detailed route continues here. Check: Are guides removed and edges joined, without an unwanted stem seam? Repair: Repair only an accidental gap or remaining trial line.
Best version: In the third route layer more strokes over the right dome, right stem and recessed underside. Retain a lighter transition beside them. Remove the arrow; there is still no ground shadow. Why: Three regions — white paper, midtone and own shadow — describe the surface turning away from the chosen light. Check: Does volume read through broad tonal regions rather than just a dark outline, with gills still legible? Repair: Lighten a harsh black rim or dense underside patch while keeping a lighter transition.
Step 10. Connect the mushroom to its support
Trial
After checking
Simplest: This route is already finished. Keep your clean line result; a more detailed route continues here. Check: Are guides removed and edges joined, without an unwanted stem seam? Repair: Repair only an accidental gap or remaining trial line.
A little more detail: This route is already finished. Keep your clean line result; a more detailed route continues here. Check: Are guides removed and edges joined, without an unwanted stem seam? Repair: Repair only an accidental gap or remaining trial line.
Best version: Start a small contact shadow directly below the stem base. Extend the cast shadow across the ground towards the lower right, away from upper-left light. Keep it denser near the base and softer at its far edge. Check the light area with the eraser; add no new details. Why: Own shadow sits on the mushroom; cast shadow sits on the support plane. Building them separately explains volume and placement. Check: Does the shadow touch the stem and extend away from the source, with white, midtone and the dark side retained? Repair: Bring a detached shadow start to the base or lighten its wrong far edge; recover a small light area with the eraser.
If the drawing is unclear
A crosswise stem seam. Cause: The original ellipse lower arc remains inside the stem. Repair: Erase only the section between stem sides; keep the upper attachment.
The cap rim twists. Cause: The thickness arcs have different endpoints or cross. Repair: Lighten one inner-arc endpoint and return it to the same rim.
Gills cut across the stem. Cause: Their endpoints continued past the attachment. Repair: Shorten only the line inside the stem; keep the rest of the fan.
The mushroom is uniformly grey. Cause: The first layer filled the light area. Repair: Lift upper-left tone with an eraser; retain midtone beside it.
The mushroom floats above its shadow. Cause: A white gap separates the base from the cast-shadow start. Repair: Bring a short contact shadow directly to the base.
Independent tasks
All three conditions are available at every selected level. Choose one, begin with new supports and decide the rim or shadow placement yourself. Each pair shows a coherent construction and example rather than a compulsory exact result.
1. Look from lower down
Construct a taller underside ellipse: separate its upper and lower arcs while keeping shared side endpoints. Place your own stem oval below the centre. Decide where the lower arc goes behind the stem.
Why: A lower viewpoint reveals more underside; the old shallow curve no longer fits.
Check: Is the underside visibly deeper than the main drawing, with its arc stopping at the stem?
Repair: Lower only the lower arc and erase its newly hidden section.
Question: What changes before the gills?
Answer: First ellipse depth and stem attachment: gills are then placed on that newly constructed surface.
2. Raise the view to the rim
Place the dome and stem, but compress the underside ellipse into a very narrow band. Check the arc gap first; do not copy the broad gill fan from the earlier view.
Why: At rim level less underside is exposed. This changes viewpoint rather than shrinking the entire mushroom.
Check: Is the cap still broad, with its underside almost hidden?
Repair: Raise only the lower arc and remove details whose surface is no longer visible.
Question: Must the dome shrink with the ellipse?
Answer: No. The visible underside changes; dome width and height can stay the same.
3. Move the light to the right
Keep the familiar construction, but choose upper-right light. Before shading reserve white on the right, place midtone on the left and sketch a lower-left ground shadow from the stem. Build the left own shadow in two layers yourself.
Why: The new source changes surface illumination and cast-shadow direction; the old tonal patches no longer fit.
Check: Is the right light and the left darker, with cast shadow touching the base and extending left?
Repair: Recover the right light area with the eraser; lift the old right-hand ground mark and sketch a new left-hand shadow.
Question: Why is moving only the bright patch insufficient?
Answer: Light changed for the whole form: align midtone, own shadow and cast shadow. In the first two routes you may practise this separately on a simple volume.
Self-check
Point to shared curve endpoints, your stem attachment and an erased support. In the detailed version name the light source, three tonal regions and two different shadows.
Question: Why avoid strengthening all trial lines?
Answer: Some lines only located the forms; the lower arc inside the stem is now hidden. Darkening it creates an unwanted seam. Keep visible edges only.
Light question: Why does the ground shadow extend lower right?
Answer: The main example uses upper-left light. This is a decision for this drawing, not a rule for all mushrooms: right-hand light changes the direction.
Uneven lines and your own proportions are welcome. Check your form and lighting decisions. Structural and visual checks do not replace classroom trials; none have been performed.
What to draw next
All drawing lessons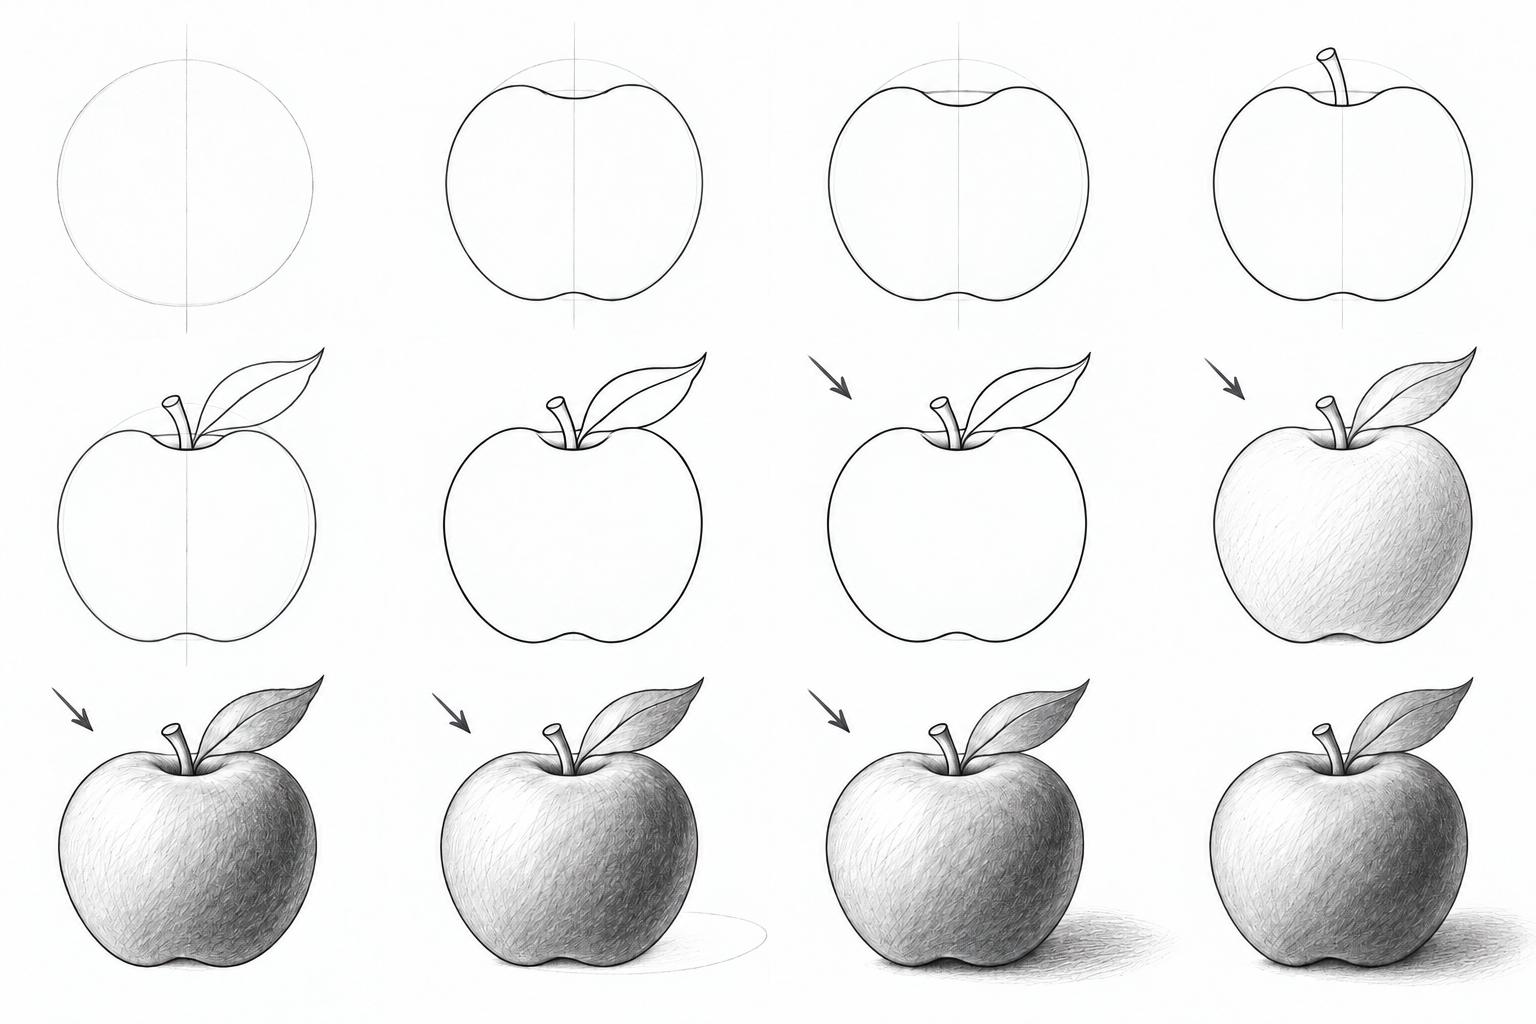 3 levels
How to draw an apple
Draw an apple at three levels: simple forms, a recessed top and bent leaf, then pencil light and shadow. Clear stages, small repairs and A4/Letter PDFs.
 3 levels
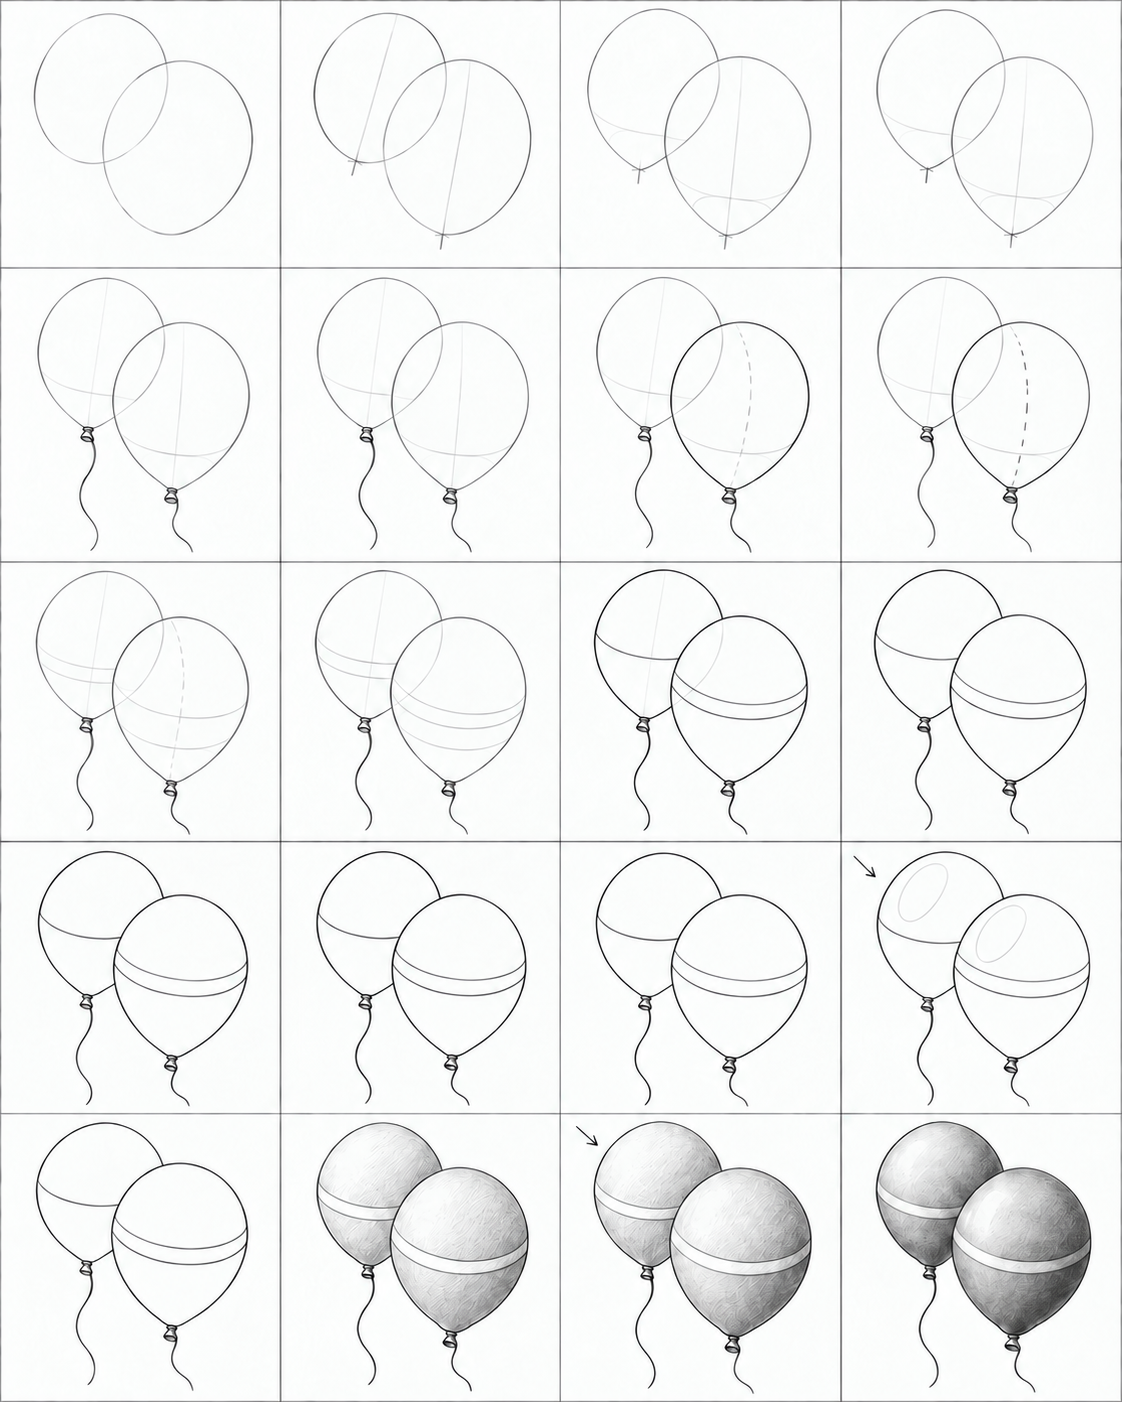
How to draw balloons
Three balloon drawing routes, from two simple ovals to tapered necks and pencil volume. Illustrated steps, checks, small repairs and practice PDFs.
 3 levels
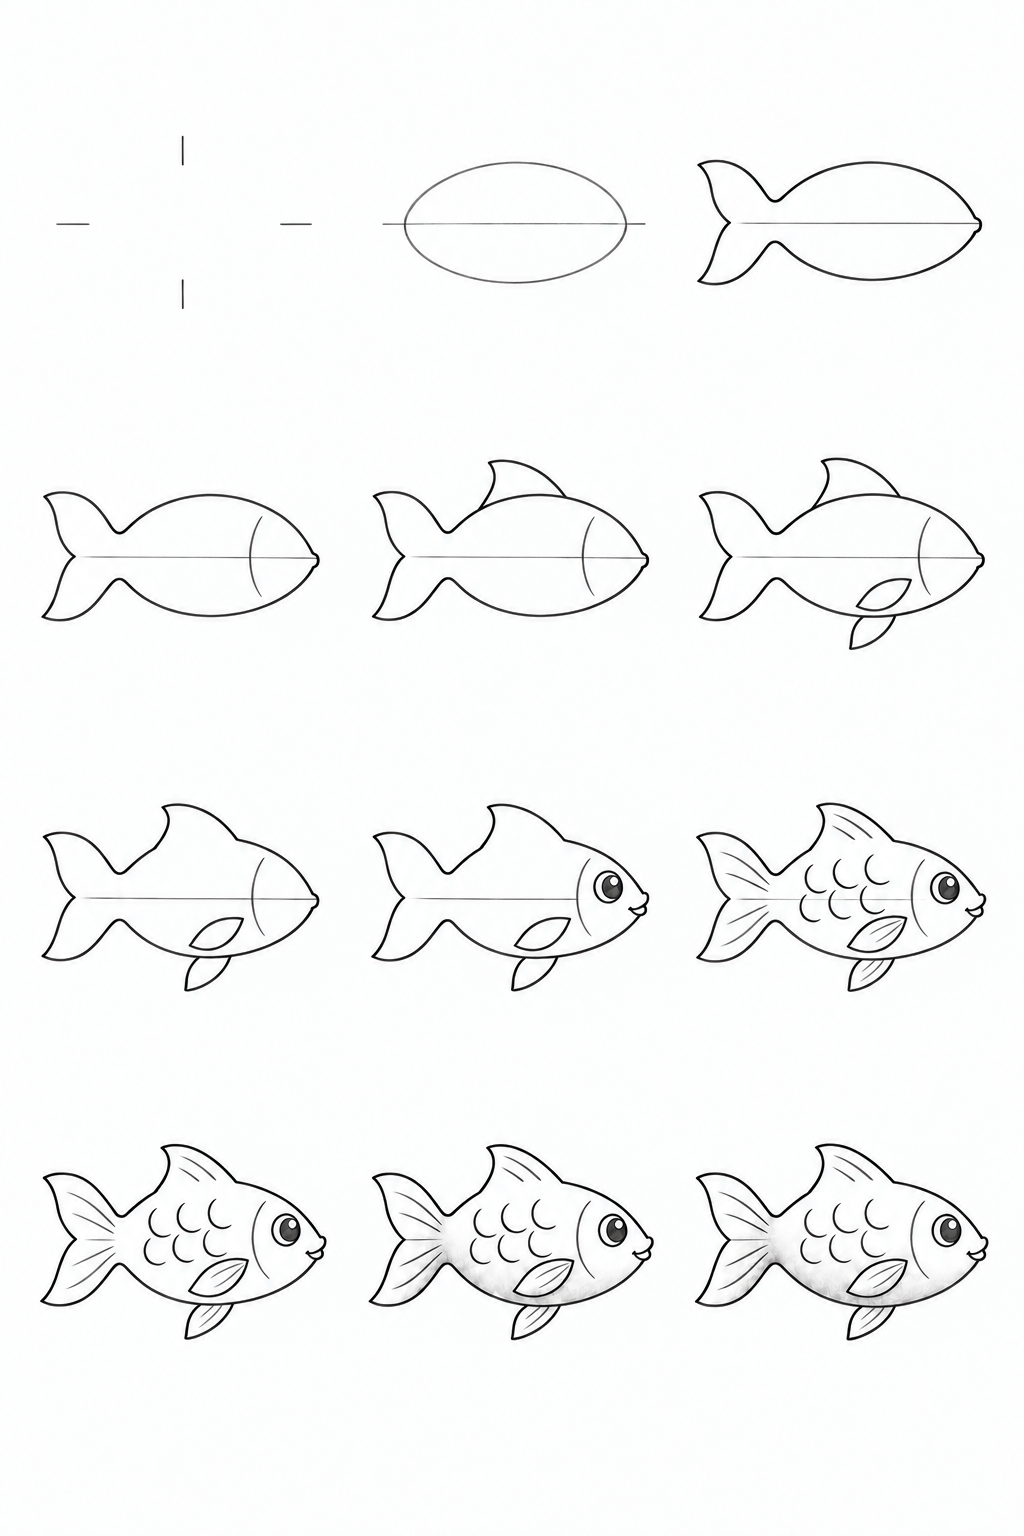
How to draw a fish
Build a fish from an oval: three pencil routes, ten steps, fins, erasing covered lines and softly blended shading. Printable lesson and practice PDFs.