kiduverse
How to draw a rabbit: three levels
Draw a seated rabbit from a circle and oval: three detail levels, curved eye guides, paw overlap, eraser practice and printable PDFs.
- 3 detail levels
- Paper, HB/2B pencil, eraser
- 12 parts
Tap a drawing below to choose your level. The other levels hide and the “trial → after checking” pairs get bigger.
Start with two large forms, check face placement and overlap, then remove guides. Choose a detail route and continue your own drawing.
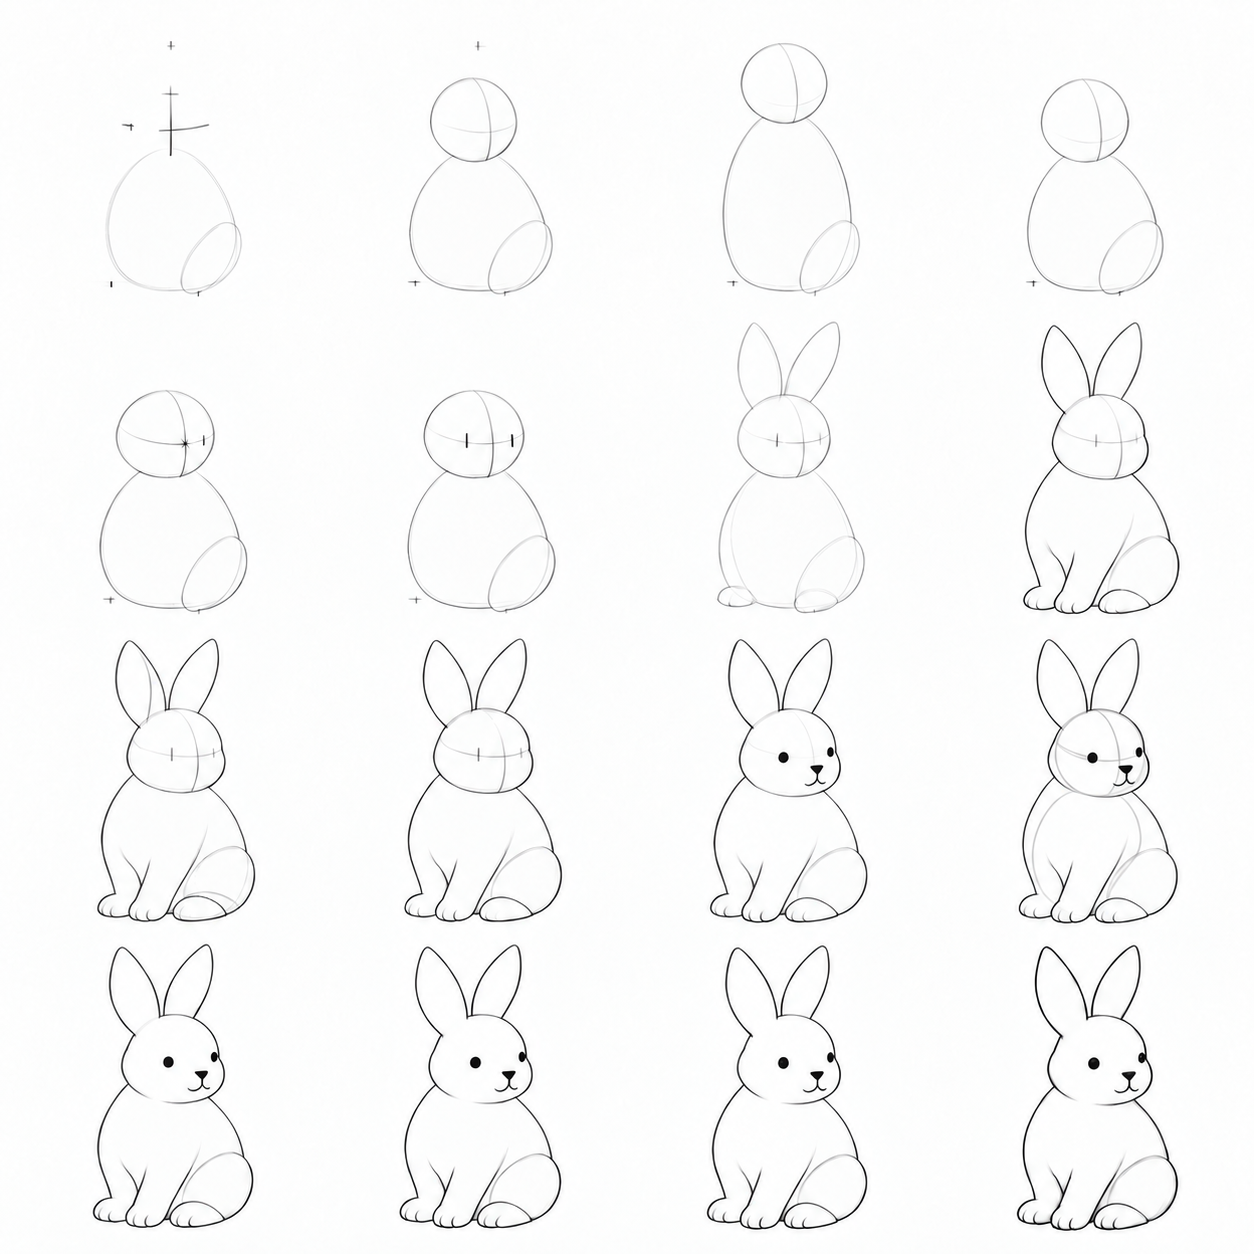
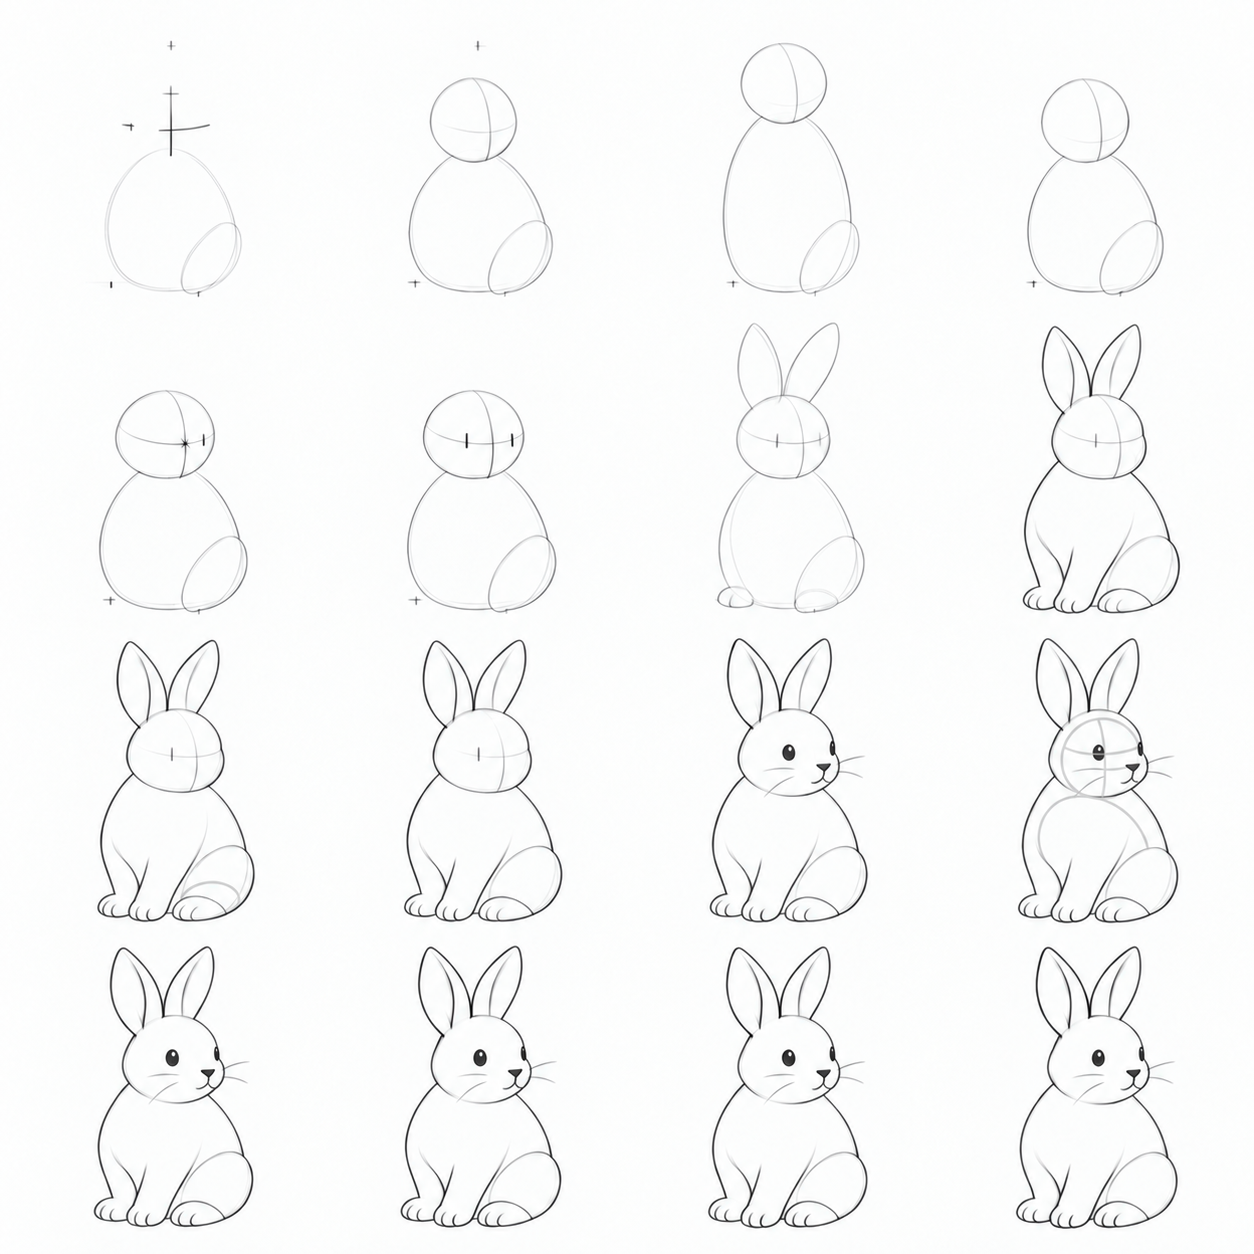
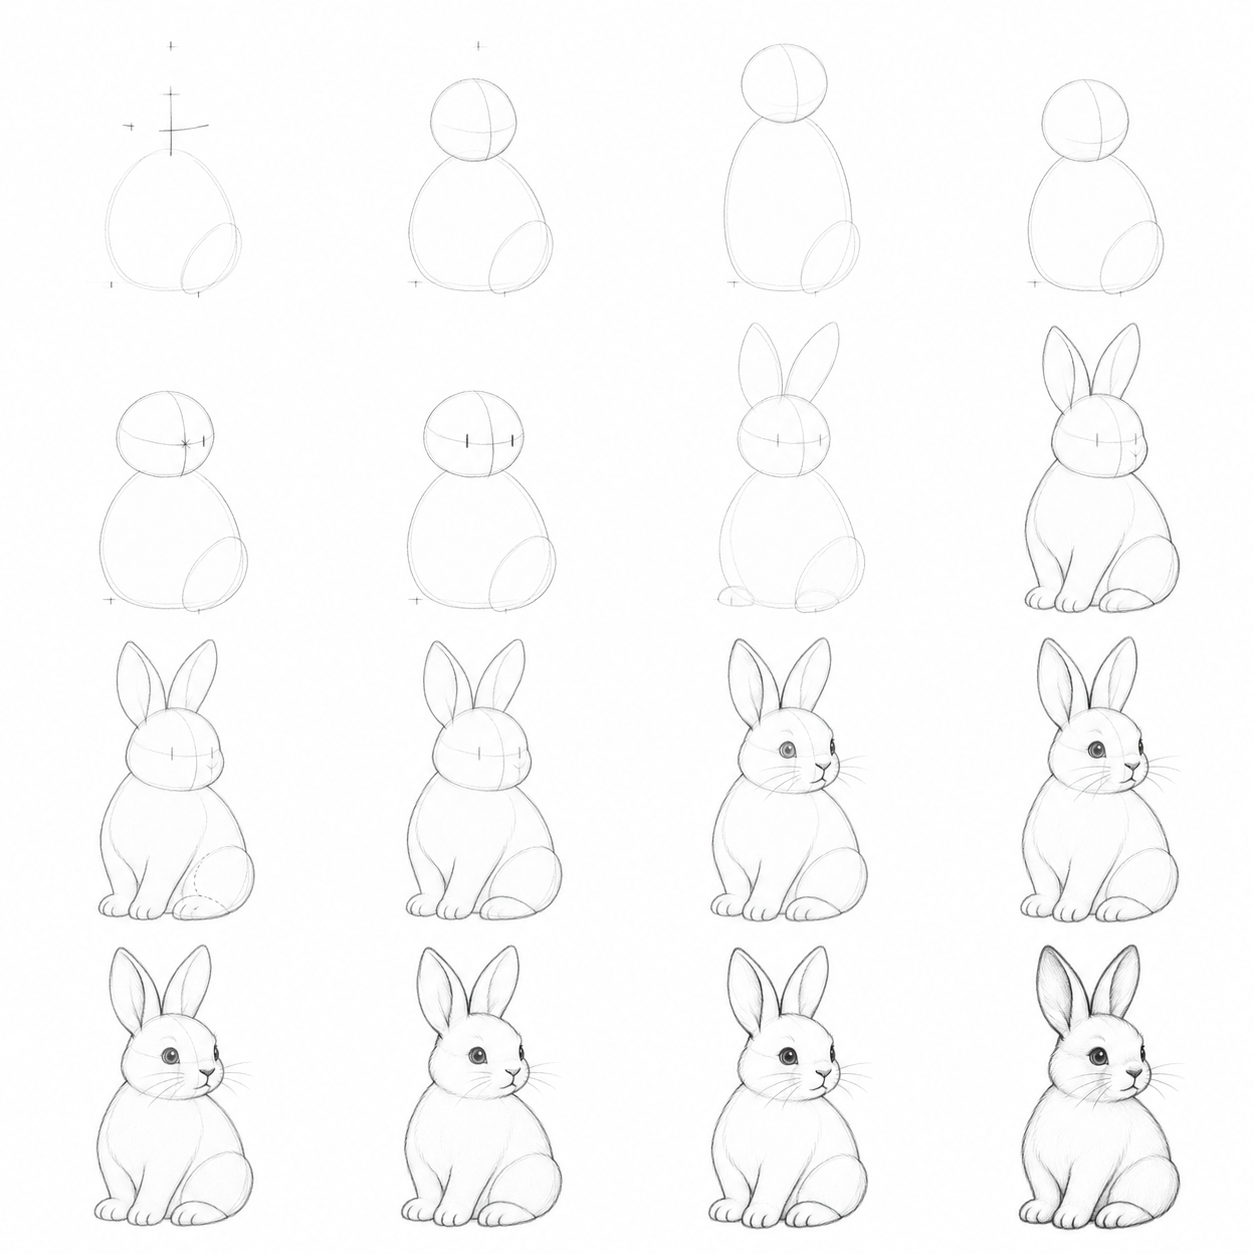
Simplest: a careful soft silhouette, dot eyes and a tiny muzzle, without whiskers, ear folds or hatching. A little more detail: small oval eyes with pupils, two short whiskers each side, one inner-ear arc and small toe marks only on the near paw. Best version: shaped cheeks, highlighted eyes, inner-ear folds, distinct feet and a few pale pencil strokes. This is the lesson’s detail ceiling. Each route makes a complete drawing. Simplify with dot eyes; extend the task with a new final view while keeping your chosen detail level.
“Trial → After checking” pairs show choices and repairs. You do not need to reproduce the left-hand error. Check your drawing and change only the necessary section. All three routes use original AI-generated graphite illustrations. These are not photographs of human or child artwork.
Your goal and materials
Draw a simple seated rabbit with long ears and a slightly turned head. Explain an eye position using a curved guide and a rear edge stopping at the near paw. Use paper, HB or 2B pencil and a soft eraser. Begin with light circles, ovals and curves. Allow 25–45 minutes with breaks. Around age 6 and up is a suggestion for learners familiar with these forms, not an ability test. This teaches a character rather than realistic anatomy.
Surface guide (cross-contour). A curve resembles a ribbon around the head. Try two eye ticks beside an axis; shift the axis right in another trial and choose ticks again. Check: do both ticks belong to one guide and chosen axis rather than the page edge?
Overlap. A foreground shape hides a rear edge. Try two overlapping ovals: choose the nearer one and erase the covered rear section. Swap the order in another trial. Check: where does the rear line stop? It should end at the opaque foreground shape.
Warm up
Do both short trials above on spare paper: two heads with different axes and two oval overlap orders. These prepare steps 3 and 5. Name the head turn and foreground oval before erasing.
Step 1. Place head and body
Trial
After checking
Trial
After checking
Trial
After checking
Leave a head-height of space for long ears. Put a head circle above a broad body egg; its bottom sits near the paws.
Why: Two masses let you check size before details.
Check: Is there another head-height above the head?
Repair: Lighten the top marks and move both masses down.
Step 2. Compare the large forms
Trial
After checking
Trial
After checking
Trial
After checking
Compare the tall left egg with the compact right one. Raise the body bottom for a seated rabbit, keeping the head still.
Why: A short broad body supports the seated pose.
Check: Is the body just taller than the head diameter?
Repair: Erase only the low trial arc and replace it higher.
Step 3. Find eyes on a curved guide
Trial
After checking
Trial
After checking
Trial
After checking
Wrap a pale curve around the head and put an axis just right of centre. Put two eye ticks on the curve on opposite sides of the axis, away from the nose tip.
Why: The curve connects eyes to one round head; the axis indicates its turn.
Check: Is the far tick closer to the axis? This applies to our slight turn.
Repair: Erase the wrong nose-side tick and move it onto the left part of the guide.
Step 4. Choose a living contour
Trial
After checking
Trial
After checking
Trial
After checking
Build two long narrow leaf ears above the head. Connect cheek and body with a soft edge; add a broad oval near hind paw below. Avoid tracing the internal mass seam.
Simplest: connect cheek, short neck and smooth body with a soft edge. Use two curves for forelegs ending in round feet, with a broad hind paw on the right. Ears use outer leaf outlines only. A little more detail: keep those large forms and leave room for one inner-ear arc. Best version: refine the cheeks toward the nose, forefeet and oval right haunch; an inner-ear leaf follows the ear bend. In every route avoid tracing the internal circle/egg seam.
Why: Circle and egg are search guides; the chosen outer edge connects the character.
Check: Do ears grow from the upper head? Is the inner seam lighter than the silhouette?
Repair: Lighten the seam and trial cheek edge; refine only the short neck connection.
Step 5. Hide the edge behind the near paw
Trial
After checking
Trial
After checking
Trial
After checking
Choose the foreground form and find the rear edge inside it. In the checked view only that covered segment disappears; the foreground paw outline stays. The repair location depends on your route.
For all three routes: the near right paw covers the lower body-egg arc. Remove only the trial inner section at the bottom of its oval. Keep the outer paw edge, visible upper haunch and forefeet.
Why: The opaque foreground form hides the rear edge; a continuous line would imply transparency.
Check: Did the covered segment disappear while nearby visible edges stayed?
Repair: Remove only the covered rear section; keep the paw outer contour.
Step 6. Add your chosen details
Trial
After checking
Trial
After checking
Trial
After checking
Place eyes at the checked ticks, a tiny nose lower right and a short mouth curve. Keep your chosen route’s detail.
Simplest: put two small dots on the guide, a tiny triangle nose and two short mouth arcs; connect cheeks with a soft outer contour. Keep ears and body white inside. A little more detail: use small ovals with pupils, two short whiskers each side, one inner-ear curve and two small toe marks on the near foot. Best version: place oval eyes with pupils and tiny white highlights; refine the cheeks below the nose with two soft arcs and add short whiskers. Find a narrow inner-ear leaf following its bend and add two toe arcs on the feet. The face follows checked ticks; add no new features after erasing.
Why: Ticks preserve the same face turn as details appear.
Check: Are eyes on the same guide and the nose below it?
Repair: Lighten one misplaced eye and return it to its tick without changing the head.
Step 7. Remove used guides
Trial
After checking
Trial
After checking
Trial
After checking
Erase the inner head circle, body egg, eye curve and axis. Keep the outer edge and chosen paw-line ending.
Why: Guides have done their job and should not look like seams on the animal.
Check: Did curve and axis disappear without new details?
Repair: If a useful edge vanished, restore only its short segment.
Step 8. Choose a few accents
Trial
After checking
Trial
After checking
Trial
After checking
Slightly strengthen eyes, nose and a short near-paw edge. Keep other lines lighter.
Simplest: strengthen dot eyes, nose and a short near-paw edge slightly; leave ears and body unhatched. A little more detail: strengthen pupils and a small paw accent while keeping the inner-ear arc pale. Best version: add a few light strokes along the inner-ear leaf and rounded chest edge with plenty of white paper. This is the chosen detail ceiling; fur, tail and complex eyelids are unnecessary.
Why: Varied pressure highlights the face and overlap without tracing every guide.
Check: Can you point to one stronger and one light section?
Repair: Lighten an overly dark back edge while keeping the small face accent.
Repair a small problem
| Symptom | Cause | Small repair |
|---|---|---|
| Ears do not fit | No space above | Lighten both masses and move them down |
| Eye sits on nose | Guide ignored | Move one tick onto the head side |
| Transparent paw | Rear edge remains | Remove only the segment inside the near paw |
| Sticker-like head | Inner circle traced | Lighten the inner arc and refine the neck |
| Every edge is dark | All edges traced | Lighten the back while keeping the face accent |
Three ideas: a new position
Choose one new condition. Look at the supports above, then build your own version. Below is an example after erasing in the same position. Keep your route’s detail. Adjust the tilt differently from the example and explain your choice.
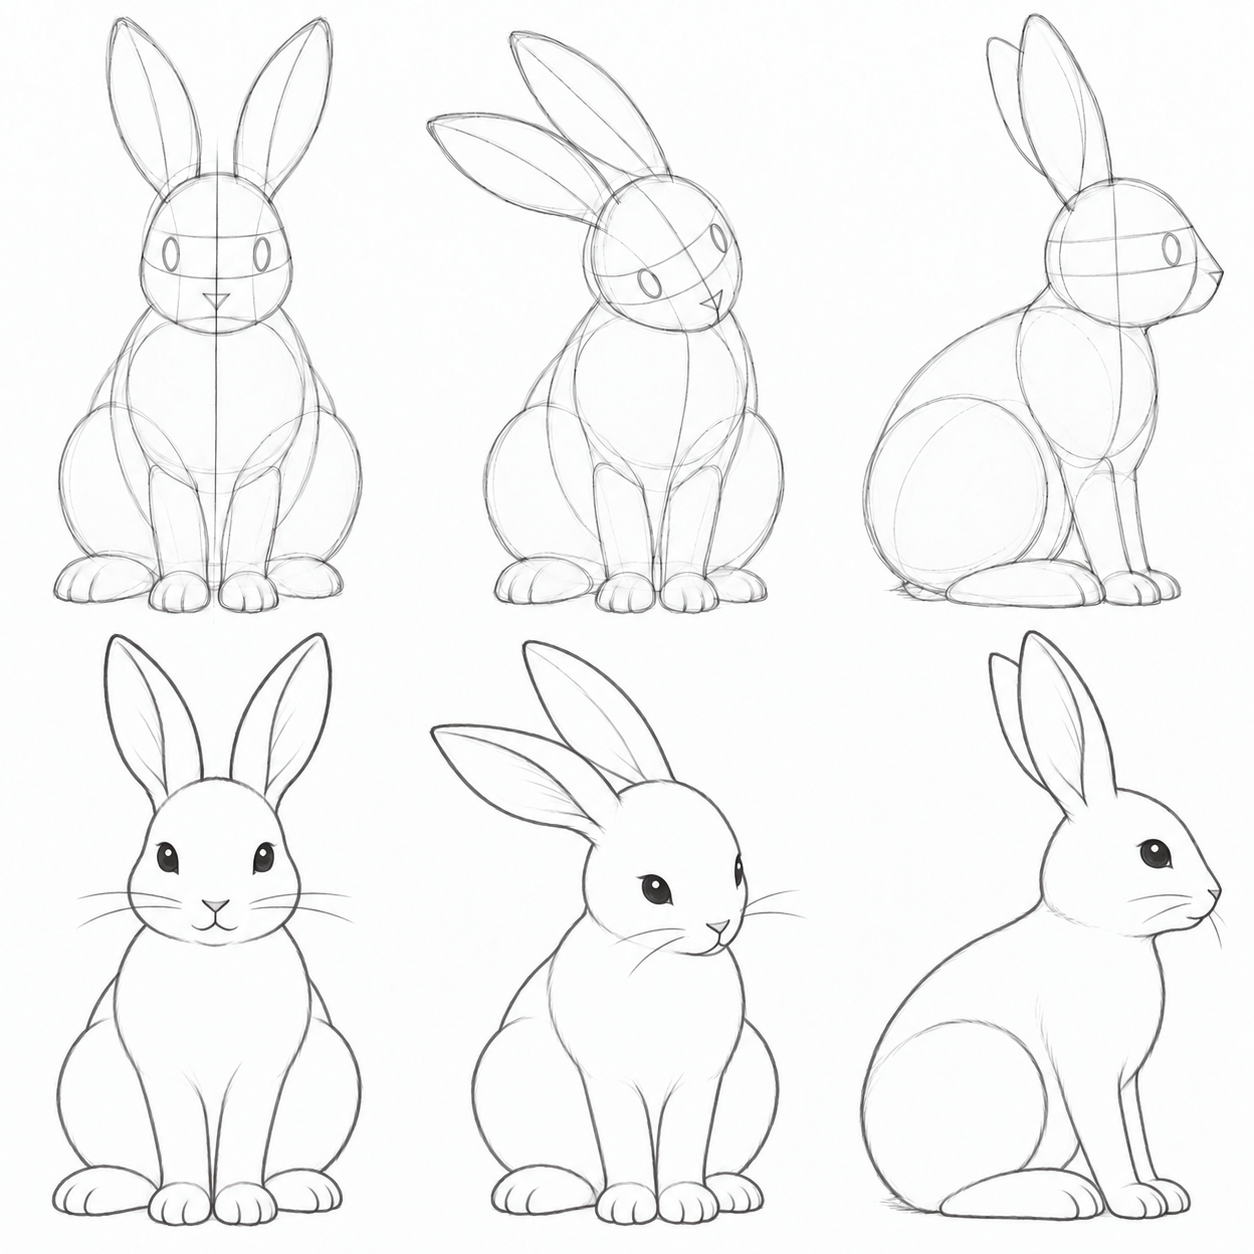
1. Rabbit faces forward
New condition: Central head axis with roughly equal visible face sides.
Practiced techniques: surface guide and overlap.
Put the axis at circle centre, eye ticks on either side and nose beneath it. Choose the nearer paw and erase the edge it covers.
Why: The new axis changes eye positions; paw overlap stays familiar.
Check: Eyes beside the central axis? Rear edge stops at the paw?
Repair: Move one tick to the curve and remove only the covered line.
2. Head tilts toward paws
New condition: Head, guide and ears tilt together while the body stays seated.
Practiced techniques: surface guide and overlap.
Rotate the head circle, axis and ears about a quarter of a right angle. Replace eyes on the guide and hide the chest edge behind the cheek.
Why: Face and ears belong to the head and turn together.
Check: Is the nose lower and have ears tilted with the head?
Repair: If only the nose moved, lighten ticks and rotate the whole head support.
3. Strict side view
New condition: One visible eye; muzzle projects sideways and the far ear is partly hidden.
Practiced techniques: surface guide and overlap.
Place a head circle and short rightward muzzle projection. Find one eye on a side guide. Put the near ear before the far ear and stop the covered rear edge.
Why: Side view changes feature visibility; this is fresh construction, not a mirrored outline.
Check: One eye and a projecting muzzle? Does the far ear edge stop?
Repair: Remove the second eye tick and only the hidden far-ear section.
Question: can you lower only the nose while leaving eyes and ears in place? Answer: tilt the whole head support, axis, guide and ears together, then place eyes and nose again. The body can stay seated. Show the new guide and name one erased rear edge.
Self-check: explain an eye position on the new guide and one hidden edge; point to removed supports.
What to draw next
All drawing lessons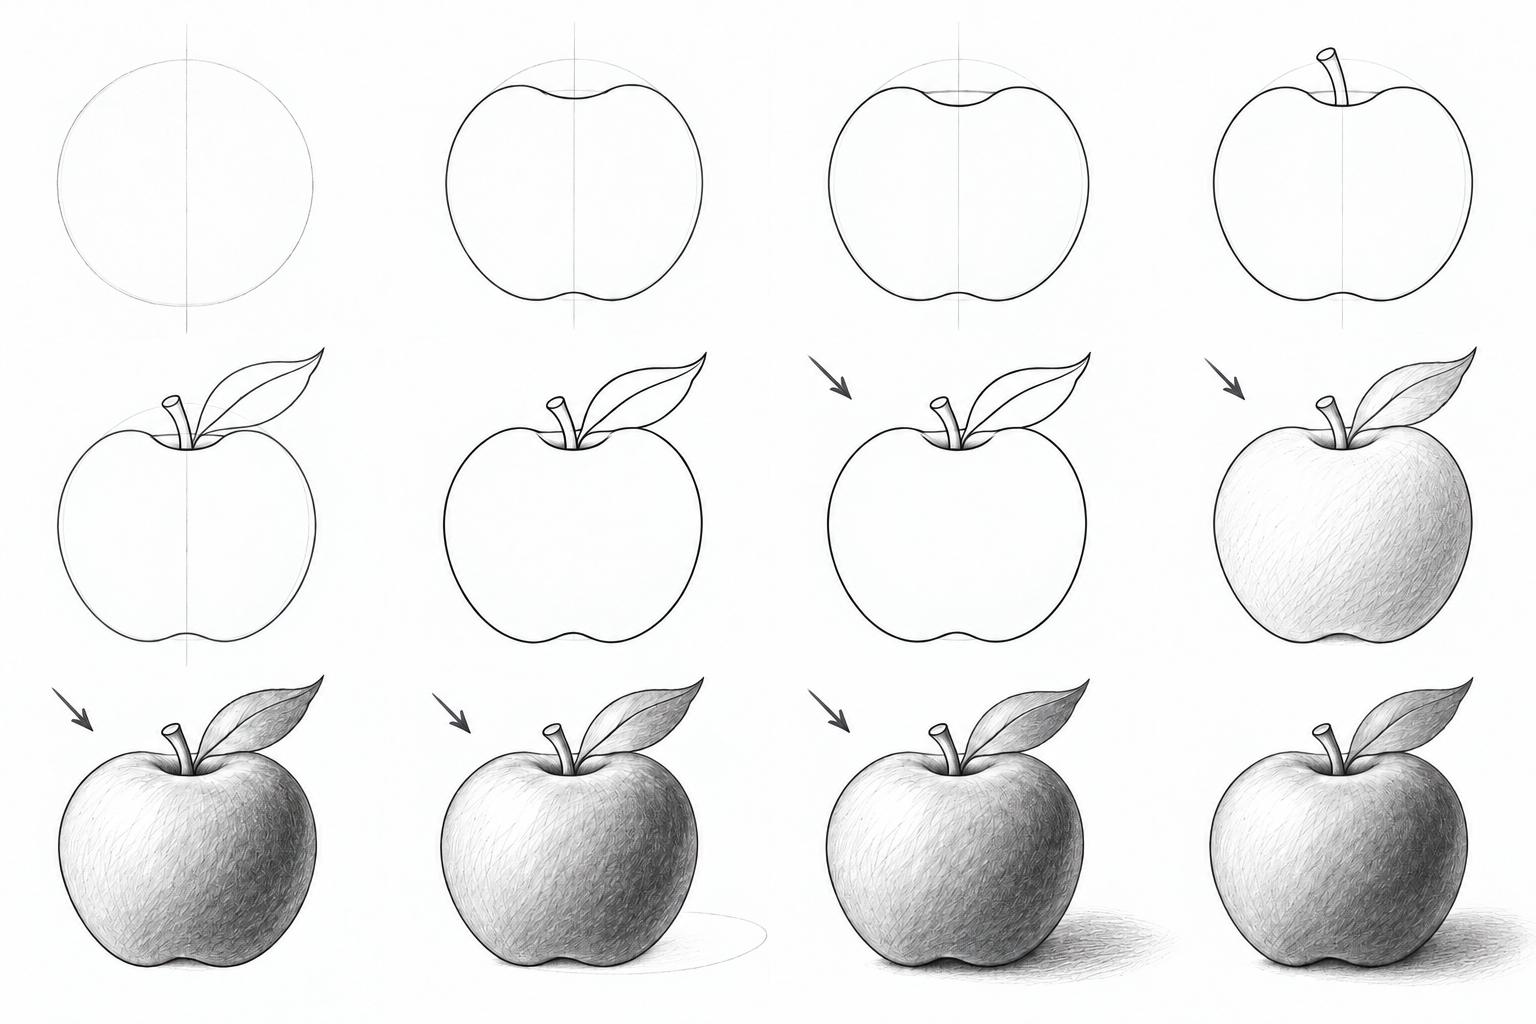 3 levels
How to draw an apple
Draw an apple at three levels: simple forms, a recessed top and bent leaf, then pencil light and shadow. Clear stages, small repairs and A4/Letter PDFs.
 3 levels
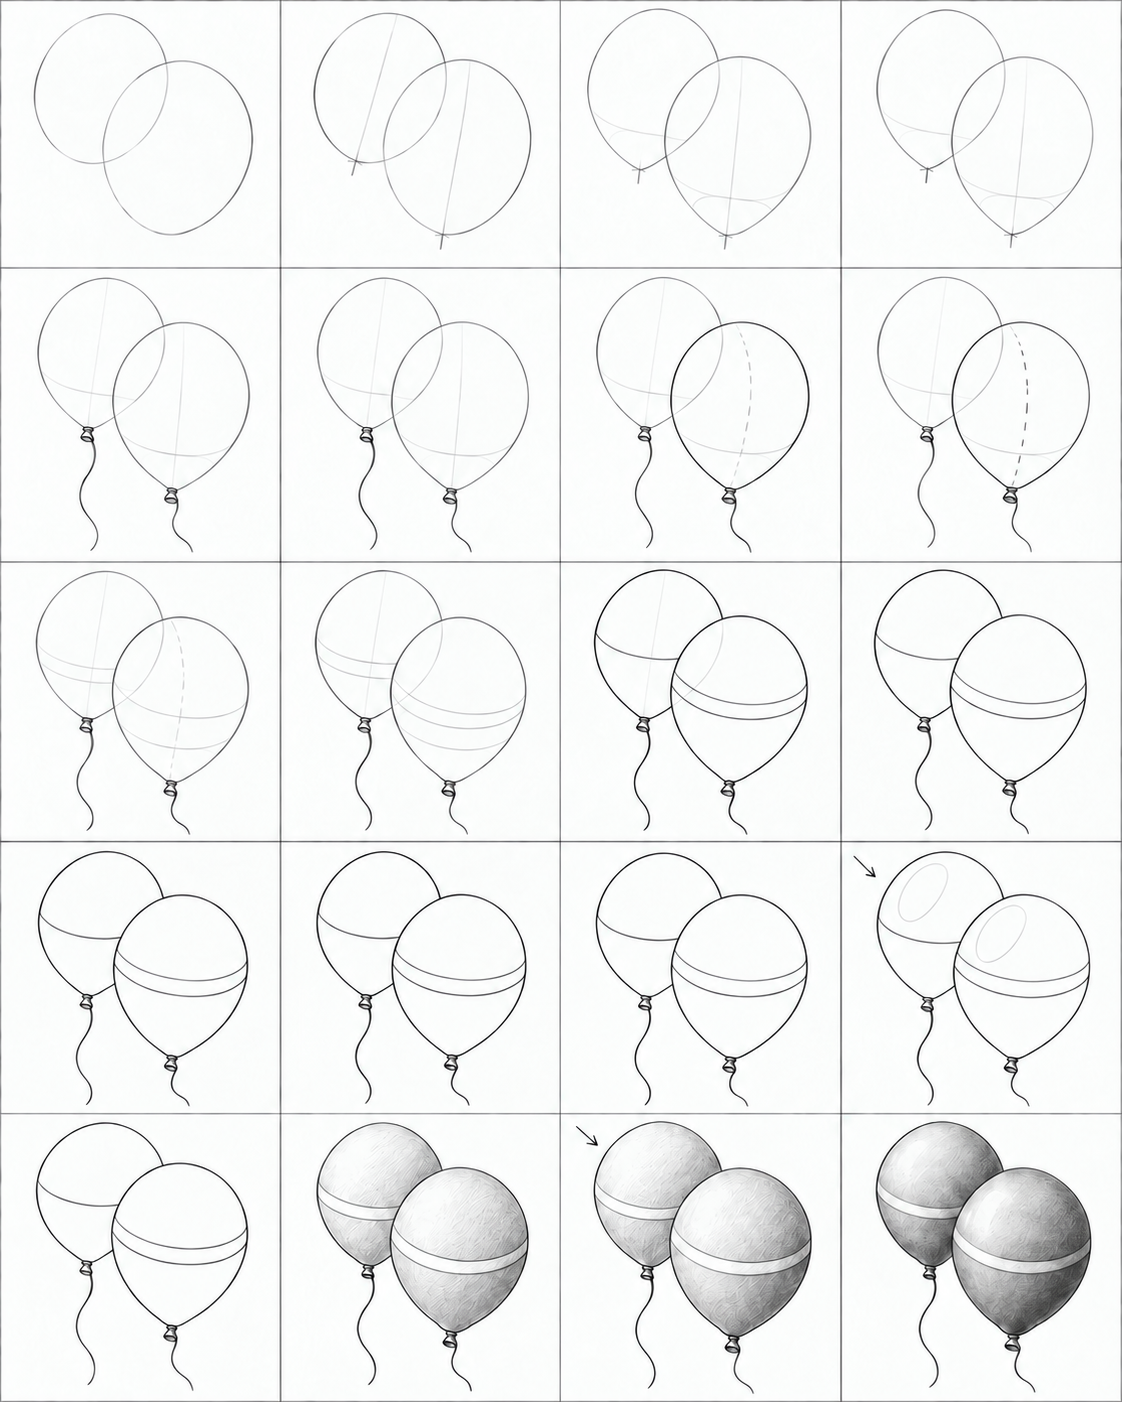
How to draw balloons
Three balloon drawing routes, from two simple ovals to tapered necks and pencil volume. Illustrated steps, checks, small repairs and practice PDFs.
 3 levels
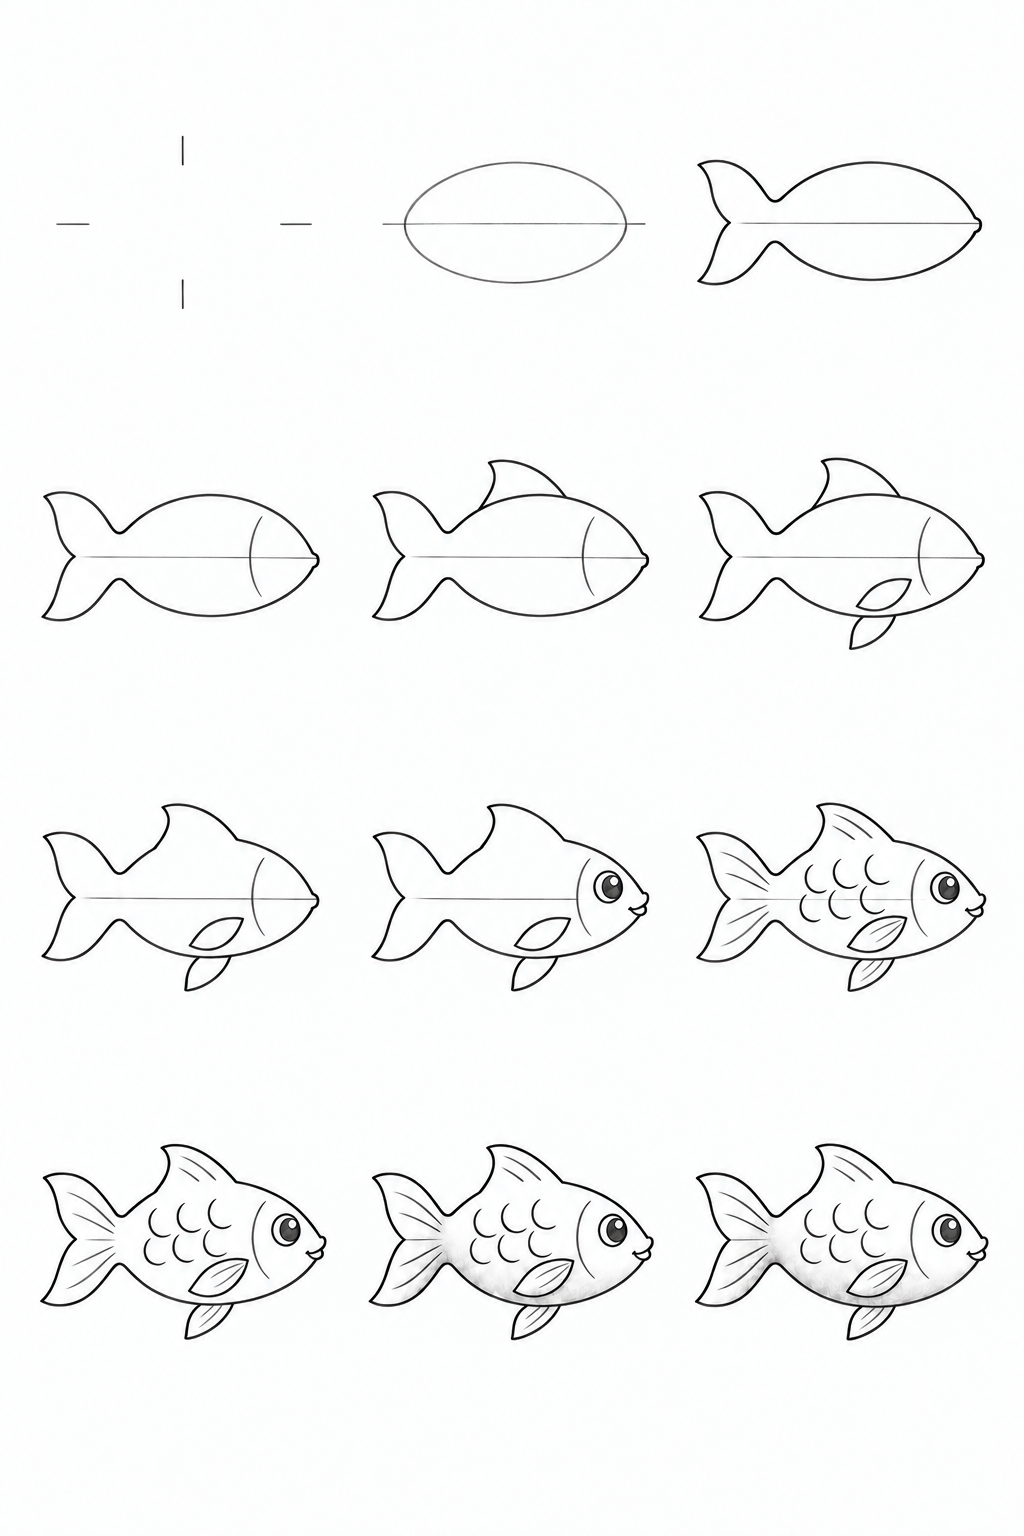
How to draw a fish
Build a fish from an oval: three pencil routes, ten steps, fins, erasing covered lines and softly blended shading. Printable lesson and practice PDFs.