kiduverse
How to draw a turtle: form and overlap
A step-by-step lesson to draw a turtle from simple forms: curves, overlap, erasing, warm-up, small repairs, independent tasks and printable A4/Letter PDFs.
- 3 detail levels
- Paper, HB/2B pencil, eraser
- 14 parts
Tap a drawing below to choose your level. The other levels hide and the “trial → after checking” pairs get bigger.
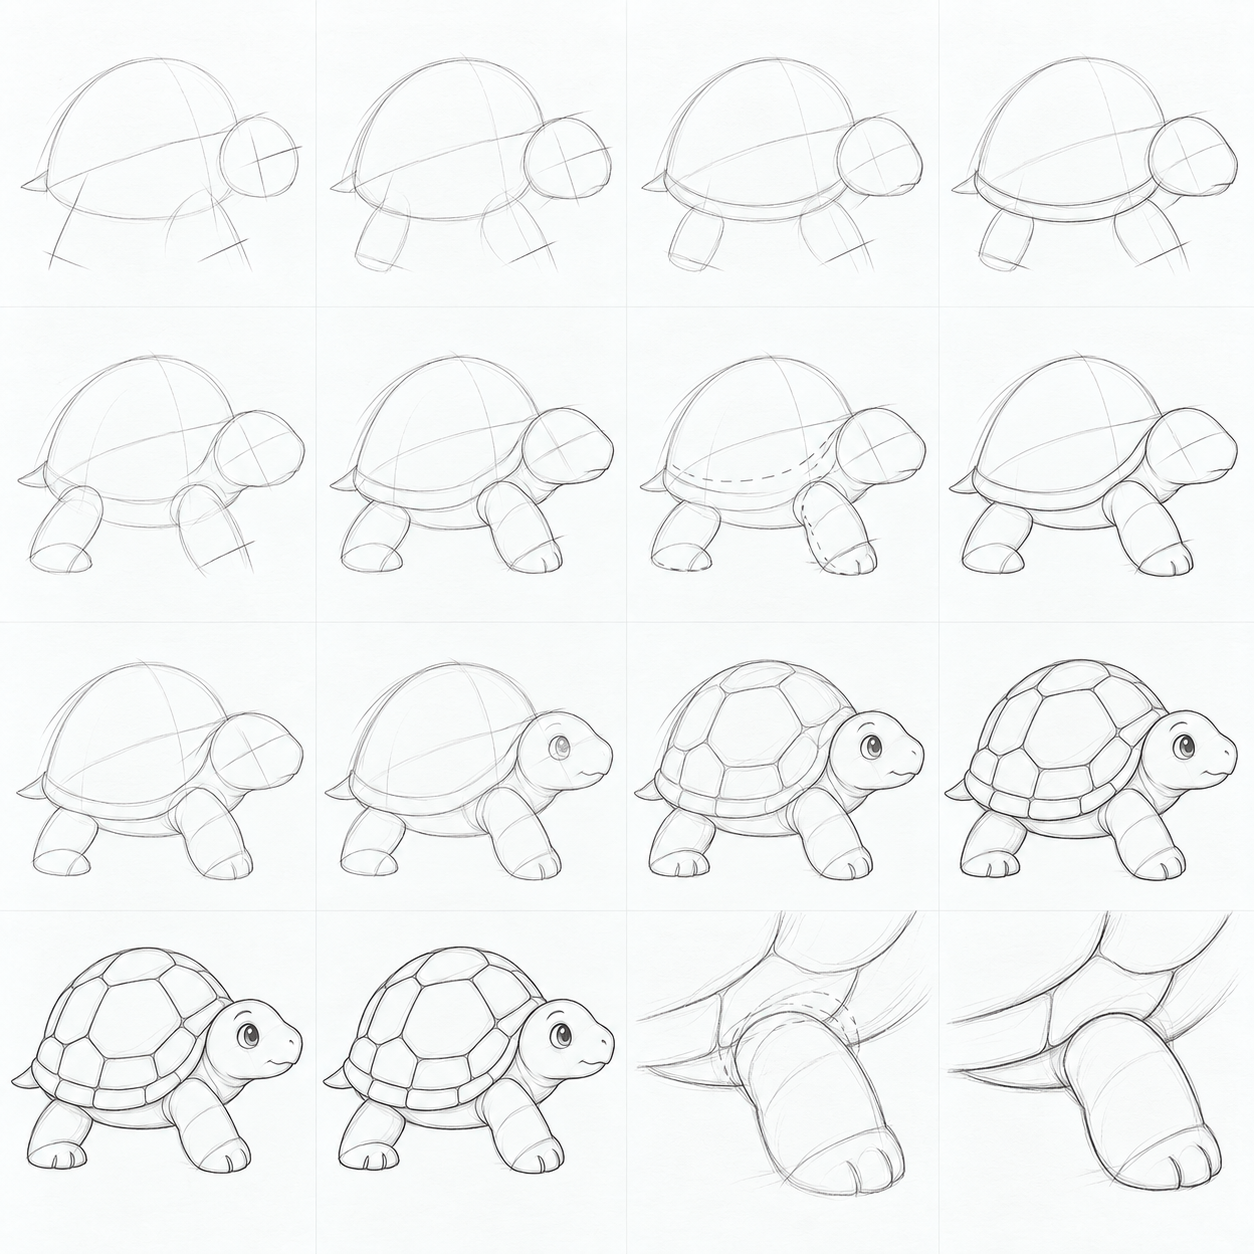
Build a shell dome and show the head and feet emerging from under it. The main decisions are form and overlap; choose your own sizes.
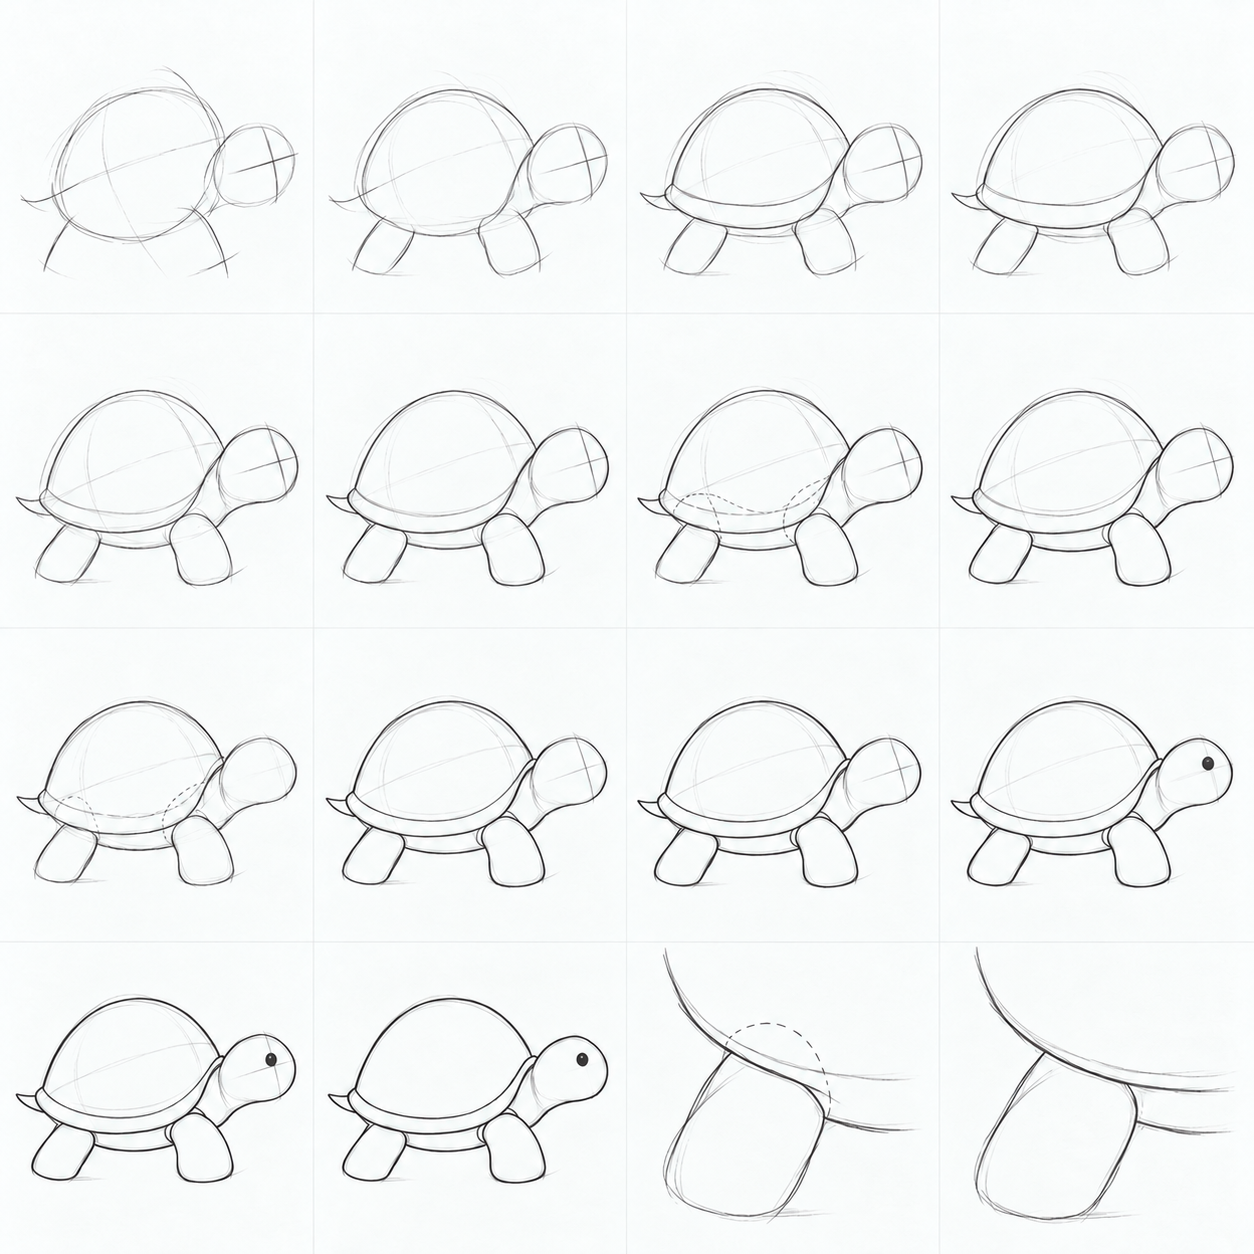
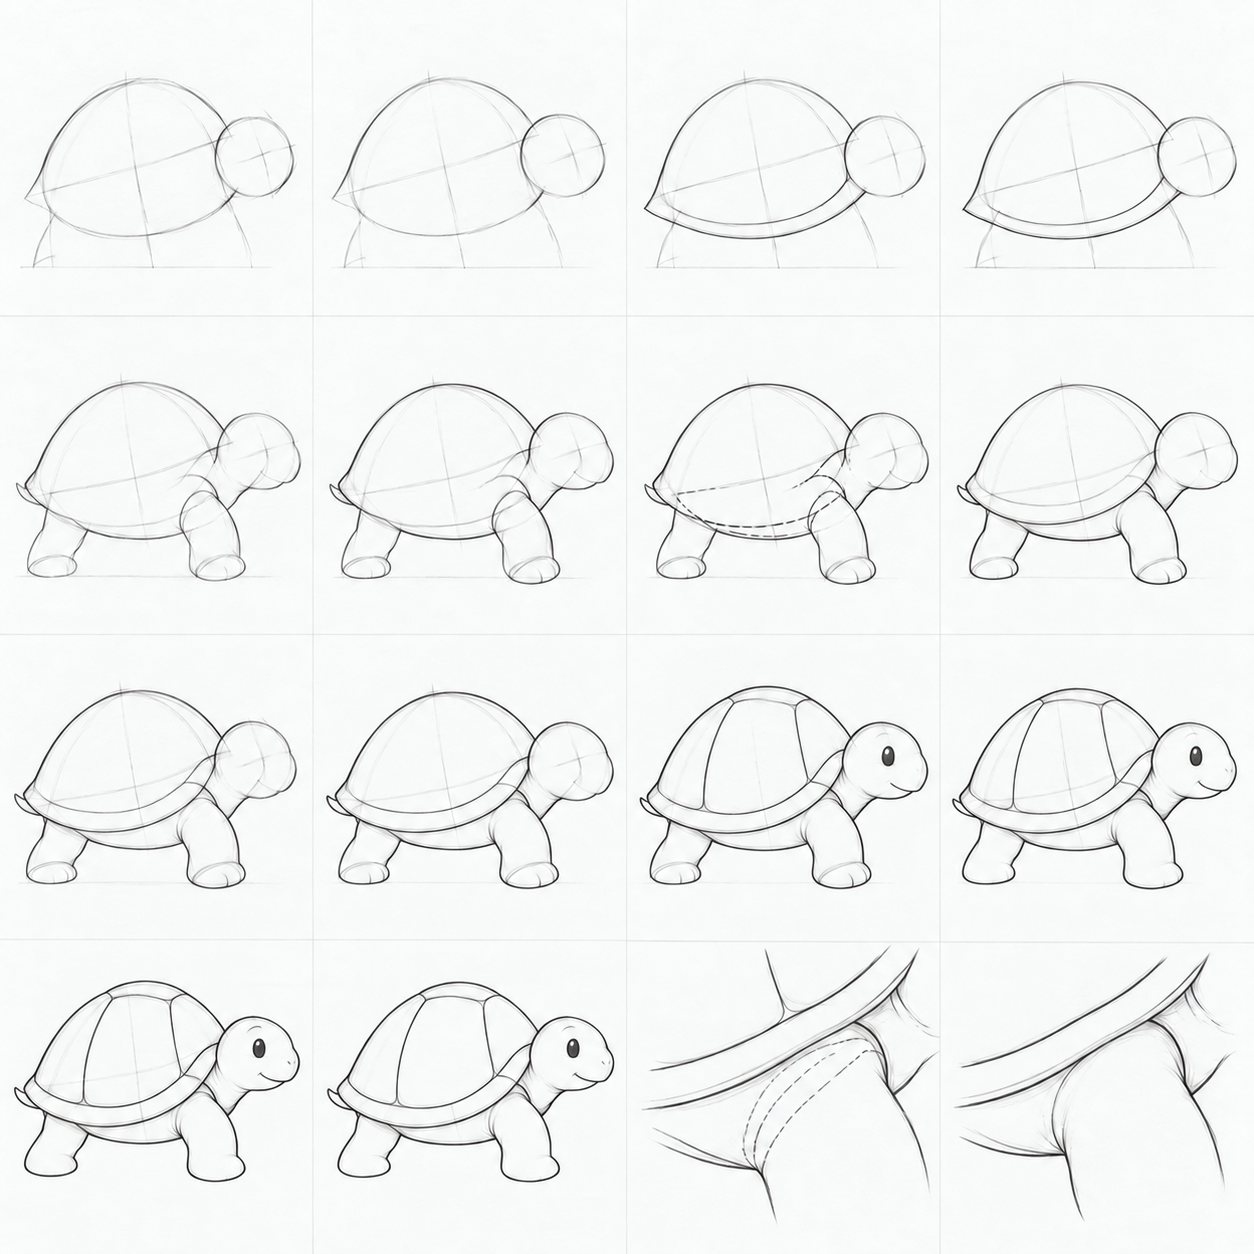
Simplest: Plain dome, chosen lower rim, dot eye, two feet and a tiny tail. Guides removed.
A little more detail: Short neck and cheek, bent front leg, double rim, three broad shell panels, oval eye and mouth.
Best version: Bent leg built from two masses, dimensional rim, broad scutes following the dome, expressive eye, mouth and toe separations.
“Trial → After checking” pairs show a choice and a local repair. You do not need to copy a diagnostic error. These pencil-style illustrations are AI-generated, not photographs of human or child drawings.
Goal and preparation
One simple turtle seen from the side, head on the right; two visible feet, no anatomical detail. Choose a curve on a form, explain the overlap order and erase only the covered rear edge.
Use paper, an HB/2B pencil and an eraser. Start with a rough circle, oval and curve. Allow 20–35 minutes, with a break if needed. Around age 7 is a suggestion for learners familiar with these shapes, not an ability rating. To simplify, omit small details but keep both checks. To extend, try all three transfer tasks and choose your own sizes.
Technique 1. A curve on the form
Shell curves wrap around the dome: they stop at its edge rather than continuing onto the feet. In the detailed route, broad scutes follow the dome; fine texture is unnecessary.
On a simple mass try the two warm-up curves: shallow, then deeper. Choose the one that better describes the selected surface or open circular rim.
Check: The curve endpoints stay on one mass; explain what the curve shows.
Technique 2. Overlap
An opaque foreground shape hides part of the rear shape. Draw two intersecting ovals, choose the front one and erase the covered rear segment. Swap the order in a second trial. Check: where does the rear line end? The criterion is at the foreground edge, not inside it.
Warm-up
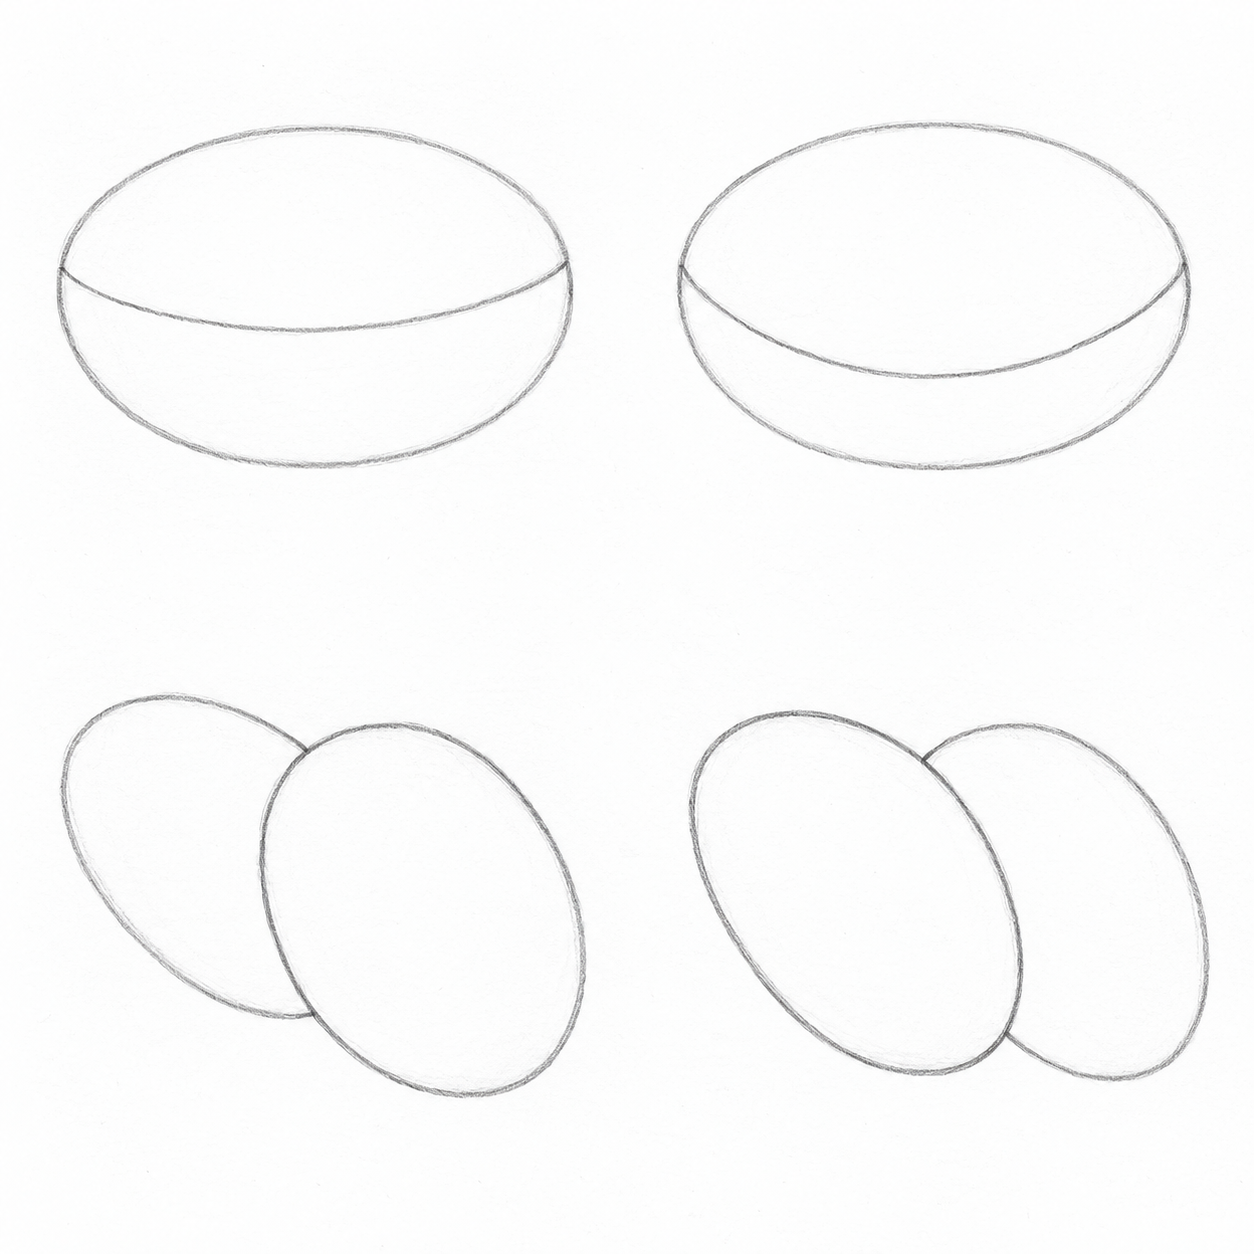
In the margin try the chosen curve twice: shallow and deeper. Name the one that exposes more of the surface. Then overlap two ovals and erase the covered edge; repeat with the other oval in front. The first trial prepares step 2; the second prepares steps 4–5. For the detailed routes, also try two parallel rim curves and a bent leg made from two overlapping ovals. For the best route, divide a small dome into broad scutes that narrow near its edge. Check that the lines stay within the form; shorten an excess endpoint. For the new views, sketch a small head with a vertical axis and curved eye band; turn the axis in a second trial. Decide where the near and far eyes belong. In a third trial put the head in front of a shell oval and erase the covered shell edge.
Step 1. Place shell and head
Trial
After checking
Trial
After checking
Trial
After checking
Simplest: Sketch a rounded shell mass and a smaller head mass to the right. Lightly mark the head direction and two foot positions; these are guides, not finished details. Leave a short tail marker on the left.
A little more detail: Sketch a rounded shell mass and a smaller head mass to the right. Lightly mark the head direction and two foot positions; these are guides, not finished details. Leave a short tail marker on the left.
Best version: Sketch a rounded shell mass and a smaller head mass to the right. Lightly mark the head direction and two foot positions; these are guides, not finished details. Leave a short tail marker on the left.
Sketch a rounded shell mass and a smaller head mass to the right. Lightly mark the head direction and two foot positions; these are guides, not finished details. Leave a short tail marker on the left.
Why: Large masses set head size; light markers establish direction and support positions.
Check: Is the head smaller than half the shell?
Repair: Reduce only the light head oval.
Step 2. Mark the dome curve
Trial
After checking
Trial
After checking
Trial
After checking
Simplest: Find the lower shell-edge curve on the mass, its middle below its ends. Compare it with the light trial and choose the line rather than outlining the whole original oval.
A little more detail: Find the lower shell-edge curve on the mass, its middle below its ends. Compare it with the light trial and choose the line rather than outlining the whole original oval.
Best version: Find the lower shell-edge curve on the mass, its middle below its ends. Compare it with the light trial and choose the line rather than outlining the whole original oval.
Draw a curve across the shell lower half, its middle below its ends.
Why: It describes how the lower edge wraps around the dome.
Check: Are the endpoints at the shell side boundaries?
Repair: Shorten the endpoint that extends onto the head.
Step 3. Find the dome and feet
Trial
After checking
Trial
After checking
Trial
After checking
Simplest: Replace the oval top with a dome and the lower edge with a gentle curve. Place two broad feet below it; refine the head on the right. Keep the outer edge plain, without internal details. Add a tiny tail on the left: two short edges meet at a point.
A little more detail: Refine the head: extend its lower edge into a short neck and soft cheek. Bend the front leg: tilt the upper mass and keep its lower mass on the ground. Why: bending changes the direction of a form rather than decorating its outline. Check: can you identify the neck and the foot support? Repair: move only the bend.
Best version: Refine the short neck and cheek. Build the front leg from two overlapping rounded masses: tilt the upper one and rest the lower one on the ground; keep the rear foot broad. Why: bending changes the direction of a form rather than decorating its outline. Check: can you identify the neck and the foot support? Repair: move only the bend.
Replace the oval top with a dome and the lower edge with a gentle curve. Place two broad feet below it; refine the head on the right. Add a tiny pointed tail on the left with two short lines.
Why: The shell covers the foot bases; its form differs from the original closed oval.
Check: Do the feet emerge from under the lower edge?
Repair: Move only one foot upper marker under the shell.
Step 4. Choose the hidden edge
Trial
After checking
Trial
After checking
Trial
After checking
Simplest: Find the short provisional bases of both feet and neck inside the dome. The shell is in front of these parts. Point to one section to erase.
A little more detail: Draw a second curve beside the lower shell edge to give its rim thickness. The neck emerges from behind it. Why: two matching curves show thickness; the rear edge is hidden. Check: does the rim avoid crossing the visible neck? Repair: shorten only the covered endpoint.
Best version: Refine the double shell rim and stop the rear neck and leg lines at it. Decide which bent-leg mass is in front before erasing its inner junction. Why: two matching curves show thickness; the rear edge is hidden. Check: does the rim avoid crossing the visible neck? Repair: shorten only the covered endpoint. Mark two short toe separations on each foot: keep them inside the lower mass rather than extending onto the shell.
Find the short provisional bases of both feet and neck inside the dome. The shell is in front of these parts.
Why: Because the shell hides the foot bases and part of the neck, a continuous rear line would make the front shape look transparent.
Check: Can you name the front shape and point to the covered segment?
Repair: Do not erase everything: first locate both ends of the covered segment.
Step 5. Erase only the covered line
Covered edge: close-up
After erasing: close-up
Covered edge: close-up
After erasing: close-up
Covered edge: close-up
After erasing: close-up
Simplest: Erase the covered foot and neck bases. Keep their visible parts beyond the lower and right shell edges. Keep the foreground outer edge. The close-up shows the front foot at the shell edge; keep your drawing size. Erase the covered lines of the other foot and neck in the same way.
A little more detail: Erase the covered foot and neck bases. Keep their visible parts beyond the lower and right shell edges. Check that the visible rear end reaches the front edge. The close-up shows the front foot at the shell edge; keep your drawing size. Erase the covered lines of the other foot and neck in the same way.
Best version: Erase the covered foot and neck bases. Keep their visible parts beyond the lower and right shell edges. If the eraser touched an adjacent visible line, restore only its short endpoint. The close-up shows the front foot at the shell edge; keep your drawing size. Erase the covered lines of the other foot and neck in the same way. After checking the overlap, place the eye using the light head marker: oval edge, pupil and tiny white highlight. Below it mark a short mouth and nostril dot. Check: eye within head and highlight within pupil? Repair: reduce only the pupil if the white gap disappears. A short curve above the eye marks the upper lid; keep it within the head.
Erase the covered foot and neck bases. Keep their visible parts beyond the lower and right shell edges. The close-up shows one foot: its edges must stop at the shell. Apply the same decision to the other foot and neck without changing your drawing scale.
Why: The eraser commits the chosen order: the front form hides the rear one.
Check: Is the previous error line gone, with adjacent visible edges retained?
Repair: If you erased a visible end, restore a short line up to the foreground boundary.
Step 6. Add the useful details
Trial
After checking
Trial
After checking
Trial
After checking
Simplest: Strengthen the chosen rim and place a small dot eye. Keep the dome plain. Retain the pale guides for now.
A little more detail: Draw two bowed boundaries defining three large shell panels. Place an oval eye with pupil and a short mouth curve on the head. Why: boundaries follow the surface, so panels narrow near its edge. Check: do shell lines stay on the dome and facial marks on the head? Repair: shorten any endpoint outside its form. Leave a tiny white gap in the pupil, add a nostril dot and short curve above the eye. Check: do all three marks stay inside the head? Repair: reduce only a mark outside the edge.
Best version: Divide the dome into broad scutes: start with the central polygon, then neighboring panels. Narrow the scutes near the edge; the bottom row follows the rim. Keep the already constructed eye, mouth and toes. Why: boundaries wrap around the rounded surface. Check: do scutes stay off the neck and feet? Repair: shorten only the excess endpoint.
Add your route’s details described above. Keep the best route’s scutes out of the simplest drawing.
Why: Shell boundaries follow the dome; facial features stay inside the head.
Check: Does each new line belong to its own form?
Repair: Shorten only the endpoint outside the boundary.
Step 7. Remove the guides
Trial
After checking
Trial
After checking
Trial
After checking
Simplest: Erase the original oval and head and foot markers; retain the chosen edge, eye and visible feet. Add no new details.
A little more detail: Remove the light masses and axis. Keep the taught shapes and details; add no new lines.
Best version: Remove the light masses and axis. Keep the taught shapes and details; add no new lines.
Remove your route’s light masses and axis. In the simplest route erase the pale original oval arc below the shell between the feet. Retain the chosen lower rim and explained details. Add no details.
Why: The guides helped choose the form, but not all are part of its surface.
Check: Is there less construction, with the overlap order intact?
Repair: Restore one needed visible edge if the eraser touched it; do not trace everything again.
If the drawing is unclear
The front form looks transparent. Cause: A covered rear edge remains: the shell hides the foot bases and part of the neck. Repair: Erase the covered foot and neck bases. Keep their visible parts beyond the lower and right shell edges.
The curve does not belong to the form. Cause: Its endpoints escaped the mass boundary. Repair: Soften one endpoint and return it to the side marker from step 2.
There is a gap after erasing. Cause: The eraser touched a visible section beside the overlap. Repair: Restore a short visible end up to the front boundary; keep the hidden line erased.
Independent tasks
Choose one new condition below. First construct your own masses and curve, name the foreground form, then draw the edge and erase the covered section. The construction-to-example pair explains the change; build rather than copy a finished outline. Your sizes and uneven lines may differ.
1. Head lowered
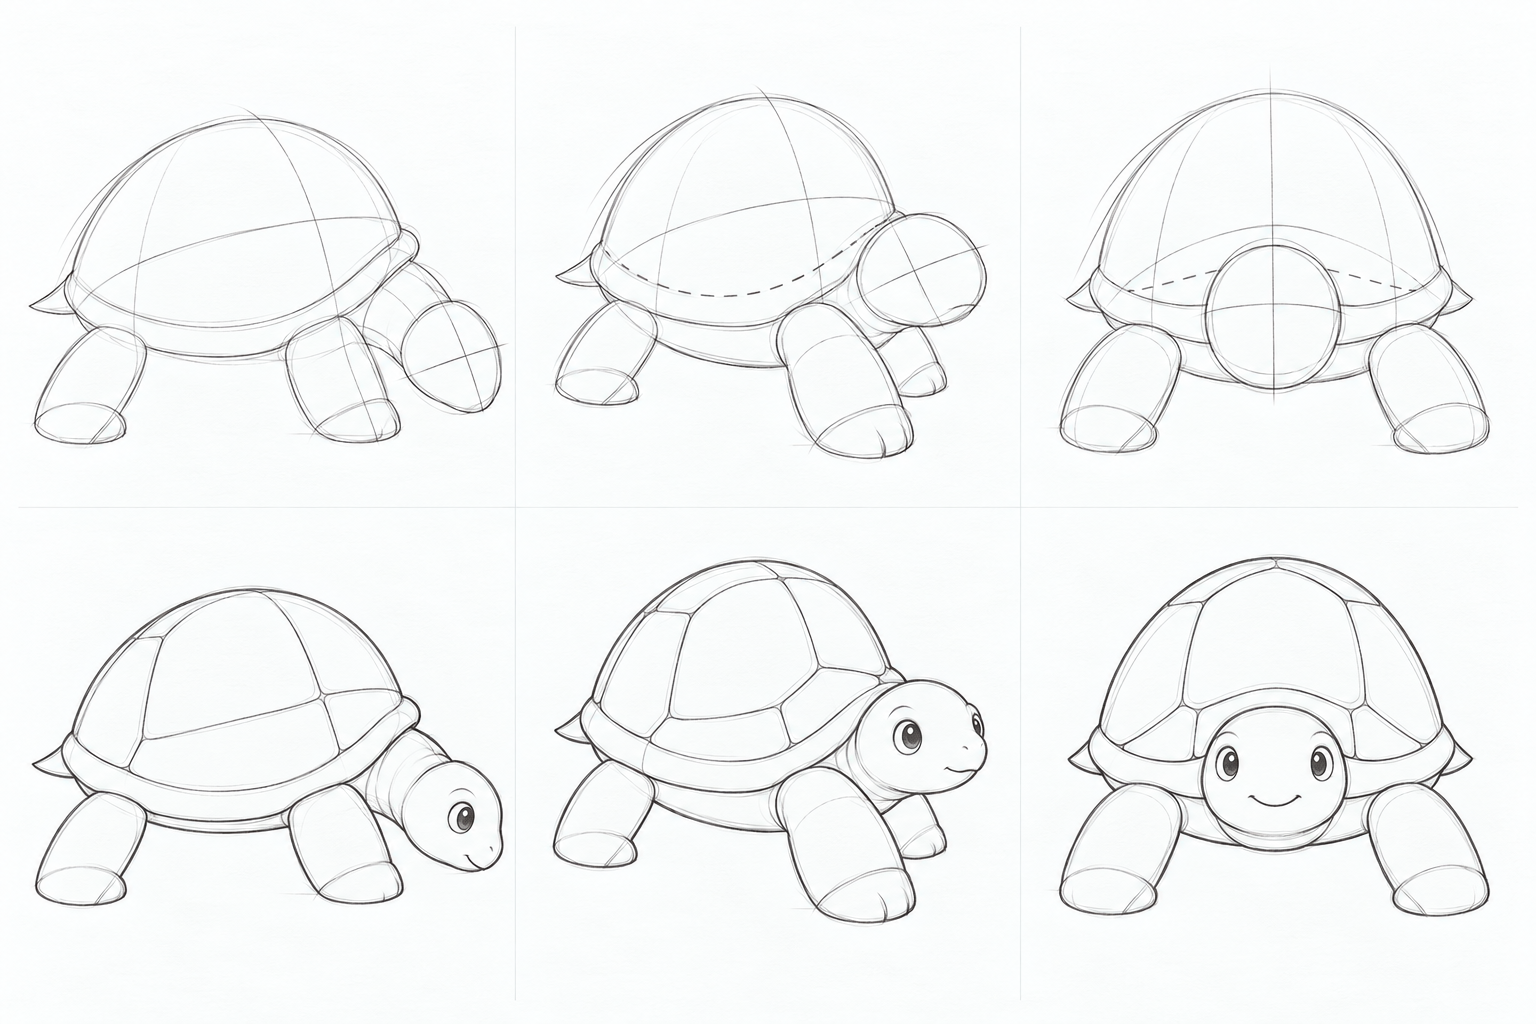
Start with the dome and a small head below its right edge. Connect them with a light curved neck axis and place two foot masses. Find the new lower neck line using the axis; the shell still covers the neck base. Erase the covered junction and guides after checking. Place the eye and short mouth on the lowered head; divide the dome into a few broad panels, as in the main route. Build the eye in the familiar way: oval edge, pupil with a white gap and short lid curve; keep a nostril dot at the snout tip. You may leave the dome plain and use a dot eye: the new viewpoint decision stays the same.
Why: Tilting changes neck direction and eye position; moving the old head down without a connecting neck does not solve the pose.
Check: Does the neck follow its curved axis and emerge from behind the shell, with the eye inside the head?
Repair: Lighten only the lower neck edge and redraw it closer to the axis, keeping the shell in place.
2. Three-quarter turn
Place a shell mass with a diagonal axis toward the lower right. Put the head at the front end of the axis. Make the near right foot larger; the far foot is smaller and partly covered. Wrap an eye-placement band around the head: the near eye is clear and the far eye sits near the cheek edge. Choose the foreground forms and erase covered lines and guides. Broad shell boundaries wrap around the new dome; small scutes are unnecessary; a short toe separation can reuse the best route’s construction. Build the eye in the familiar way: oval edge, pupil with a white gap and short lid curve; keep a nostril dot at the snout tip. You may leave the dome plain and use a dot eye: the new viewpoint decision stays the same.
Why: Turning changes head width and overlap: the far foot is smaller than the near foot and is not fully visible.
Check: Is the near foot larger, does the far contour stop at the foreground form, and do the eyes follow one curved band?
Repair: Reduce only the far foot or far eye; erase a short rear edge inside the foreground shape.
3. Facing straight ahead
Build a broad dome and a small head in front on a central vertical axis. Place two front feet at the sides. A curved head band sets the level of both eyes; compare their distances from the axis. The head is now in front of the shell: erase the rim section inside it and retain the visible ends at either side. Then remove axes and mass guides, add a short mouth and broad shell panels following the familiar curves. The tail is hidden in this view. Build the eye in the familiar way: oval edge, pupil with a white gap and short lid curve; keep a nostril dot at the snout tip. You may leave the dome plain and use a dot eye: the new viewpoint decision stays the same.
Why: This view reverses the overlap order: the shell is behind the head. An axis helps place paired features without demanding perfect symmetry.
Check: Does the rim stop at both sides of the head, are the eyes on one level and are both front feet visible?
Repair: Erase only the rim inside the head; if an eye drifted, move it toward the band without restarting the drawing.
Self-check
Name the changed condition, point to a curve on your new mass and show where the rear edge stops. Explain which guide you erased after checking.
Question: Why does the rear edge stop at an opaque foreground shape?
Answer: The foreground shape hides that segment. Continuing the rear edge inside it would suggest transparency. Retain the visible end up to the overlap.
Uneven lines are fine. Explain your chosen curve and where the rear edge stops. The example does not prescribe the only proportions. Structure and illustrations received editorial checks; no classroom trial has been conducted.
What to draw next
All drawing lessons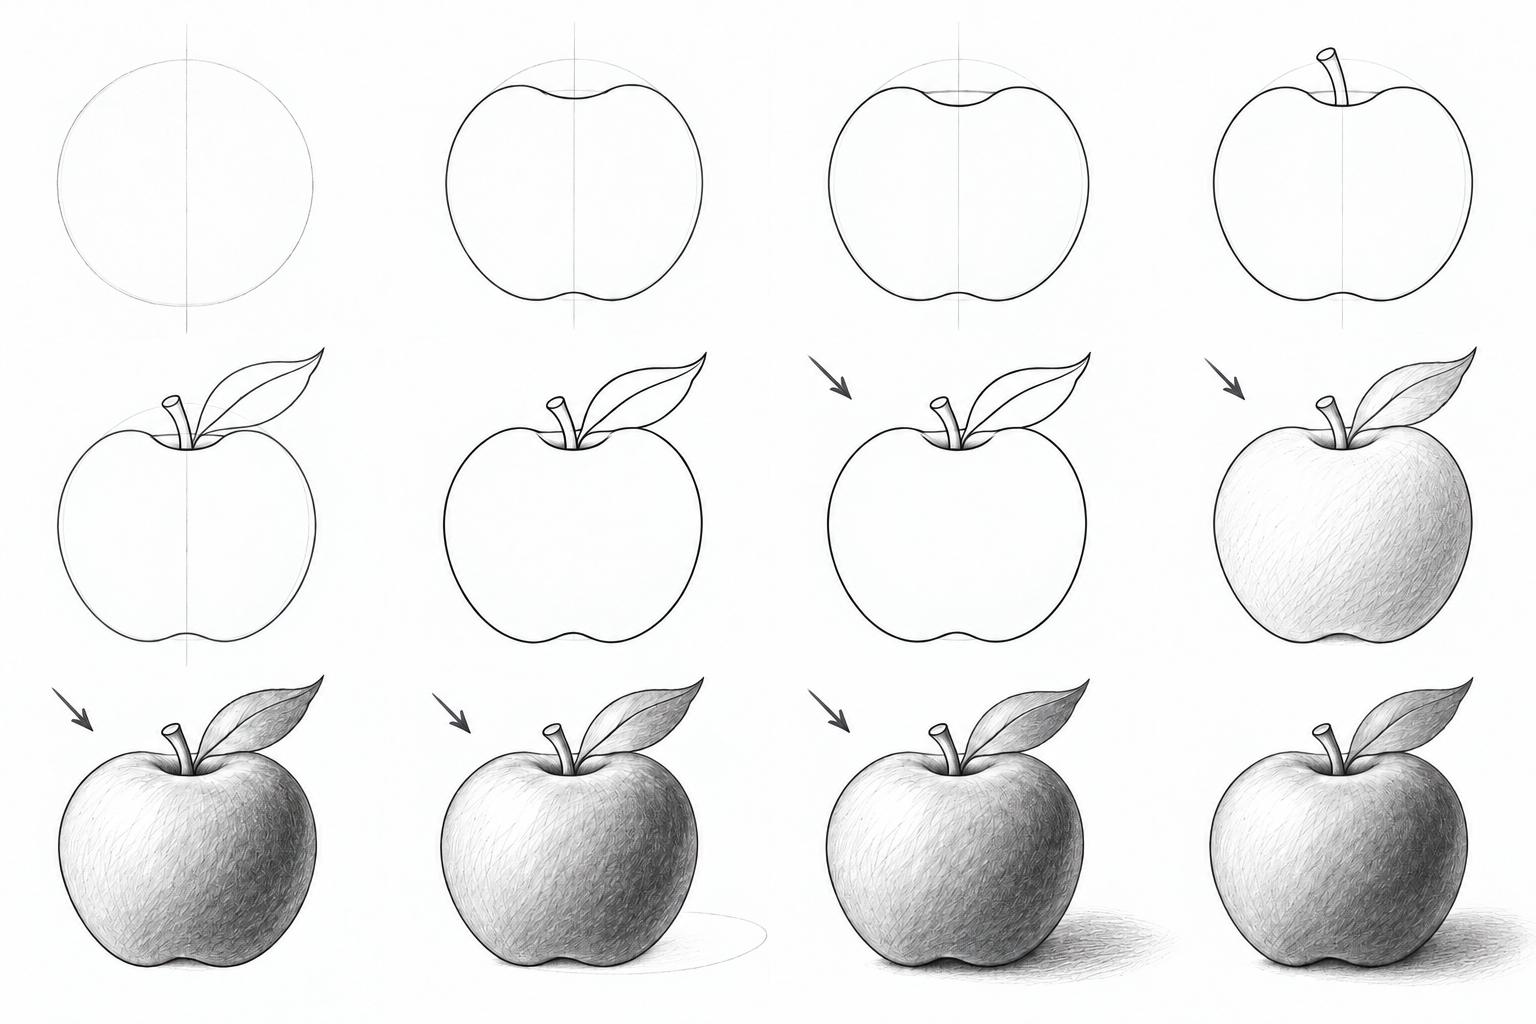 3 levels
How to draw an apple
Draw an apple at three levels: simple forms, a recessed top and bent leaf, then pencil light and shadow. Clear stages, small repairs and A4/Letter PDFs.
 3 levels
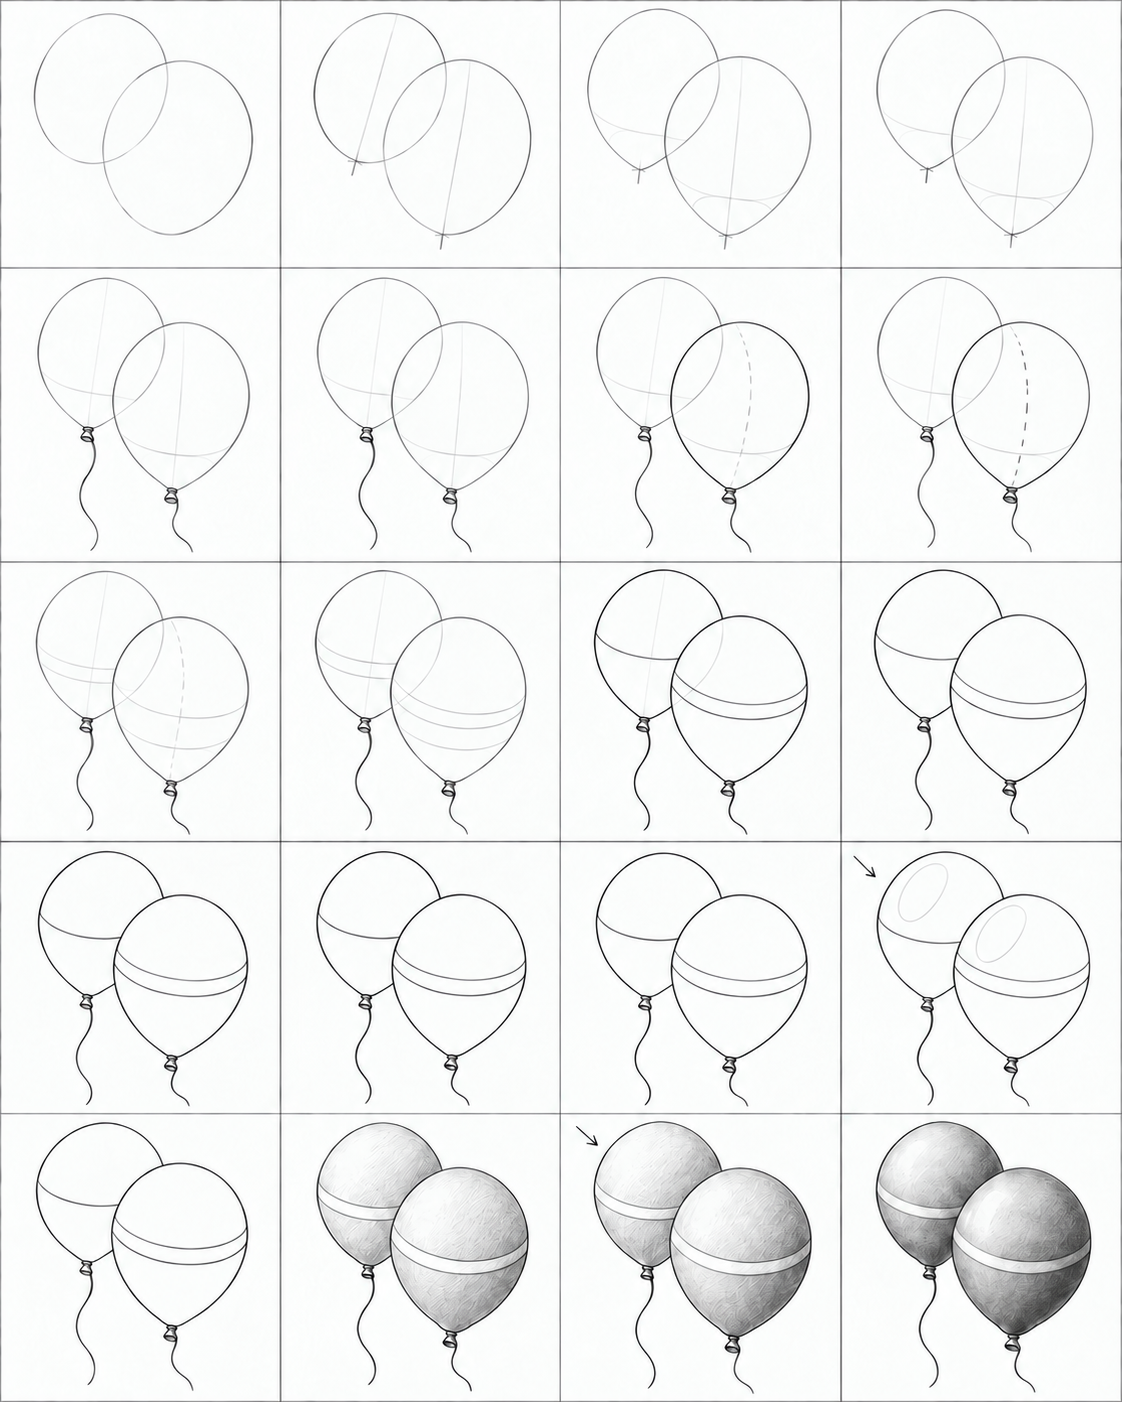
How to draw balloons
Three balloon drawing routes, from two simple ovals to tapered necks and pencil volume. Illustrated steps, checks, small repairs and practice PDFs.
 3 levels
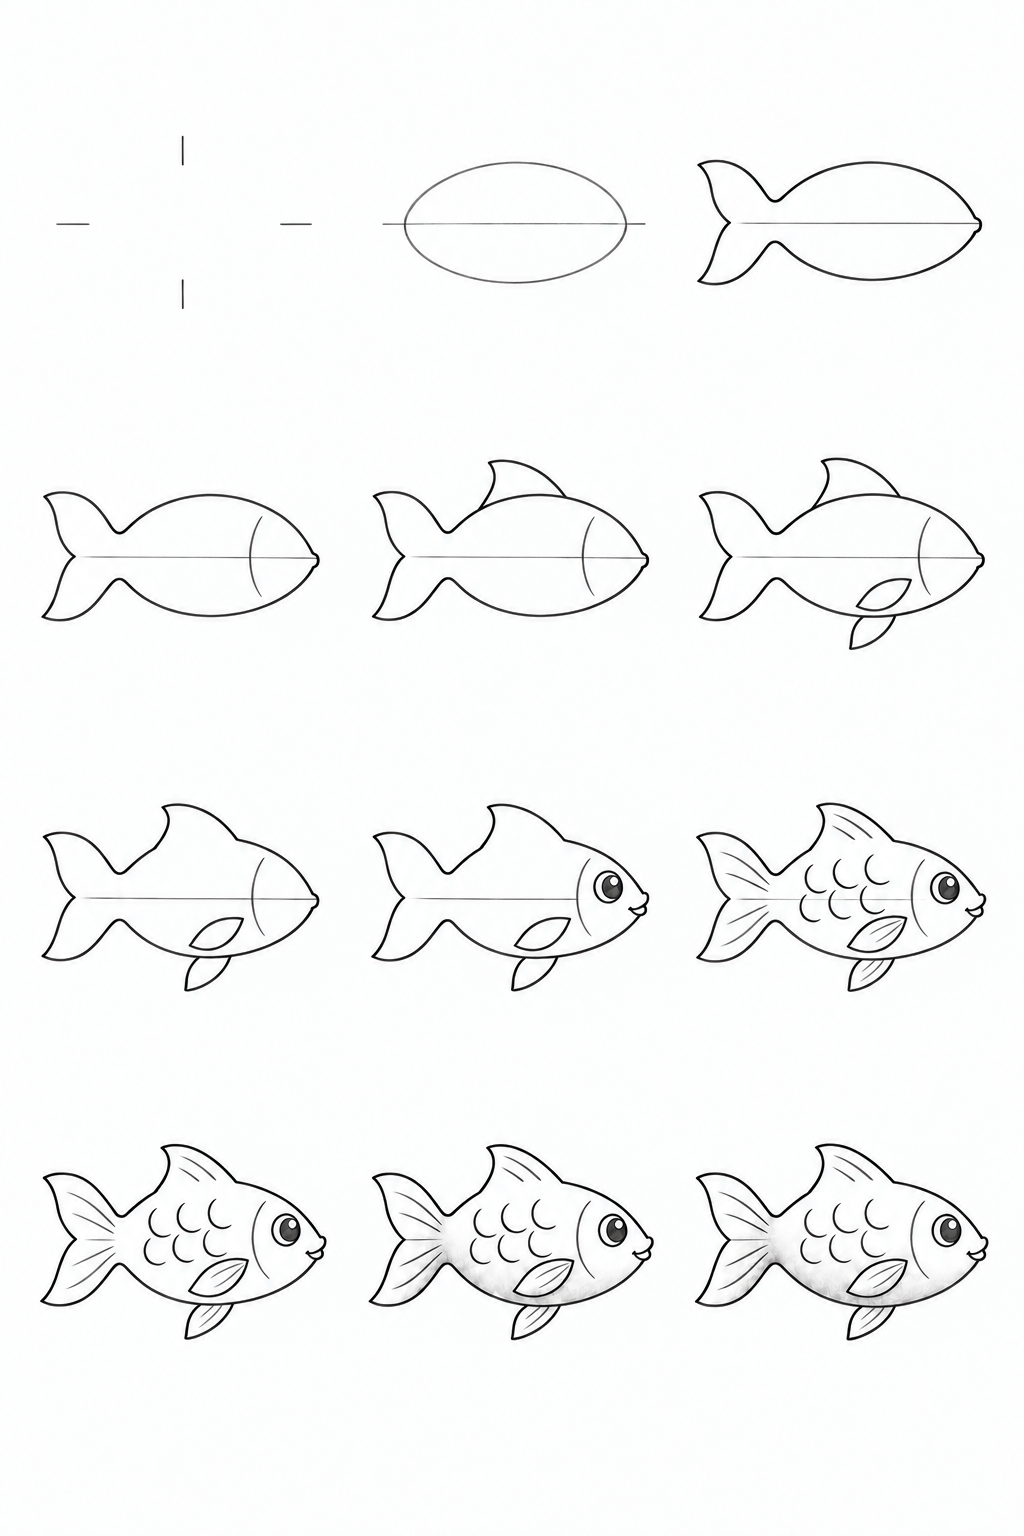
How to draw a fish
Build a fish from an oval: three pencil routes, ten steps, fins, erasing covered lines and softly blended shading. Printable lesson and practice PDFs.