kiduverse
How to draw a pumpkin: form and pencil shading
Draw a squat pumpkin in 12 stages: three levels, lobe and stalk construction, pencil shadows, independent exercises and complete A4/Letter PDFs.
- 3 detail levels
- Paper, HB/2B pencil, eraser
- 17 parts
Tap a drawing below to choose your level. The other levels hide and the “trial → after checking” pairs get bigger.
Choose an achievable result: three broad parts in a simple outline, five lobes with a solid stalk, or pencil volume. Every route builds a squat pumpkin from one broad mass; your own proportions and uneven lines are welcome.
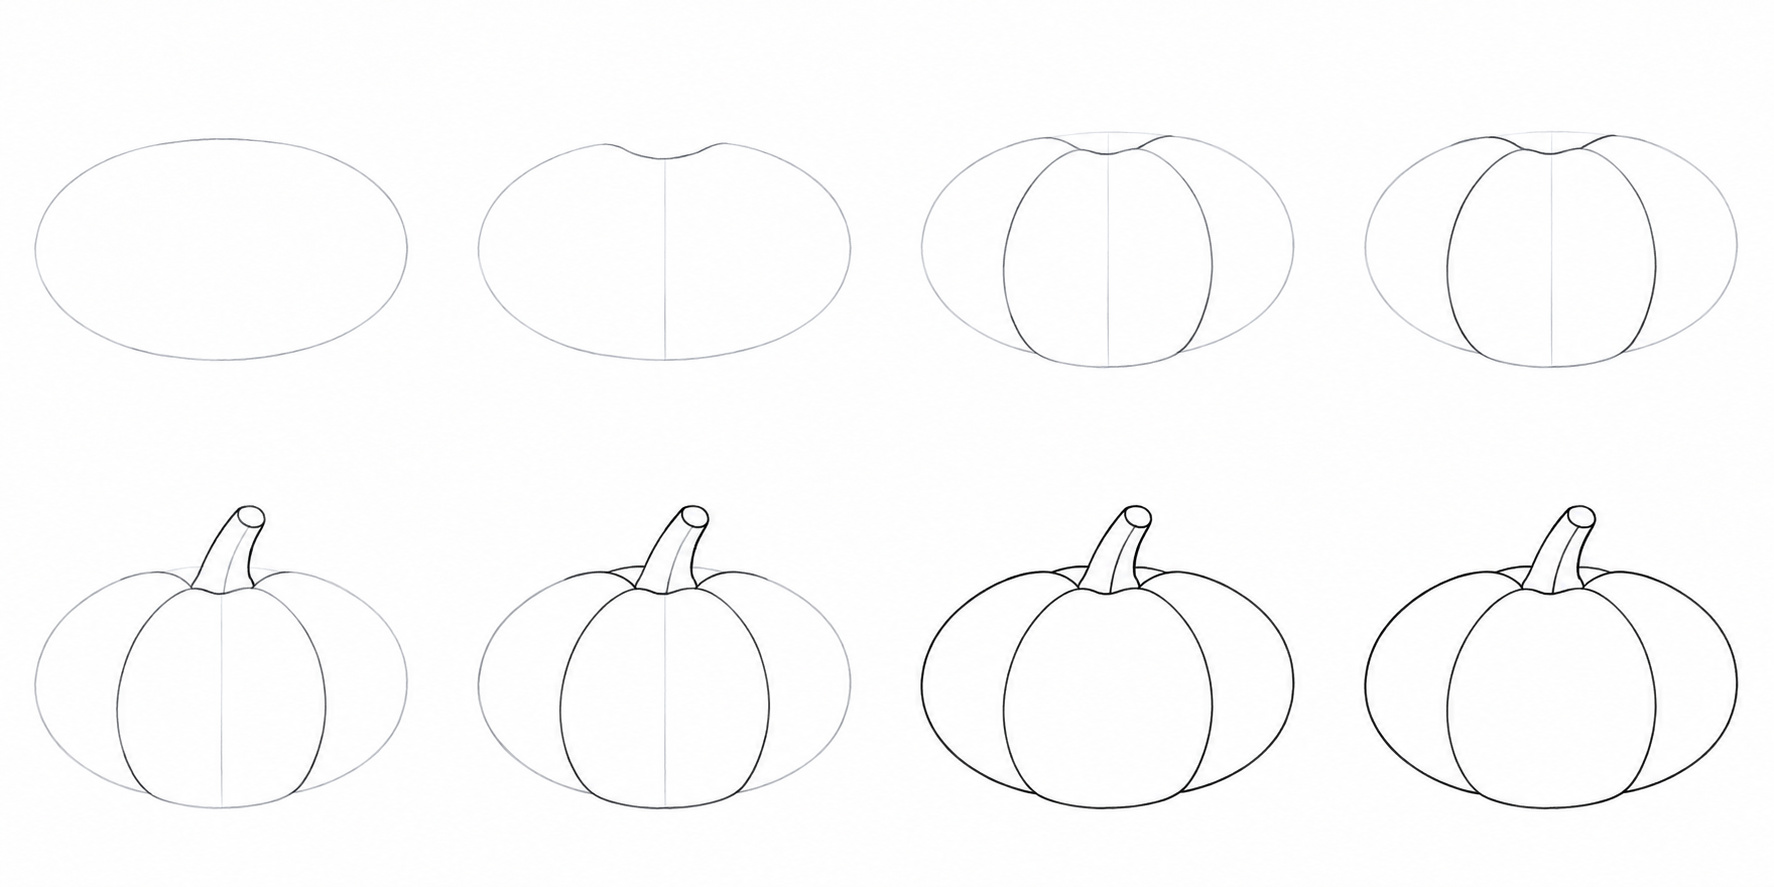
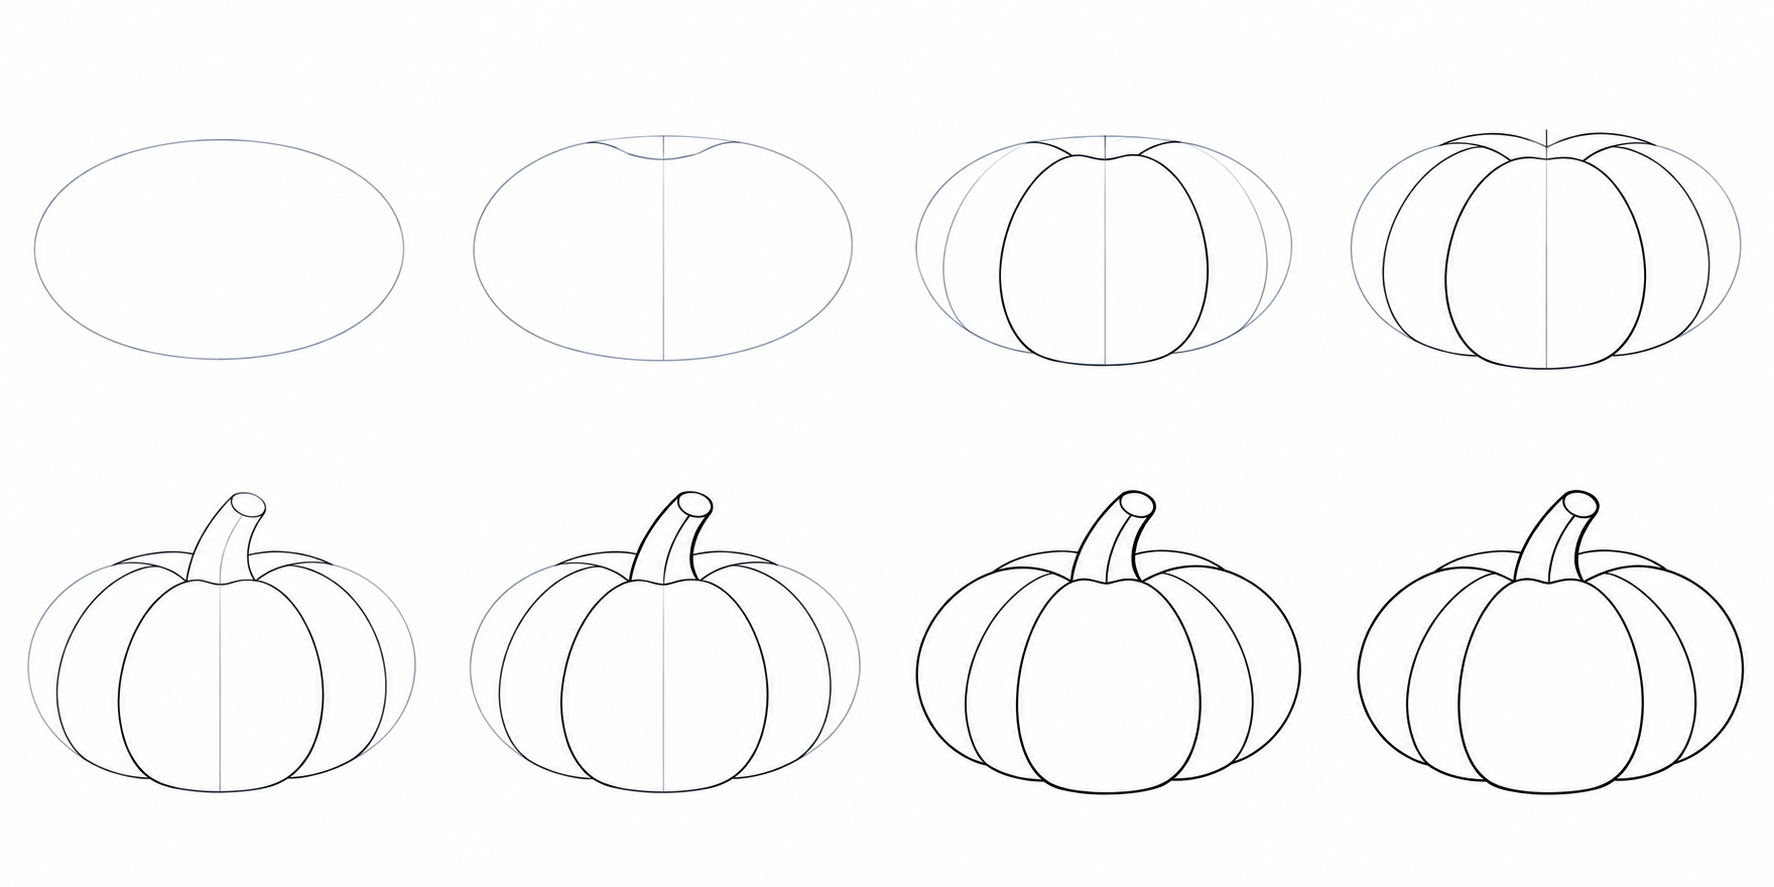
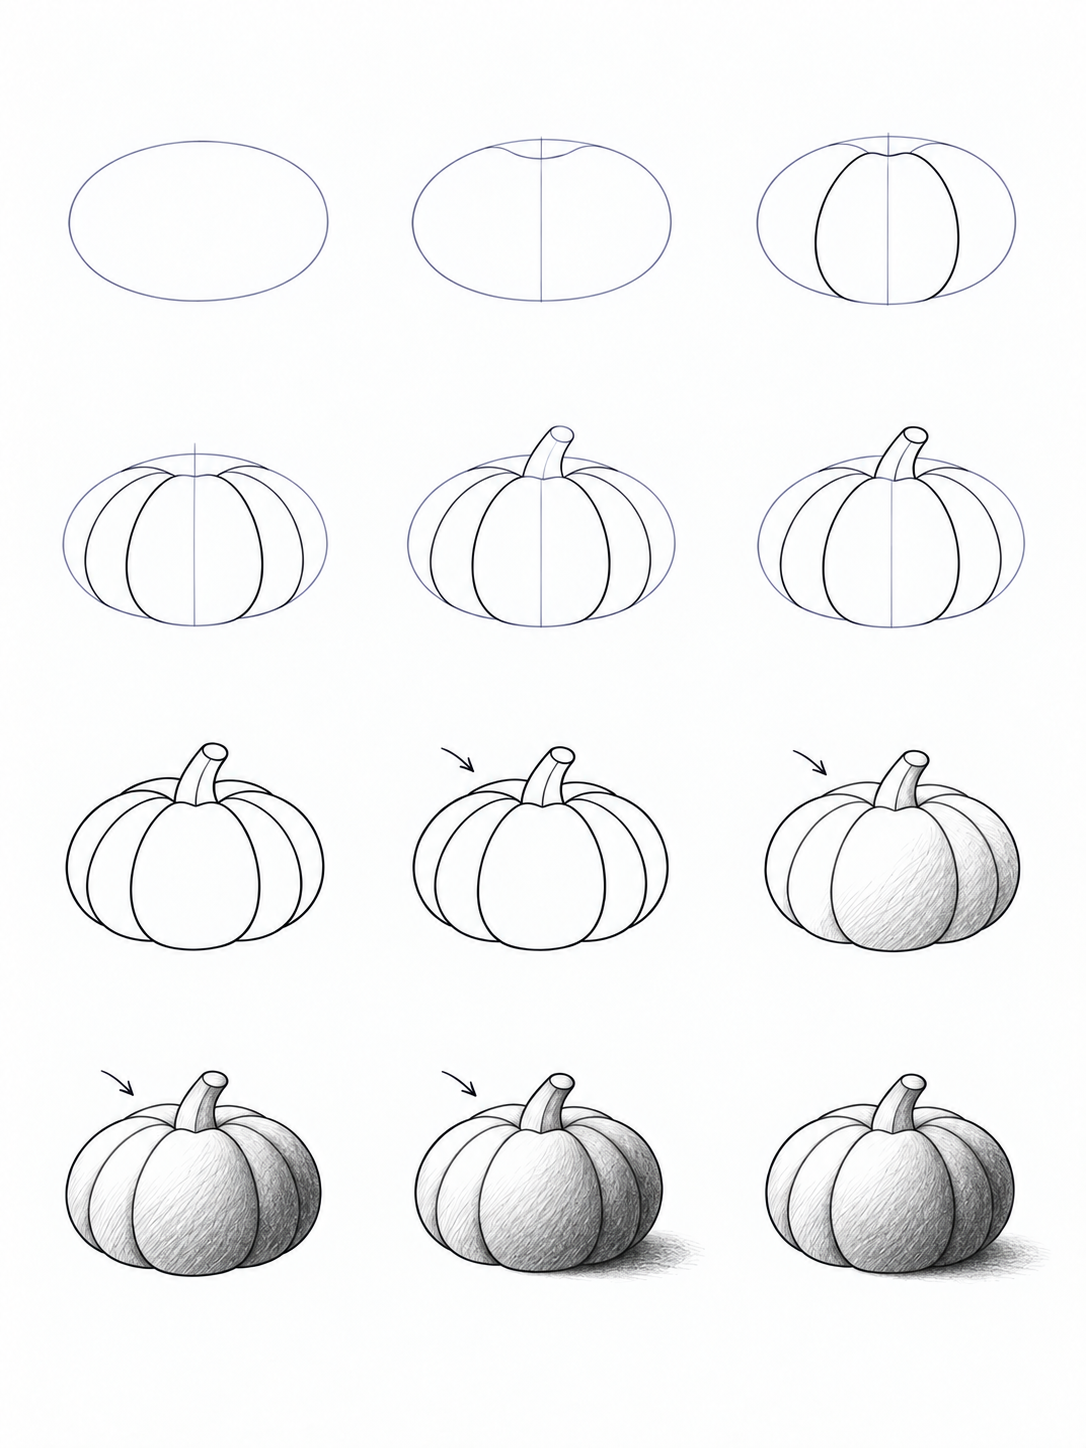
Simplest: mass, two curves and a short stalk. More detail: rear arcs stop behind near lobes and the bent stalk has thickness. Best version: choose light, build two tone layers and attach a ground shadow. The first two routes finish at step 7; their later cards only check the completed form. Pencil-style illustrations are AI-generated.
Your goal
Show lobe fullness, connect the stalk to the mass and remove used supports. The middle route adds overlap and thickness; the third adds consistent light, midtone, own shadow and cast shadow. Use paper, HB or 2B and a soft eraser. Starting skills are a light oval and curve. Allow roughly 25–60 minutes with breaks. Around age 7 is a suggestion rather than an ability rating. Simplify with the first route; extend by changing viewpoint or light in an independent task.
Construct the form: Begin with a broad mass and centre. Curves show fullness; a near lobe hides the end of a rear one. Two sides and an elliptical cap make the stalk solid. Erase used supports while retaining useful edges.
Practice: Draw two broad ovals of different heights with two bowed divisions in each. Overlap two smaller ovals and erase the covered arc. For the middle route, separately try a bent tube with an elliptical cut cap.
Check: Curves change with mass height; a rear line stops at the front shape and the tube cap joins both sides.
Light and pencil value: For route 3 choose one light before hatching. White paper shows the lit area, a light layer gives midtone and a repeated layer gives own shadow on the turned-away side. Cast shadow lies on the neighbouring plane and starts at contact.
Practice: Make three small patches of short strokes with different densities. On a round mass keep the upper left white, lay two layers on the right and add a shadow from the base. Move light to the right on another mass and independently choose the areas again.
Check: Three values differ; moving the light changes the bright area, own shadow and cast shadow.
Warm-up
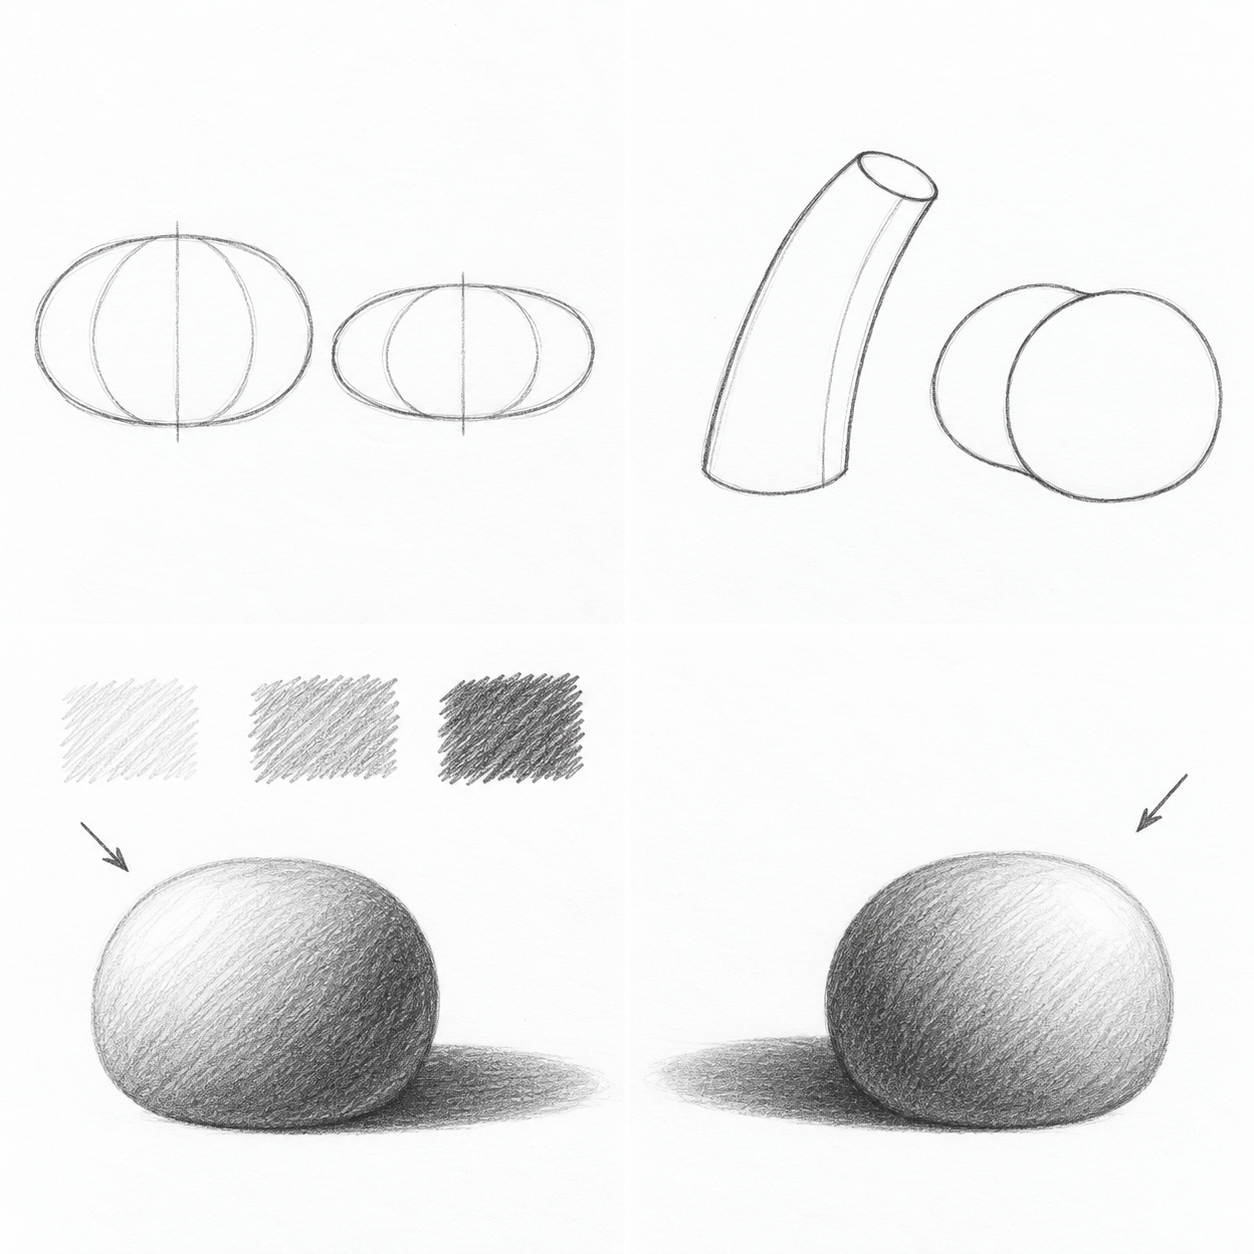
Upper-left trial: independently draw two ovals of different heights with two bowed curves in each. Upper right: join two bent-tube sides to a cap, then choose the front oval in the pair and erase the covered edge of the other. For route 3 make three value patches and a round mass lit from the left; change light to the right on a new mass.
Why: Curves, overlaps and the cap prepare steps 1–7; two layers and shadow contact prepare steps 8–11.
Check: How does the curve change when height decreases? Where did the rear edge stop? Which side became white after moving the light?
Answer: Curves are shorter vertically on the flatter mass. The rear edge stops at the front oval. With right light the bright area is on the right, darkness on the left and ground shadow extends left.
Repair: Adjust one curve or cap end and erase only a covered edge. In the tone trial lift excess on the light side and close a base gap.
Step 1. Size and the broad mass
Simplest: Lightly place one broad oval, about one and a half times as wide as it is tall. Leave room above for a short stalk and on the right for a later shadow. Why: One mass establishes the squat pumpkin before its lobes appear. Check: Is the oval wider than tall, with spare paper around it? Repair: Soften just one oval side or lift its lower arc instead of restarting the drawing.
A little more detail: Lightly place one broad oval, about one and a half times as wide as it is tall. Leave room above for a short stalk and on the right for a later shadow. Why: One mass establishes the squat pumpkin before its lobes appear. Check: Is the oval wider than tall, with spare paper around it? Repair: Soften just one oval side or lift its lower arc instead of restarting the drawing.
Best version: Lightly place one broad oval, about one and a half times as wide as it is tall. Leave room above for a short stalk and on the right for a later shadow. Why: One mass establishes the squat pumpkin before its lobes appear. Check: Is the oval wider than tall, with spare paper around it? Repair: Soften just one oval side or lift its lower arc instead of restarting the drawing.
Step 2. Hollow and centre
Before the action
After the action
Before the action
After the action
Before the action
After the action
Simplest: Draw a light vertical centre guide. Replace a short section of the upper oval with a shallow hollow; its neighbouring curves become the shoulders. Why: The guide locates the front lobe and the hollow locates the stalk. Check: Is the hollow near the centre, with shoulders connected to the broad mass? Repair: Move only the hollow or lighten an unwanted upper segment; do not turn it into a deep cut.
A little more detail: Draw a light vertical centre guide. Replace a short section of the upper oval with a shallow hollow; its neighbouring curves become the shoulders. Why: The guide locates the front lobe and the hollow locates the stalk. Check: Is the hollow near the centre, with shoulders connected to the broad mass? Repair: Move only the hollow or lighten an unwanted upper segment; do not turn it into a deep cut.
Best version: Draw a light vertical centre guide. Replace a short section of the upper oval with a shallow hollow; its neighbouring curves become the shoulders. Why: The guide locates the front lobe and the hollow locates the stalk. Check: Is the hollow near the centre, with shoulders connected to the broad mass? Repair: Move only the hollow or lighten an unwanted upper segment; do not turn it into a deep cut.
Step 3. The front lobe
Before the action
After the action
Before the action
After the action
Before the action
After the action
Simplest: From the hollow edges draw two long curves downward. Spread them in the middle and bring them closer at the base, forming a broad front lobe. Why: The curves describe a rounded surface rather than straight stripes on a flat oval. Check: Do both curves bow outward and stay inside the main mass? Repair: Lighten an overly straight middle section of one curve and make it slightly fuller.
A little more detail: From the hollow edges draw two long curves downward. Spread them in the middle and bring them closer at the base, forming a broad front lobe. Why: The curves describe a rounded surface rather than straight stripes on a flat oval. Check: Do both curves bow outward and stay inside the main mass? Repair: Lighten an overly straight middle section of one curve and make it slightly fuller.
Best version: From the hollow edges draw two long curves downward. Spread them in the middle and bring them closer at the base, forming a broad front lobe. Why: The curves describe a rounded surface rather than straight stripes on a flat oval. Check: Do both curves bow outward and stay inside the main mass? Repair: Lighten an overly straight middle section of one curve and make it slightly fuller.
Step 4. Near and far lobes
Before the action
After the action
Before the action
After the action
Before the action
After the action
Simplest: Compare the two front curves with the mass sides. Clarify their useful sections without adding the detailed route’s side lobes or rear arcs. Why: Three broad parts already make an achievable form; check curvature rather than line count. Check: Is the middle lobe broad, with side parts inside the original mass? Repair: Lighten only a narrow or straight curve and bow it outward a little.
A little more detail: Between each front division and outer side choose another curve for a narrow side lobe. Add two short rear crown arcs, stopping them at the nearer lobes. Keep the trial mass oval light for now. Why: Side lobes turn away and nearer lobes hide part of the rear crown. Rear arcs must not show through the front lobe. Check: Can you see five broad lobes, with rear arcs ending at near ones instead of crossing them? Repair: Erase only a rear-arc extension inside a near lobe; restore its visible tip up to the boundary.
Best version: Between each front division and outer side choose another curve for a narrow side lobe. Add two short rear crown arcs, stopping them at the nearer lobes. Keep the trial mass oval light for now. Why: Side lobes turn away and nearer lobes hide part of the rear crown. Rear arcs must not show through the front lobe. Check: Can you see five broad lobes, with rear arcs ending at near ones instead of crossing them? Repair: Erase only a rear-arc extension inside a near lobe; restore its visible tip up to the boundary.
Step 5. Place the stalk
Before the action
After the action
Before the action
After the action
Before the action
After the action
Simplest: Raise two close sides of a short stalk from the hollow, bending them slightly right. Place a small rounded trial cap at the top; add no leaf or texture. Why: The stalk belongs to the upper support of the pumpkin instead of floating above it. Check: Do both sides start at one hollow, with the cap between their endpoints? Repair: Bring only a detached lower tip to the hollow or shorten one side.
A little more detail: Raise two close sides of a short stalk from the hollow, bending them slightly right. Place a small rounded trial cap at the top; add no leaf or texture. Why: The stalk belongs to the upper support of the pumpkin instead of floating above it. Check: Do both sides start at one hollow, with the cap between their endpoints? Repair: Bring only a detached lower tip to the hollow or shorten one side.
Best version: Raise two close sides of a short stalk from the hollow, bending them slightly right. Place a small rounded trial cap at the top; add no leaf or texture. Why: The stalk belongs to the upper support of the pumpkin instead of floating above it. Check: Do both sides start at one hollow, with the cap between their endpoints? Repair: Bring only a detached lower tip to the hollow or shorten one side.
Step 6. Stalk thickness
Before the action
After the action
Before the action
After the action
Before the action
After the action
Simplest: Check the short stalk: both sides join its little rounded cap and sit in the hollow. Do not add the solid stalk’s interior plane line. Why: A simple route needs a connected silhouette of the necessary detail. Check: Is there no gap at the cap or detachment from the pumpkin? Repair: Join one endpoint or erase an overly long trial side.
A little more detail: Make the cap a small tilted ellipse connected to both stalk sides. Add one curved line inside the right side to separate a narrow side surface from the wider front. Why: The elliptical cut end and side surface show the thickness of a bent stalk, a separate form decision. Check: Does the cap join both sides, and does the inner line follow the bend instead of cutting across the stalk? Repair: Adjust one cap endpoint or lighten an overly straight inner line.
Best version: Make the cap a small tilted ellipse connected to both stalk sides. Add one curved line inside the right side to separate a narrow side surface from the wider front. Why: The elliptical cut end and side surface show the thickness of a bent stalk, a separate form decision. Check: Does the cap join both sides, and does the inner line follow the bend instead of cutting across the stalk? Repair: Adjust one cap endpoint or lighten an overly straight inner line.
Step 7. Erase used supports
Before the action
After the action
Before the action
After the action
Before the action
After the action
Simplest: Erase the axis and unnecessary first-oval traces. Keep the two front divisions, outer edge and plain stalk. The simple drawing is complete. Why: Removing supports leaves three clear parts instead of a rough draft. Check: Has the axis gone, without double side outlines? Repair: Restore only a short visible edge accidentally touched by the eraser.
A little more detail: Erase the vertical axis and parts of the first oval that no longer serve as visible edges. Keep all four lobe divisions, useful outer edges, crown overlaps and the stalk. Why: The supports helped find the form; outlining every guide would make it transparent or double-edged. Check: Has the axis disappeared, leaving one useful edge instead of two nearby side contours? Repair: If the eraser caught an edge, restore only that short section rather than the entire first oval.
Best version: Erase the vertical axis and parts of the first oval that no longer serve as visible edges. Keep all four lobe divisions, useful outer edges, crown overlaps and the stalk. Why: The supports helped find the form; outlining every guide would make it transparent or double-edged. Check: Has the axis disappeared, leaving one useful edge instead of two nearby side contours? Repair: If the eraser caught an edge, restore only that short section rather than the entire first oval.
Step 8. Choose the light
Before the action
After the action
Simplest: Your drawing is complete; shading belongs to the third route. Check that the whole pumpkin and stalk fit on the paper. Why: Check the completed construction without compulsory extra complexity. Check: Useful edges are connected and spare guides are gone; no new lines are required. Repair: Repair only a small gap or extra trial line you notice; you may stop here.
A little more detail: Your drawing is complete; shading belongs to the third route. Check that the whole pumpkin and stalk fit on the paper. Why: Check the completed construction without compulsory extra complexity. Check: Useful edges are connected and spare guides are gone; no new lines are required. Repair: Repair only a small gap or extra trial line you notice; you may stop here.
Best version: Choose upper-left light. Put a small arrow toward the pumpkin in the margin. Before hatching, point to the upper-left light area and the right side turning away from the light. Why: Light direction decides value placement and the later shadow. The arrow is a teaching support, not a pumpkin detail. Check: Did you choose the bright area before laying tone, with light from only one side? Repair: Move the arrow into the margin if it crosses the outline; choose one source rather than two.
Step 9. The first light tone
Before the action
After the action
Simplest: Your drawing is complete; shading belongs to the third route. Follow the lobe curves with your finger: they bow rather than form straight stripes. Why: Check the completed construction without compulsory extra complexity. Check: Useful edges are connected and spare guides are gone; no new lines are required. Repair: Repair only a small gap or extra trial line you notice; you may stop here.
A little more detail: Your drawing is complete; shading belongs to the third route. Follow the lobe curves with your finger: they bow rather than form straight stripes. Why: Check the completed construction without compulsory extra complexity. Check: Useful edges are connected and spare guides are gone; no new lines are required. Repair: Repair only a small gap or extra trial line you notice; you may stop here.
Best version: Lay a light layer of short diagonal pencil strokes across the lower middle and right lobes. Let stroke direction change with the turning surface as you approach its edges. Keep a broad upper-left area paper white; begin only on the narrow right side of the stalk. Why: The first layer creates midtone while paper remains the light. A darker layer comes separately. Check: Is the white area clear, without even coverage across the whole pumpkin or any ground shadow yet? Repair: Lift excess upper-left tone with a soft eraser or lighten an overly dense first trial.
Step 10. Deepen the own shadow
Before the action
After the action
Simplest: Your drawing is complete; shading belongs to the third route. Point to the stalk/hollow join; in the middle route find the cap and side plane. Why: Check the completed construction without compulsory extra complexity. Check: Useful edges are connected and spare guides are gone; no new lines are required. Repair: Repair only a small gap or extra trial line you notice; you may stop here.
A little more detail: Your drawing is complete; shading belongs to the third route. Point to the stalk/hollow join; in the middle route find the cap and side plane. Why: Check the completed construction without compulsory extra complexity. Check: Useful edges are connected and spare guides are gone; no new lines are required. Repair: Repair only a small gap or extra trial line you notice; you may stop here.
Best version: Use repeated short strokes to deepen the right and lower turned-away surfaces. Keep the central front lighter; the stalk right side is darker than its left face and the cut cap stays light. Why: Own shadow is on the object. Different layer densities describe a surface turning under one light source. Check: Are paper white, midtone and a darker right side distinct? Does darkness occupy a surface rather than a black outline strip? Repair: Lighten the centre or extend tone into the right lobe instead of thickening the entire contour.
Step 11. Shadow on the plane
Before the action
After the action
Simplest: Your drawing is complete; shading belongs to the third route. Make sure the axis and unwanted first-oval traces are erased. Why: Check the completed construction without compulsory extra complexity. Check: Useful edges are connected and spare guides are gone; no new lines are required. Repair: Repair only a small gap or extra trial line you notice; you may stop here.
A little more detail: Your drawing is complete; shading belongs to the third route. Make sure the axis and unwanted first-oval traces are erased. Why: Check the completed construction without compulsory extra complexity. Check: Useful edges are connected and spare guides are gone; no new lines are required. Repair: Repair only a small gap or extra trial line you notice; you may stop here.
Best version: From the pumpkin contact with the paper, place a short broad shadow to the right. Make it darker at contact and lighter at its far edge. This is a simplified shadow on a horizontal plane, entirely within the spare margin. Why: Cast shadow lies beside the object, starts at support and extends away from the chosen upper-left light. Check: Is there no light gap at the base, with shadow extending right and fitting entirely on the paper? Repair: Close only a contact gap or lighten and move the wrong far edge.
Step 12. Clean up and check
Before the action
After the action
Simplest: Your drawing is complete; shading belongs to the third route. Compare your result with the goal: connected squat silhouette, broad lobes and a short stalk. Why: Check the completed construction without compulsory extra complexity. Check: Useful edges are connected and spare guides are gone; no new lines are required. Repair: Repair only a small gap or extra trial line you notice; you may stop here.
A little more detail: Your drawing is complete; shading belongs to the third route. Compare your result with the goal: connected squat silhouette, broad lobes and a short stalk. Why: Check the completed construction without compulsory extra complexity. Check: Useful edges are connected and spare guides are gone; no new lines are required. Repair: Repair only a small gap or extra trial line you notice; you may stop here.
Best version: Remove the light arrow. Lift accidental strokes outside the chosen areas, retaining three values and the entire shadow connected to the base. Add no new lobes, texture or background. Why: Finishing selects useful lines and values rather than outlining every mark. Check: Are the form, stalk cap, white area and shadow contact readable without the arrow, all within the sheet? Repair: Restore one lost edge or lift a small stray patch; do not darken everything to make it uniform.
If the drawing is unclear
The pumpkin looks like a striped flat circle. Cause: Straight inner lines do not describe fullness. Repair: Lighten one line’s middle and choose a fuller curve, leaving its ends at the same supports.
A rear lobe shows through a near one. Cause: A covered crown-arc extension remains. Repair: Erase just the covered extension without breaking the near contour.
The stalk looks like a pasted strip. Cause: Its cap does not join both sides or its plane line cuts across it. Repair: Join one cap endpoint and adjust a short inner-line section along the bend.
The bright area disappeared. Cause: The first layer covered the entire surface evenly. Repair: Lift upper-left tone with the eraser and keep a midtone between white and dark.
Own shadow looks like a black outline. Cause: Only the edge was darkened instead of the turned-away surface. Repair: Soften the outline and lay a second layer across a broader right area.
The pumpkin floats above its shadow. Cause: A light gap separates the base from the shadow patch. Repair: Join the shadow start to contact and soften its far edge; with left light it extends right.
Independent tasks
Choose a new condition, place your own supports first and explain the changed decision. Then compare with the example; exact matching is unnecessary. All three tasks remain available with every route. The simplest may keep two divisions and the first two may finish without tone. Before the lighting task, do the tone warm-up and familiar steps 8–11.
1. A flatter pumpkin
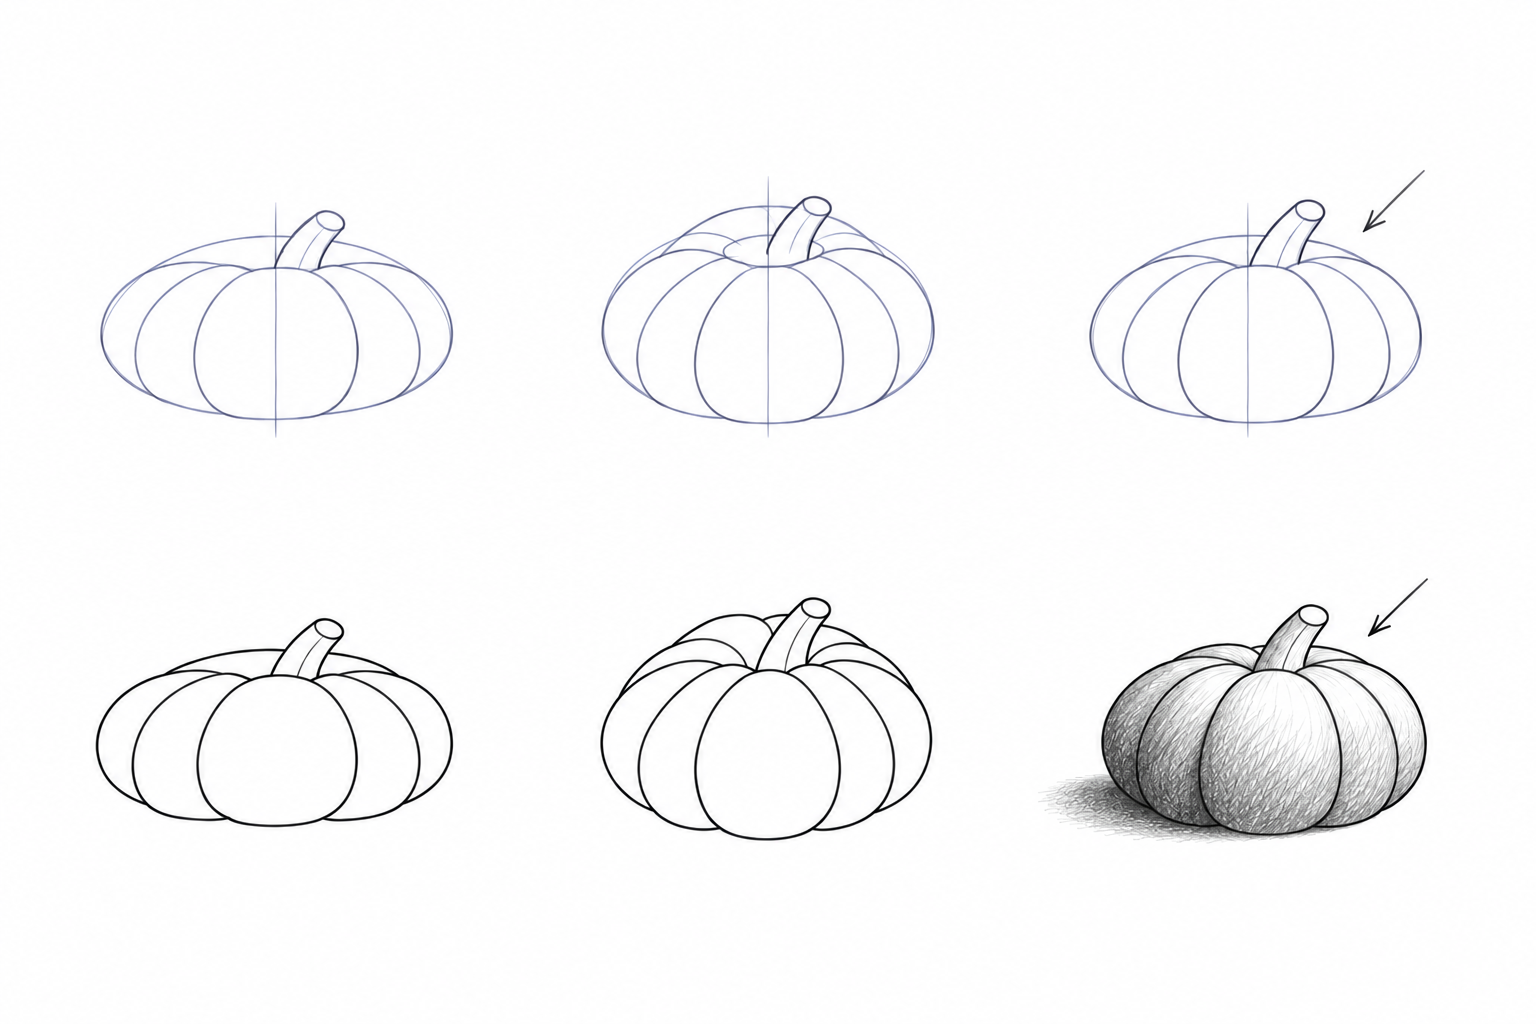
Keep the width but reduce mass height so width is about twice height. Independently choose the depth of four curves and stalk position at the new top. The simple route keeps two divisions; the example shows the middle route.
Why: New height changes the distance between supports, so the old long curves cannot transfer without a decision.
Check: Is the mass lower, with curves and stalk belonging to the new top and base?
Repair: Lift an overly low curve end or shorten its bowed middle without changing the whole width.
2. A slightly higher viewpoint
Raise the viewpoint: within the light mass place a vertically deeper crown oval around the stalk. Independently choose rear crown lobes and the near edge partly hiding them. Then erase the trial upper oval. This is a surface top, not an opening.
Why: More of the crown is visible from above, changing overlap placement rather than just silhouette height.
Check: Is more rear crown visible, with arcs still stopping at nearer lobes and no extra ring around the stalk?
Repair: Soften one overly high rear arc or erase a crown-oval remnant, retaining the chosen near edge.
3. Upper-right light
Keep the familiar low pumpkin but move light to the upper right. Before hatching independently choose a white right area, medium front tone and dark left side. Extend ground shadow left from the base. Start with a light layer, then deepen only the chosen dark area.
Why: The source changes, requiring new own-shadow and cast-shadow placement rather than copying the main tone.
Check: Is the right area light, the left darker and the shadow attached to the base extending left?
Repair: Lift excess right tone, darken only the turned-away left surface and close a contact gap.
Self-check
Point to a curve describing fullness and a removed support. In the middle route find a rear-arc endpoint and stalk thickness; in the third name the light source, three values and shadow contact.
Question: What must you decide again when light moves to the upper right?
Answer: Where to retain the bright right area, deepen own shadow on the left and extend cast shadow from the base: left, away from the light. Form may stay the same but the earlier values cannot simply be copied. Uneven lines and different sizes are welcome if your chosen relationships remain clear. No classroom trial has been performed.
What to draw next
All drawing lessons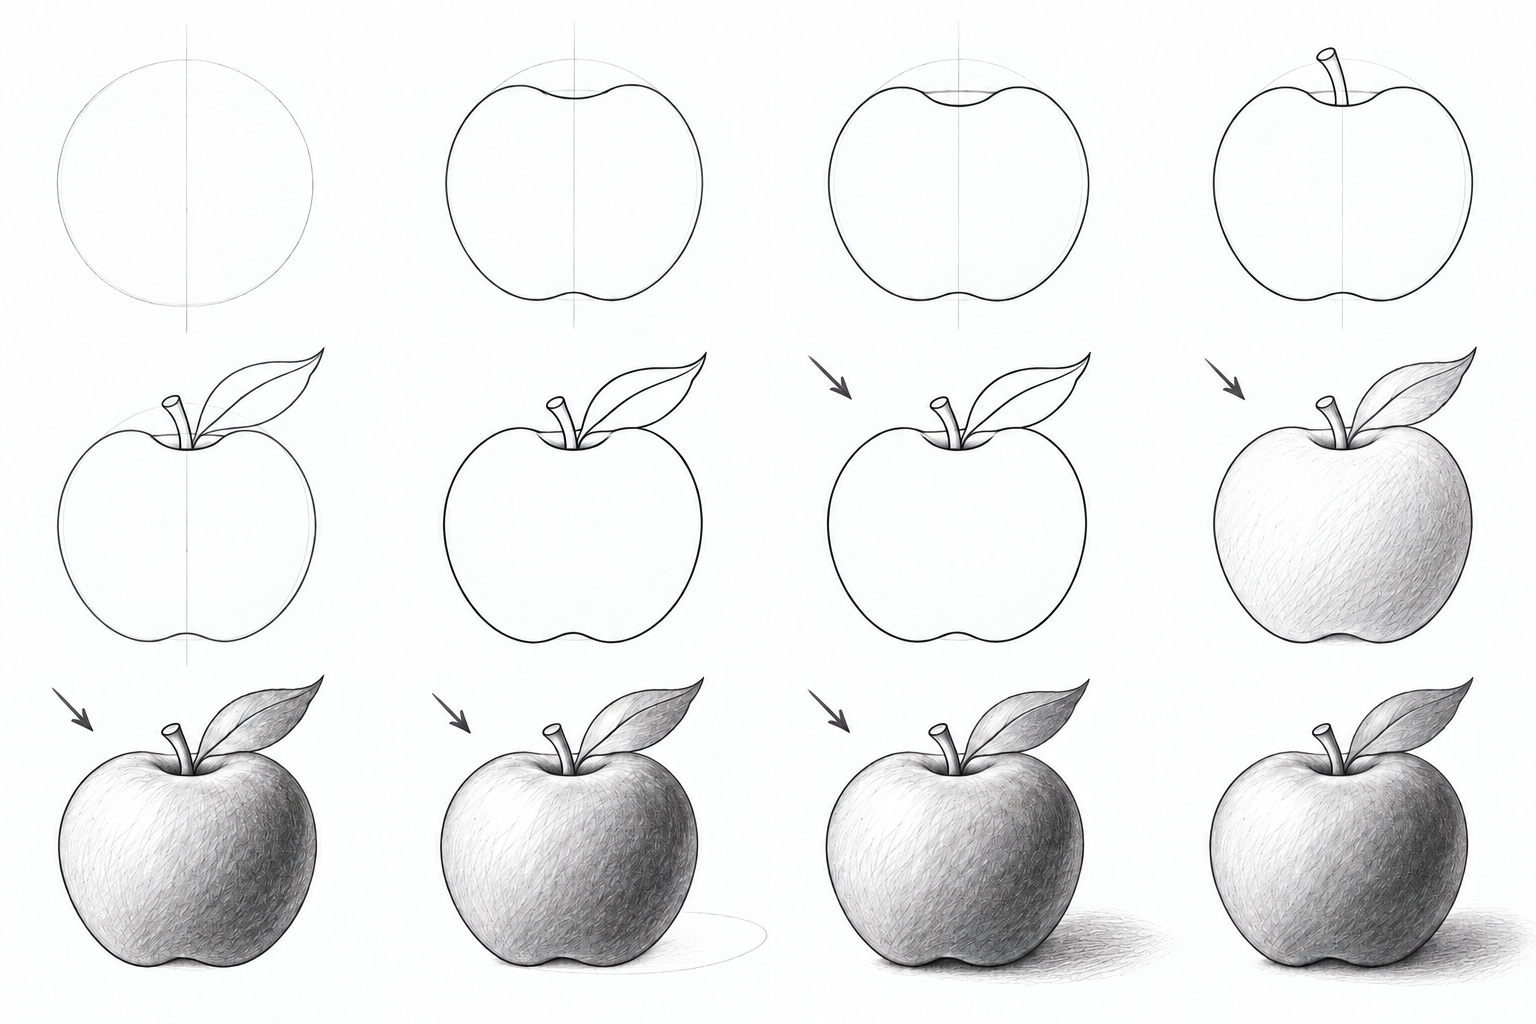 3 levels
How to draw an apple
Draw an apple at three levels: simple forms, a recessed top and bent leaf, then pencil light and shadow. Clear stages, small repairs and A4/Letter PDFs.
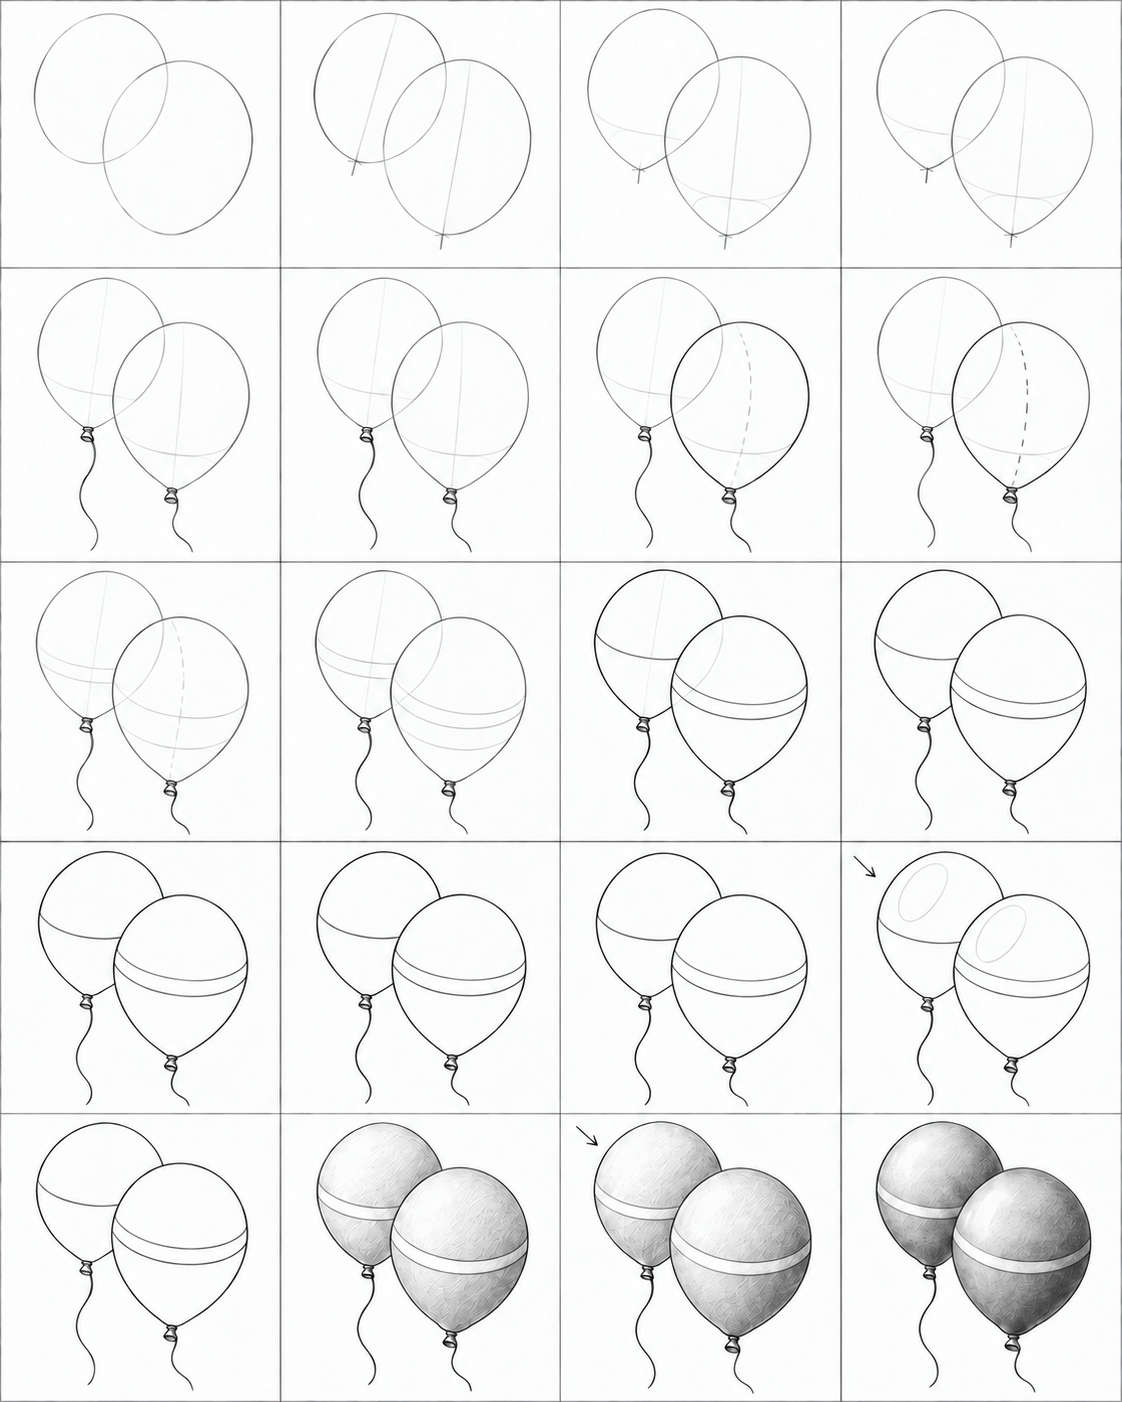 3 levels
How to draw balloons
Three balloon drawing routes, from two simple ovals to tapered necks and pencil volume. Illustrated steps, checks, small repairs and practice PDFs.
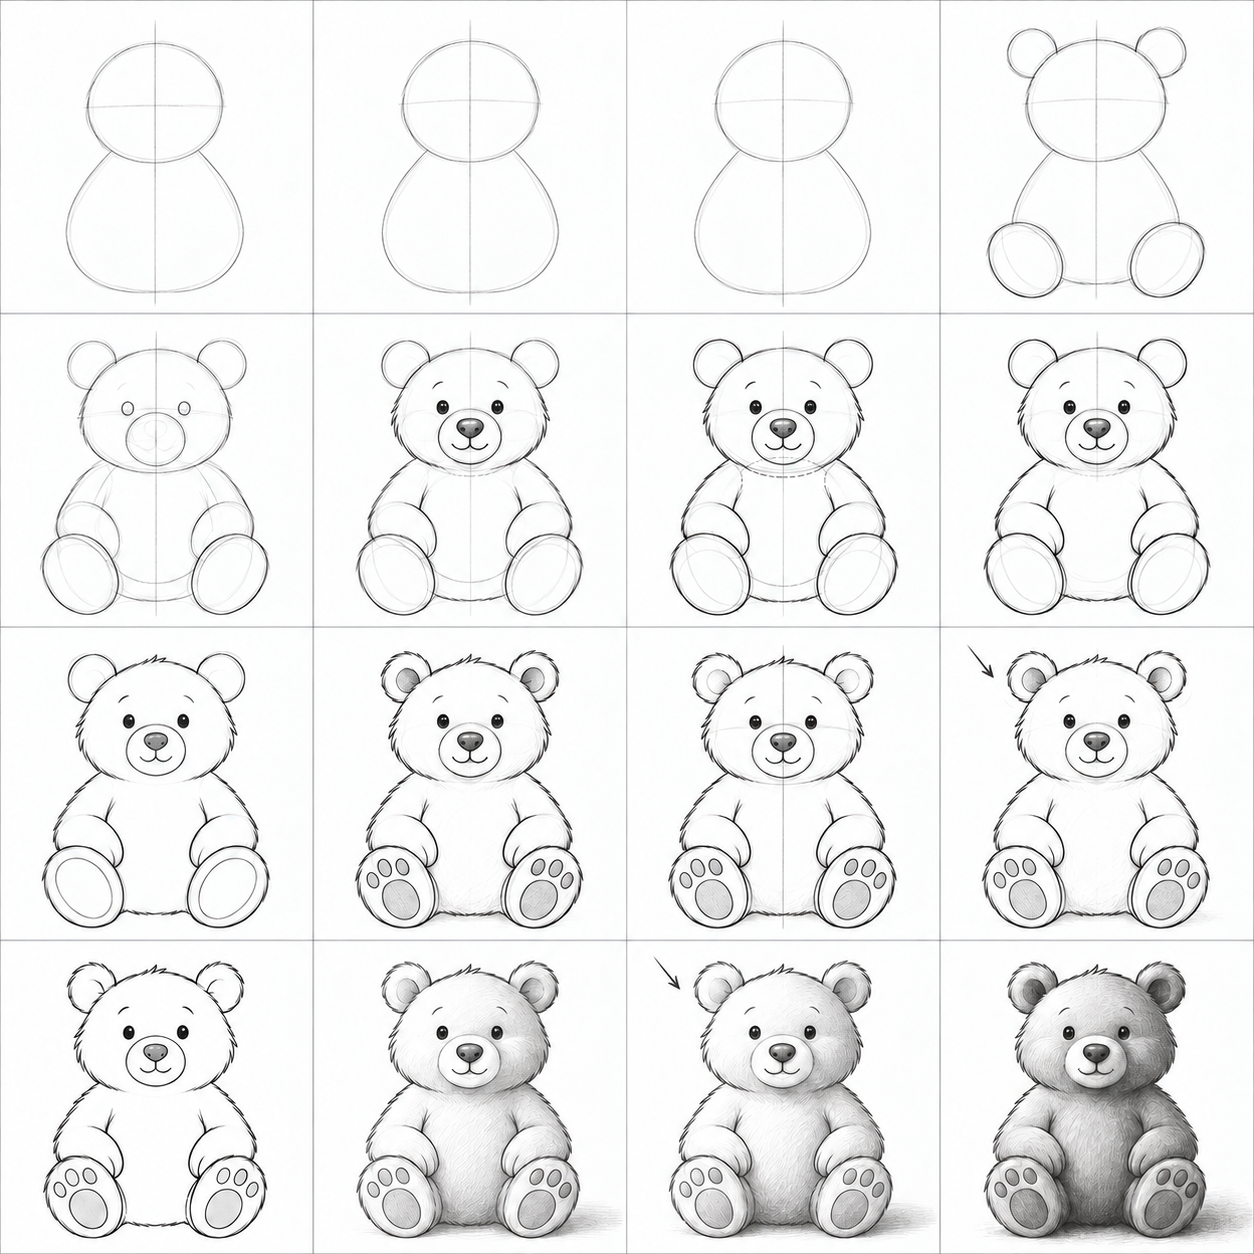 3 levels
How to draw a bear in pencil
Draw a sitting bear from simple forms: paws, muzzle, overlaps and shading. Three levels, illustrated steps and A4 lesson and practice PDFs.