kiduverse
How to draw a puppy: three levels
Draw a seated puppy from a circle and oval: three pencil detail levels, guided face placement, paw overlap, eraser practice and printable PDFs.
- 3 detail levels
- Paper, HB/2B pencil, eraser
- 12 parts
Tap a drawing below to choose your level. The other levels hide and the “trial → after checking” pairs get bigger.
Draw a seated puppy with a soft muzzle and floppy ears. Begin with two large forms, locate the face turn and check a paw overlap. Choose a detail route and continue your own drawing to the end.
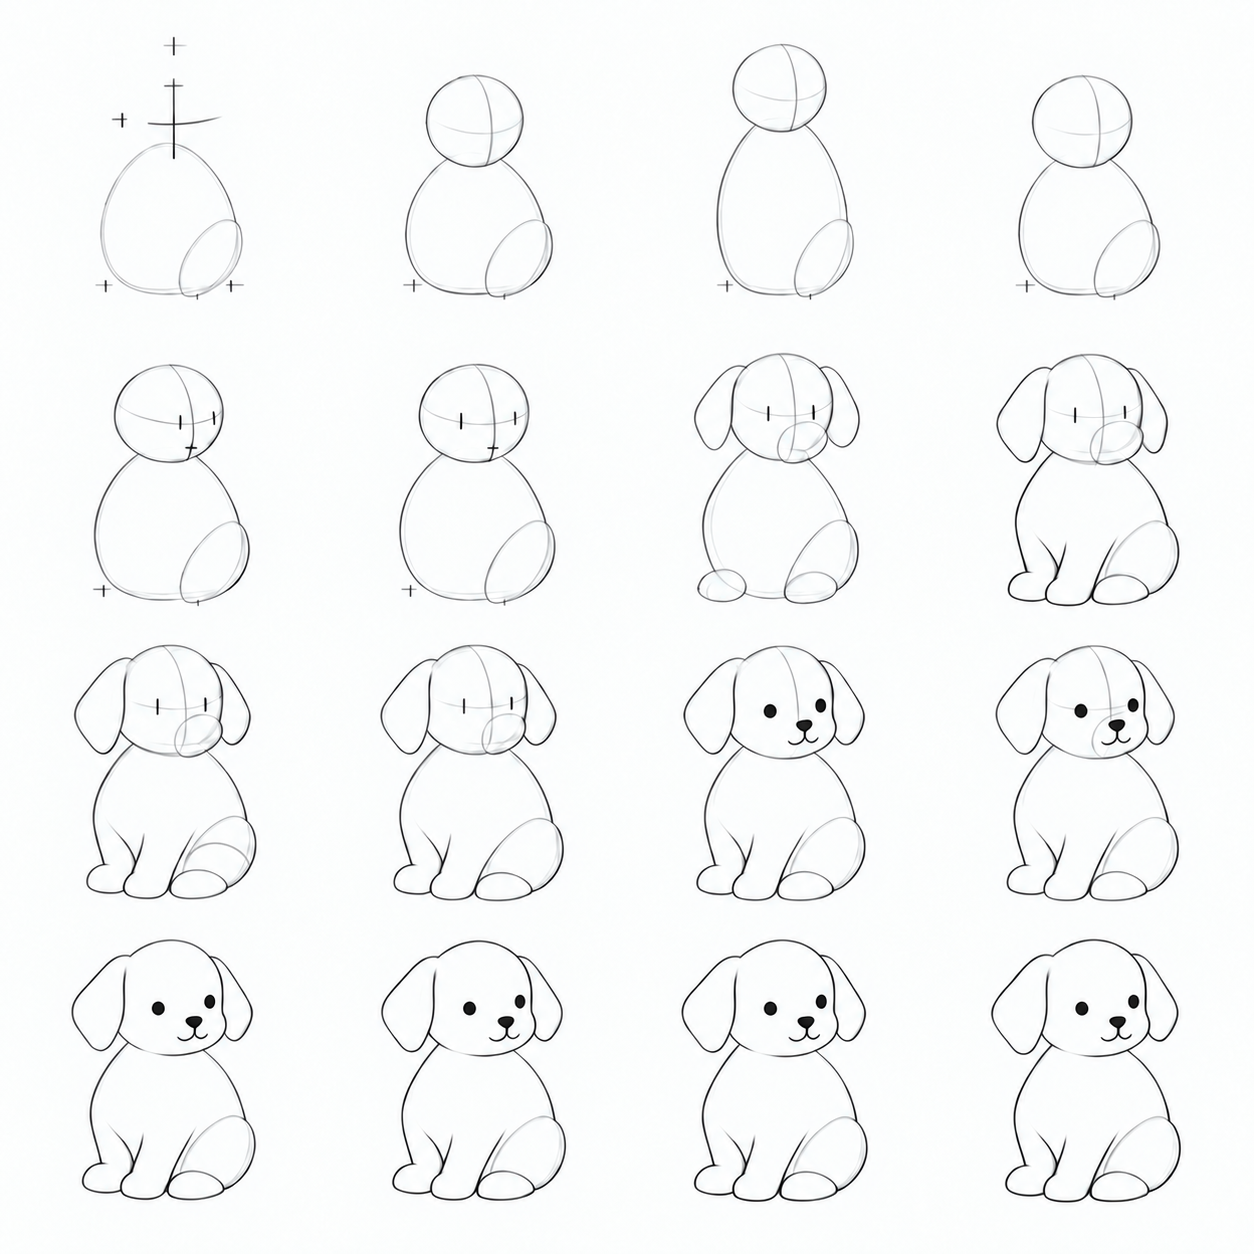
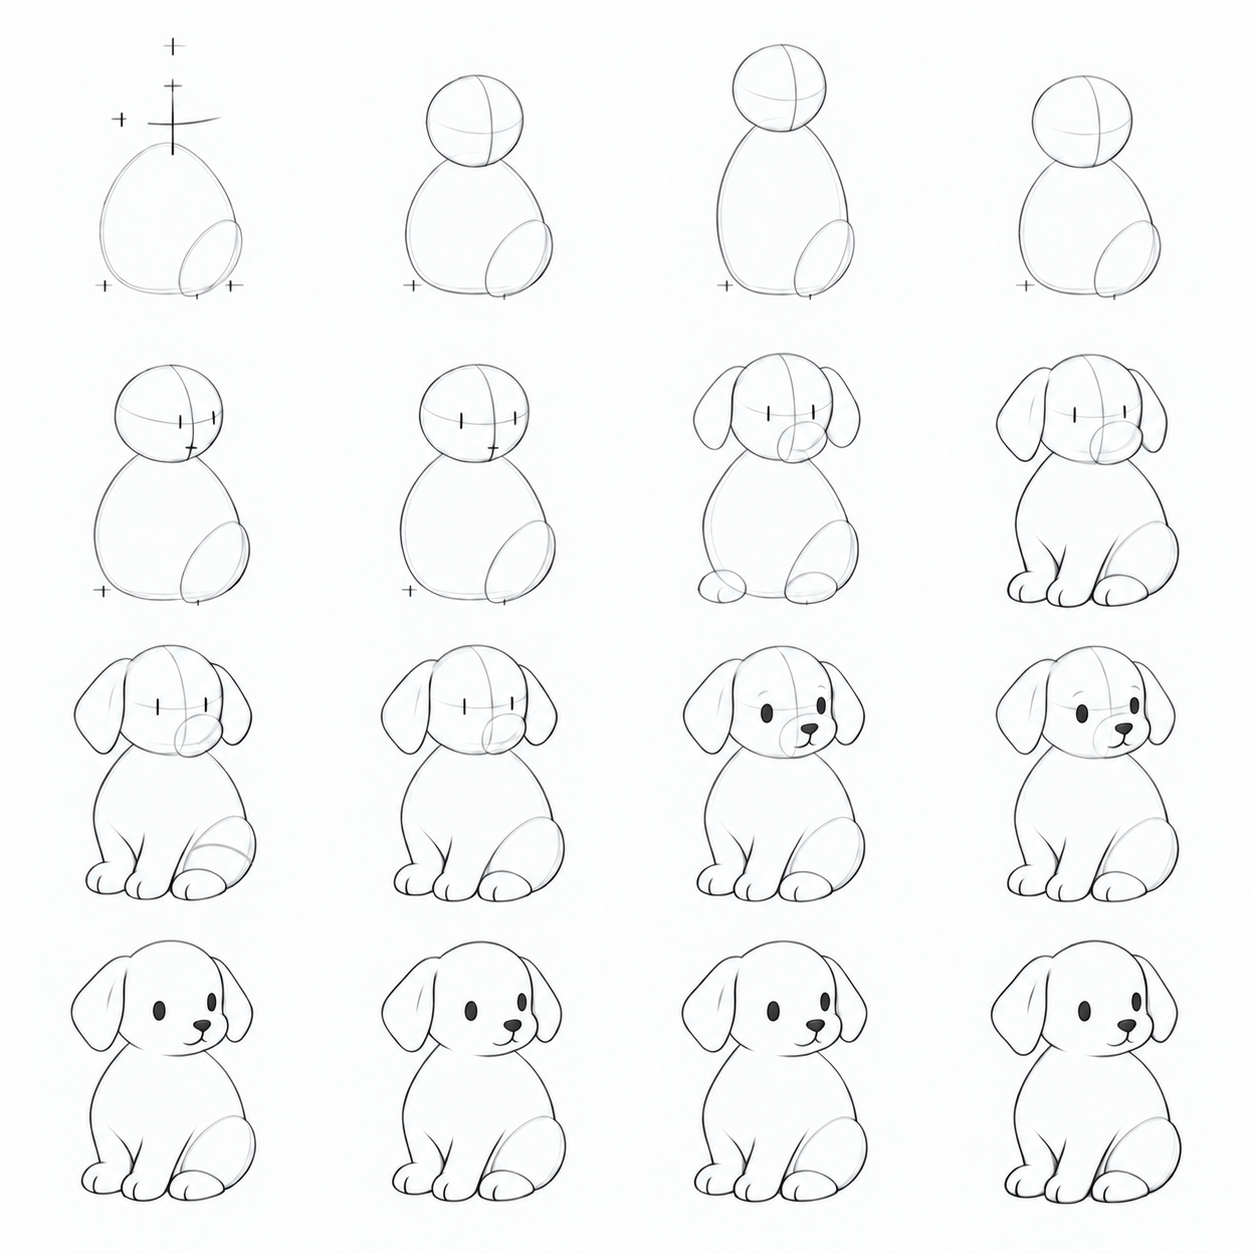
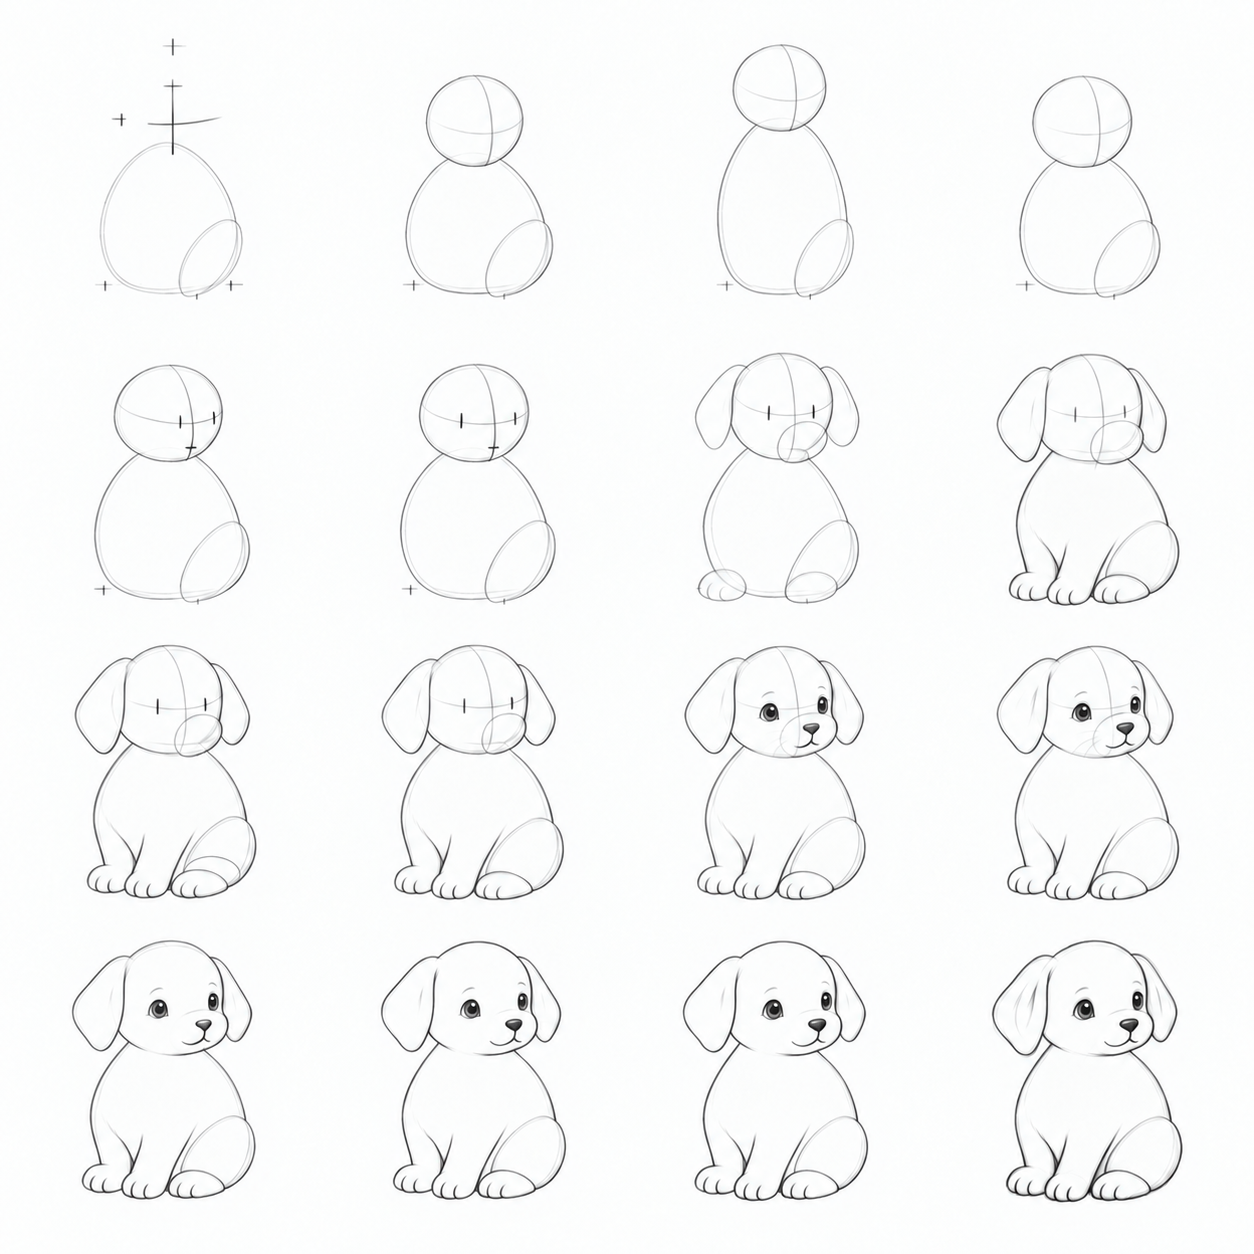
Simplest: a soft silhouette, dot eyes, tiny nose and short mouth, without ear folds or hatching. A little more detail: small oval eyes, one inner-ear arc and sparse toe marks. Best version: shaped cheeks, eyes with tiny highlights, distinct feet and a few pale inner-ear strokes. All three make complete drawings; labels name detail rather than judge ability.
“Trial → After checking” pairs show a decision and local repair. Do not reproduce a trial error on purpose. Left panels are comparisons rather than mandatory drawing states. Illustrations are AI-generated in a pencil style and are not claimed as human or child artwork.
Your goal and materials
Build a simple seated puppy and explain two decisions: where eyes and nose belong on a turning head, and why a body edge disappears behind the near paw. Use paper, HB or 2B pencil and a soft eraser. Begin with light circles, ovals and curves; allow about 25–45 minutes with a break. Around age 6 and up is a suggestion for learners familiar with these forms, not an ability judgement. This teaches a simple character rather than realistic anatomy or a particular breed. Simplify with dot eyes or extend with a new final head position at the same detail level.
Surface guide (cross-contour). Imagine a ribbon around a round head. Its curve connects the eyes while an axis locates face centre and nose. Trial: draw two heads, shift the second axis right and locate eye/nose ticks again. Check: do eyes share a curve and the nose sit below on the chosen axis? Explain a tick relative to the form. A far eye closer to the axis applies to this slight turn rather than every view.
Overlap. An opaque foreground form hides a rear edge. Trial: put a paw oval before an egg, name the front shape and erase the covered egg arc. Swap the order in a second trial. Check: which line stops at the foreground shape, and why? The rear contour should not continue through the chosen foreground oval.
Warm up
Do the two head trials and two overlap trials above on spare paper. These prepare steps 3 and 5. On each head point to axis, curve, two eye ticks and lower nose tick. Name the foreground oval before erasing, then show the missing segment. If your explanation is unclear, adjust one tick or arc section only and explain the choice.
Step 1. Place two large masses
Trial
After checking
Trial
After checking
Trial
After checking
Leave room beside the head for ears and below for feet. Put a head circle above a broad body egg; their connecting direction leans slightly right. Use pale pressure without eyes yet.
Why: Large masses establish the seated pose. You can move them before small details hold them in place.
Check: Does the head touch the upper body? Is there room for hanging ears at the sides?
Repair: If the puppy crowds the page edge, lighten and move both masses together while keeping room for feet.
Step 2. Check the compact seated shape
Trial
After checking
Trial
After checking
Trial
After checking
Compare the tall trial at left and shorter egg at right. Raise the body bottom toward the head for a seated puppy. Avoid stretching the neck to connect misplaced masses.
Why: A short broad body supports sitting. Small details cannot fix an overly long main mass.
Check: Is the body just taller than the head? Is there space below its bottom for rounded feet?
Repair: Erase only the low egg edge and replace it higher. An uneven oval is fine: the relationship between masses matters more now.
Step 3. Place face ticks on a curved guide
Trial
After checking
Trial
After checking
Trial
After checking
Wrap a pale curve around the round head and place an axis just right of centre. Find two eye ticks on the curve on opposite sides of the axis. Put a small nose tick below it on the axis. The trial eye sits near the nose; the checked tick moves to the head side.
Why: The curve connects eyes to one head turn; the axis connects the nose and face centre. Features belong to the form rather than being placed independently.
Check: Are both eye ticks on one curve? In our slight turn the far tick is closer to the axis. Is the nose below rather than between eyes on the same line?
Repair: Lighten the wrong nose-side tick and move it onto the side guide. Keep the checked axis without restarting the head.
Step 4. Find ears, muzzle and a soft silhouette
Trial
After checking
Trial
After checking
Trial
After checking
Place two hanging leaf ears beside the upper head. Below the eye guide add a short rounded muzzle support. Connect cheek, short neck and body with a soft edge. Extend two short forelegs with rounded feet from the body egg and mark an oval hind-paw mass at the right.
Simplest: ears are soft hanging leaves and feet are rounded endings of two short forelegs. A little more detail: keep that silhouette and leave space for an inner-ear arc. Best version: refine two cheeks around the nose support and the foreleg-to-foot connections. Avoid tracing the inner circle and egg.
Why: Circle and egg are search supports rather than compulsory closed boundaries. The chosen outer contour connects head, neck and body.
Check: Do ears begin beside the head and hang down? Is the muzzle short and below the eye ticks? Is the internal mass seam still pale?
Repair: If the head looks like a sticker, lighten its inner arc by the neck and refine only the cheek-to-body connection. Shorten an overly long trial muzzle edge.
Step 5. Remove the edge hidden by a paw
Trial
After checking
Trial
After checking
Trial
After checking
Choose the near right paw. In the trial the lower body-egg arc continues inside it. Erase only that covered segment while keeping the paw outer edge and visible body.
Why: An opaque foreground form hides a rear edge. A continuous rear line would make the paw look transparent rather than describe its surface.
Check: Can you point to the exact missing segment inside the near paw? Are its outer contour and the visible rear edge above preserved?
Repair: Restore a short paw outline if you erased too much. If it still looks transparent, remove the remaining rear arc inside without erasing the whole egg.
Step 6. Build the face from checked ticks
Trial
After checking
Trial
After checking
Trial
After checking
Place eyes at the guide ticks, a small rounded nose at the lower tick and short mouth curves beneath it. Soft cheeks meet at the nose. Use your route’s detail; circle, axis and guide stay pale for checking.
Simplest: two small eye dots, rounded nose and two short mouth curves. A little more detail: small dark ovals, one pale inner-ear arc and a small near-foot toe mark. Best version: oval eyes with pupils and white highlights, two soft cheeks below the nose, an ear fold and one/two toe arcs. A highlight is a retained white dot; leave it unfilled. These details appear now; add nothing new after erasing.
Why: Face details follow checked head turn and overlap. Ticks hold features on one head while you choose an expression.
Check: Are eyes still on the guide beside the axis and the nose below them on that axis? Can your expression work without matching the example exactly?
Repair: Lighten a misplaced eye only and return it to its tick. Avoid changing a correct nose or whole head to repair one mistake.
Step 7. Erase used construction
Trial
After checking
Trial
After checking
Trial
After checking
Remove the inner head circle, axis, eye guide and body egg. Preserve chosen contour, facial features and the rear line ending at the paw. The checked view adds no new details.
Why: Supports have helped you make decisions. On the finished character they should not read as seams or fur lines.
Check: Can you identify the four removed supports? Did face and paws stay in place? Does the hidden edge remain absent?
Repair: Restore only a short useful edge if it vanished with a guide. Lighten an internal seam locally rather than retracing the whole drawing.
Step 8. Choose a few pencil accents
Trial
After checking
Trial
After checking
Trial
After checking
Slightly strengthen eyes, nose and a short near-paw edge. Keep other sections light. The most developed route allows a few pale inner-ear strokes; leave the body mostly white.
Simplest: strengthen only dots, nose and a small paw edge. A little more detail: slightly strengthen eyes while keeping the inner-ear arc pale. Best version: two or three light strokes following the ear fold support its bend. Keep the body white so this route remains approachable for a beginner.
Why: Varied pressure highlights face and overlap. A finished puppy does not need an equally dark outline everywhere.
Check: Can you point to one stronger and one light section? Are simple and middle routes free of dense hatching?
Repair: Lighten an overly dark back edge with a soft eraser while retaining small face accents. Stop when chosen shapes and overlap read clearly.
Repair a small problem
| What you notice | Possible cause | Small repair |
|---|---|---|
| Puppy looks stretched | Body egg bottom is too low | Lighten only the bottom arc and replace it higher |
| Eye sits by the nose | Tick ignored curve and axis | Move one tick onto the head side along the guide |
| Transparent paw | Rear arc continues inside it | Remove only the covered segment |
| Sticker-like head | Whole circle was traced | Lighten the inner neck arc and refine a soft transition |
| All edges equally dark | Everything traced with one pressure | Lighten the back while keeping small face accents |
Three ideas: a new puppy position
Choose one spatial condition and keep your route’s detail. New supports appear above, with a cleaned example in the same position below. Build your own version first; matching the example is unnecessary. Use dot eyes and smooth ears for the simplest route, adding only chosen modest details for the middle route.
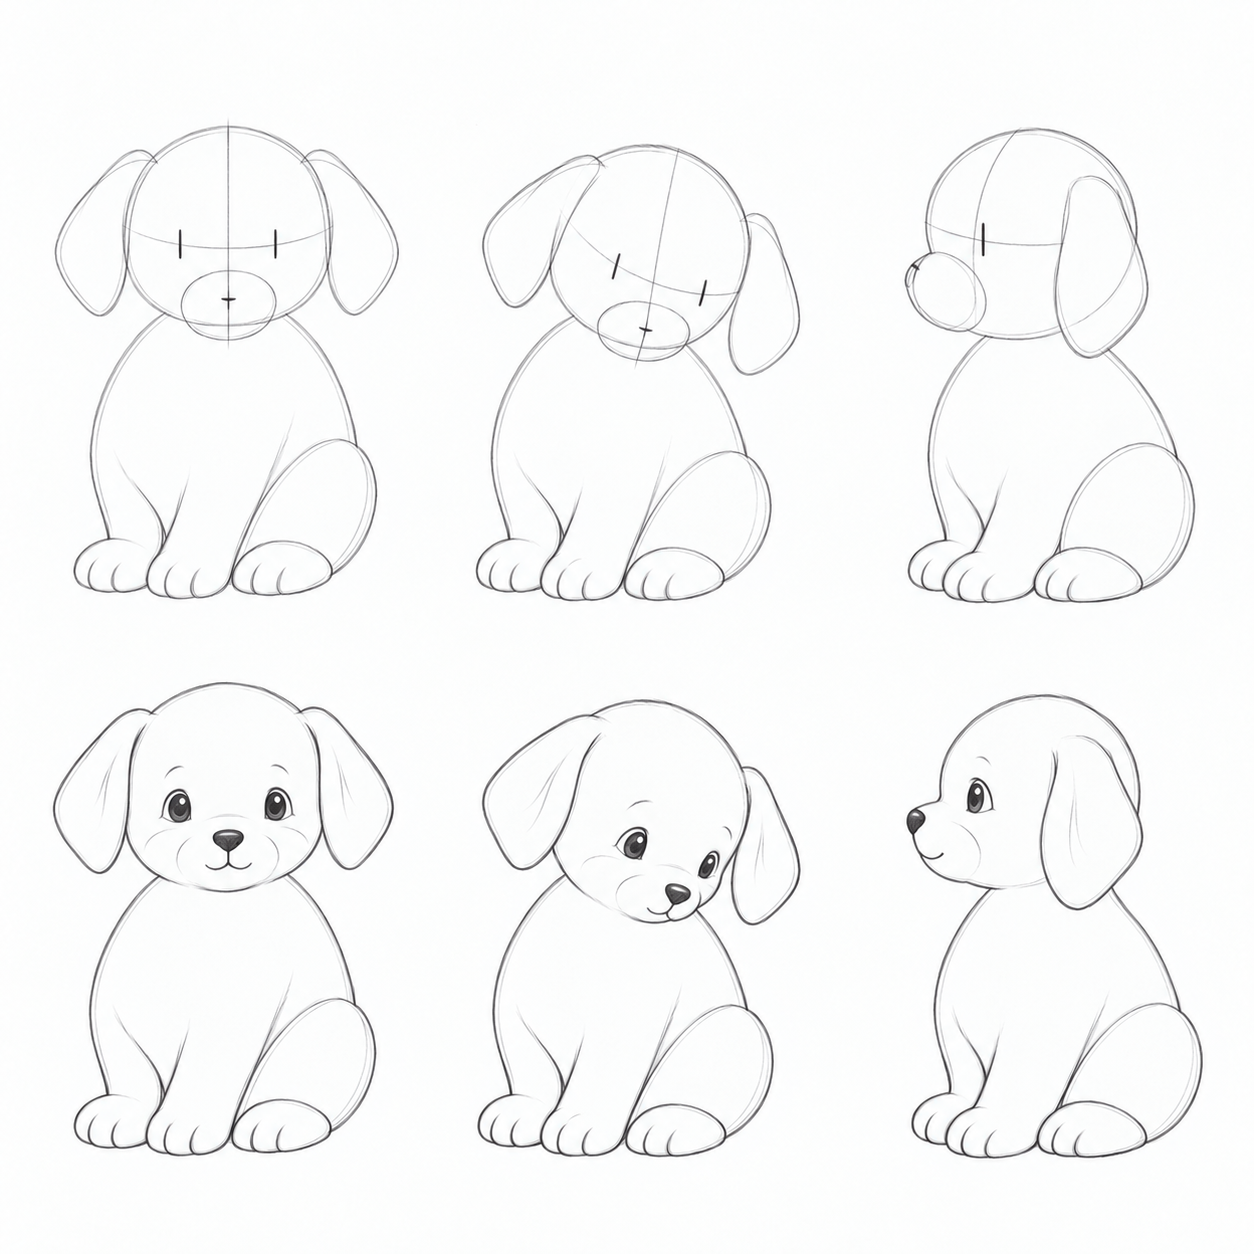
1. Puppy faces forward
New condition: Head axis is central and the face sides are roughly equally visible.
Practiced techniques: surface guide and overlap.
Put a head circle above the body egg, axis at centre, eyes on either side of its guide and short muzzle/nose beneath. Choose a nearer paw and hide the covered rear edge.
Why: The new axis changes eyes and muzzle placement; choosing a foreground paw uses practiced overlap.
Check: Are eyes on one guide on either side of the central axis, with the nose below on that axis? Does the rear line stop at your chosen paw?
Repair: Move one pale tick along the guide if the face accidentally turns. Erase only the covered paw section.
2. Head tilts toward paws
New condition: Head, guide and floppy-ear attachments tilt together while the body stays seated.
Practiced techniques: surface guide and overlap.
Tilt the head support, axis and guide about a quarter of a right angle. Locate eyes and nose again from new ticks. Move ear attachments with the head; the cheek hides a small chest edge.
Why: The face belongs to the head and changes direction with it. The foreground cheek hides a rear chest edge.
Check: Is the nose lower and are eyes on the tilted guide? Do ear attachments follow the tilt too?
Repair: If only the nose moved, lighten ticks and rotate the whole head support. Remove just the chest edge behind the cheek.
3. Puppy sits strictly side-on
New condition: One eye is visible, the short muzzle projects left and the far ear is hidden by the head and near ear.
Practiced techniques: surface guide and overlap.
Build a side head circle, short rounded muzzle projection and seated body egg. Find one eye on the side guide. Put the near floppy ear before the far ear and stop its covered line.
Why: Side view changes detail visibility; this is new construction rather than a flipped contour. The guide locates the side eye and overlap hides the far part.
Check: Is one eye visible with a side muzzle projection? Can you name a hidden far-ear or paw edge?
Repair: Lighten the muzzle and refine its side projection if the old turn returns. Remove the second eye tick and only the hidden far-edge section.
Independent trial: adjust the tilt differently from the example or choose another foreground paw. Before details show the new guide and ticks; before erasing name the front shape. Explain one new eye location and one removed rear edge afterwards.
Question: can you lower only the nose while keeping eyes and ear attachments fixed? Answer: tilt the whole head support, axis, guide and ear attachments first, then locate eyes and nose from new ticks. The body can stay seated. An independently moved nose does not explain a head tilt. Show the new support in your trial and name an edge hidden by a foreground form.
Self-check: explain eye/nose ticks on the new support, name the foreground form and one hidden edge, and point to removed construction.
What to draw next
All drawing lessons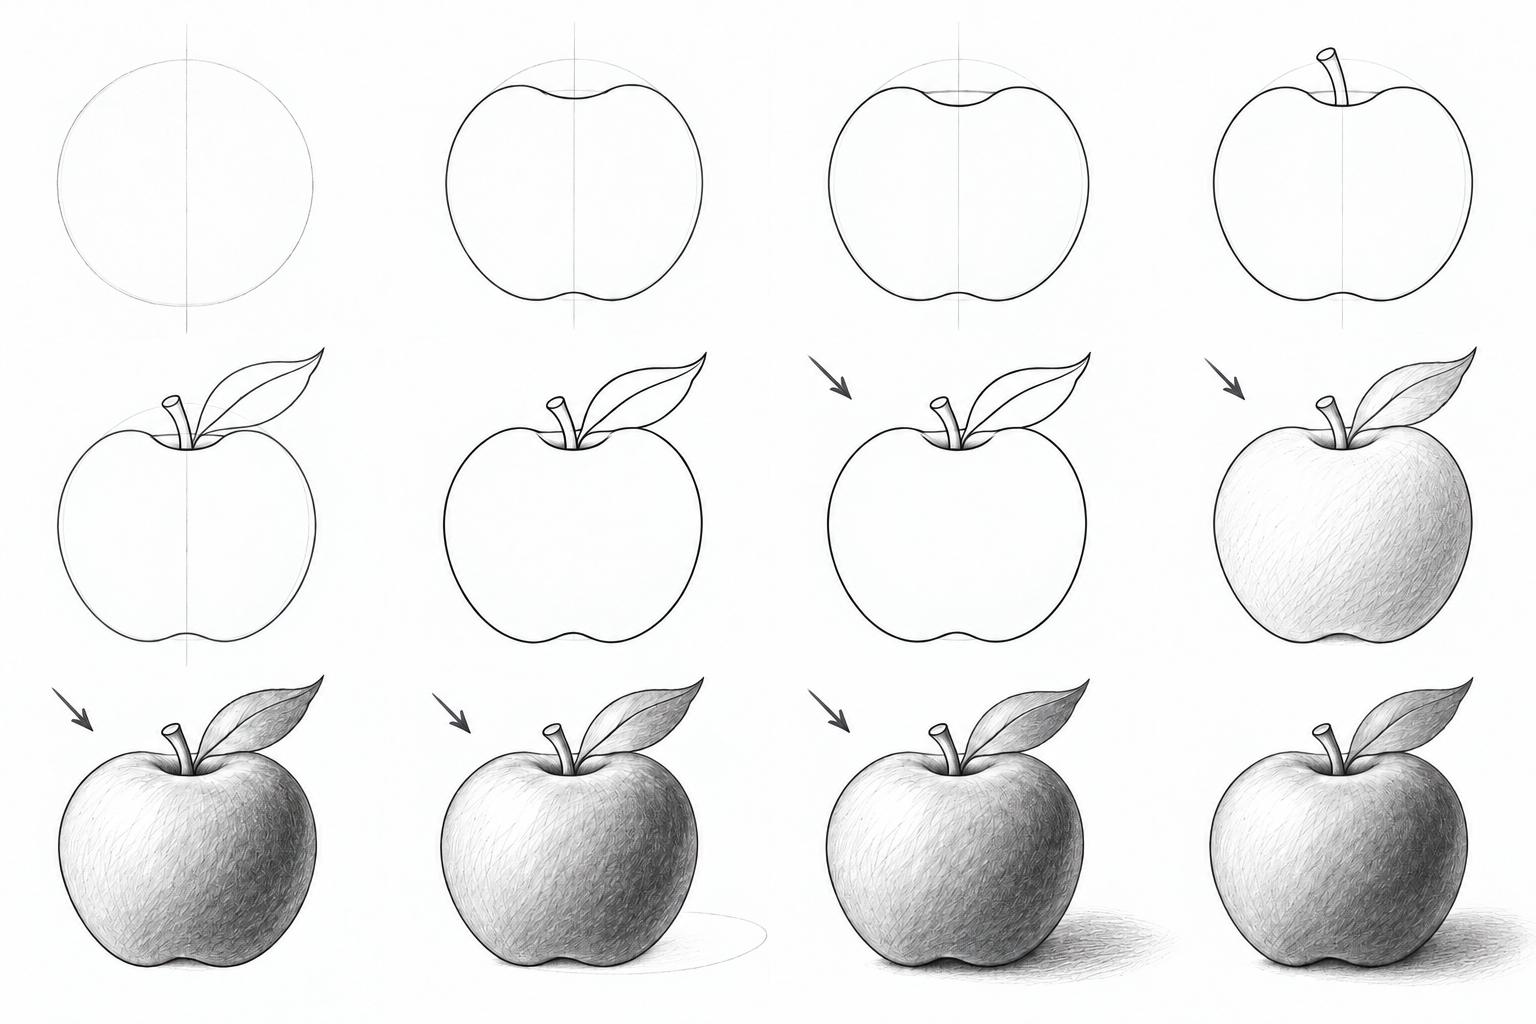 3 levels
How to draw an apple
Draw an apple at three levels: simple forms, a recessed top and bent leaf, then pencil light and shadow. Clear stages, small repairs and A4/Letter PDFs.
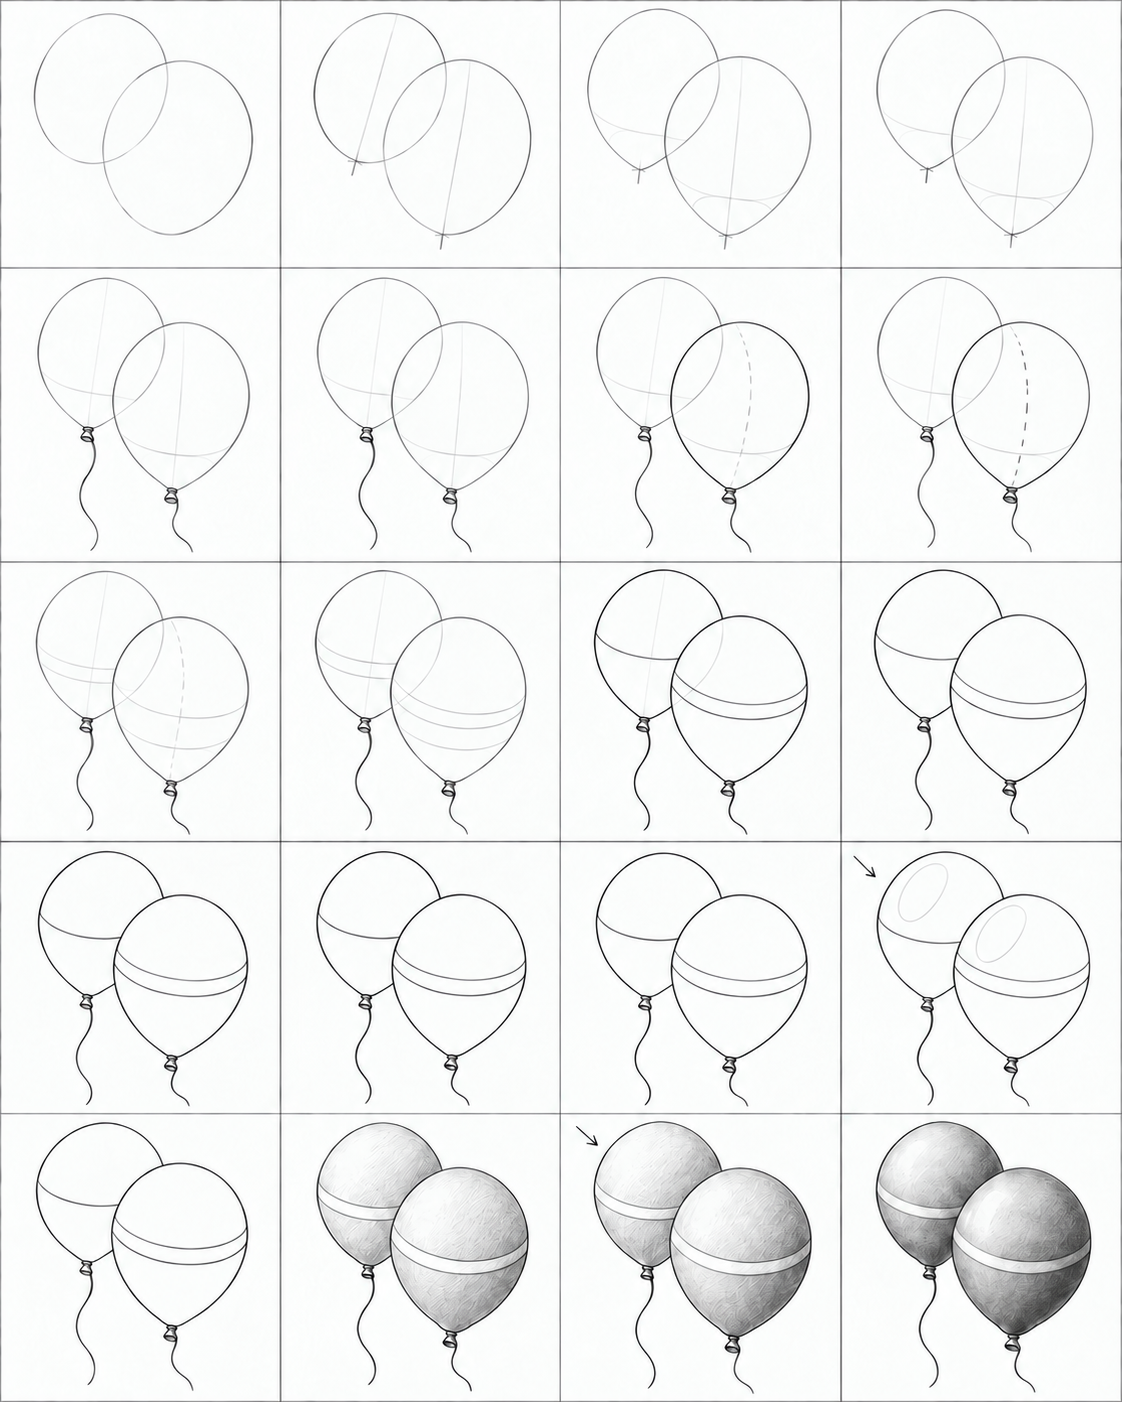 3 levels
How to draw balloons
Three balloon drawing routes, from two simple ovals to tapered necks and pencil volume. Illustrated steps, checks, small repairs and practice PDFs.
 3 levels
How to draw a fish
Build a fish from an oval: three pencil routes, ten steps, fins, erasing covered lines and softly blended shading. Printable lesson and practice PDFs.