Use one thin rectangular sheet: A4 or US Letter printer paper works. The diagrams use an 18 × 24 cm rectangle; the bottom strip will be a little deeper with A4 or Letter. Keep the same folding sequence. No cutting or glue is needed.
Work on a flat table. Start with the lighter side up and a short edge at the top. Keep folds gentle until the edges match. Two different side colors help distinguish the flaps. The finished boat is for dry pretend play; ordinary paper softens in water.
Corners first, pressure second
Hold the matching corners with one hand. With the other, press the crease from the middle toward the edges. If an edge slips, reopen and align it before pressing hard.
Dashed line — a new crease, or a center reference if the step asks you to unfold again.
↗Arrow — where to move the corner. Turning the whole model over is always a separate written step.
Before → after — the action is on the left, the result on the right. Shades distinguish visible paper sections; read the text for the number of layers.
Fold step by step
Check the result on the right before moving on. The diagrams show the shape; the text tells you which layers to fold.
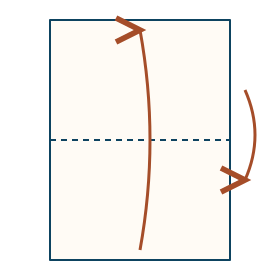
1Fold the rectangle in half
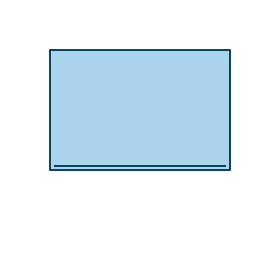
Bring the bottom short edge up to the top short edge, through the whole sheet. Match the corners and press. Rotate the folded rectangle halfway around on the table so the closed folded edge is at the top and the two open edges are below.
Before: make this moveAfter: compare your result
Why
The closed edge will support the roof folds; the open edges become separate flaps.
Check
A wide, two-layer rectangle with a closed top and an open bottom.
Repair
If the edges step out, reopen and match all four corners before pressing.
2Mark the middle, then reopen
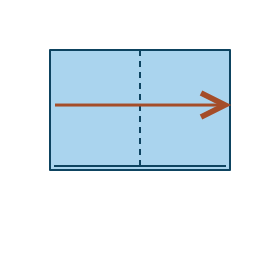
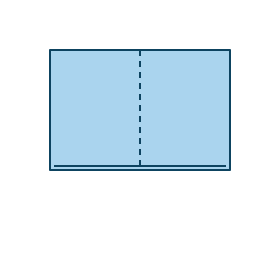
Bring the left edge to the right edge. Make a light vertical crease and reopen only this last fold. Keep the closed edge at the top.
Before: make this moveAfter: compare your result
Why
This line guides two equal roof corners.
Check
The wide rectangle has one vertical center crease and still has two layers.
Repair
Do not open the first horizontal fold. If you did, fold the full sheet in half again.
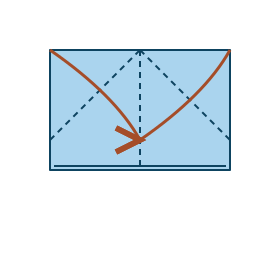
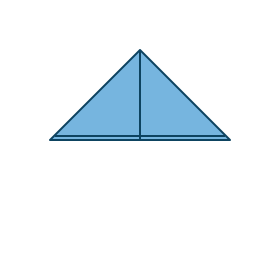
3Make two roof corners
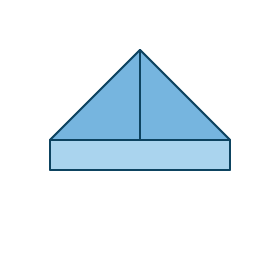
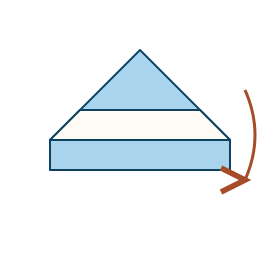
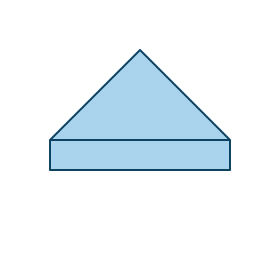
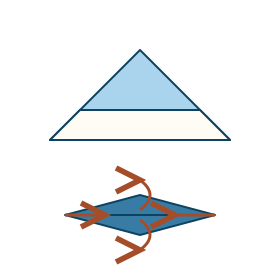
Fold the top left corner down to the center line, through both layers, so its top edge lies along the center crease. Repeat with the top right corner. Match the two edges at the middle. Leave the bottom strips unfolded.
Before: make this moveAfter: compare your result
Why
Matching both roof edges to one line keeps the two halves balanced.
Check
A pointed roof above two straight bottom strips; the roof edges meet without overlapping.
Repair
Open the uneven roof corner and aim its edge at the center before pressing.
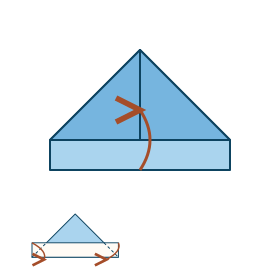
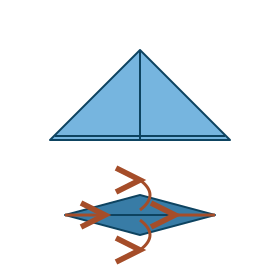
4Lift the front strip and wrap its corners
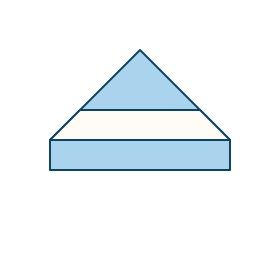
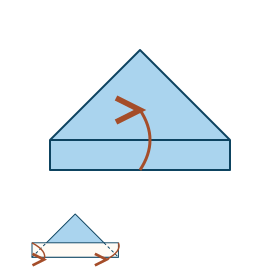
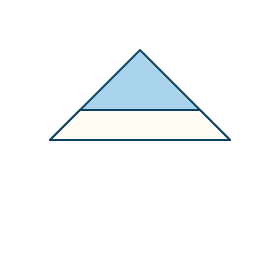
Separate the bottom strips. Fold only the strip nearest you upward along the horizontal base of the roof. The back strip stays down. Fold each small corner sticking beyond the sloping roof edge around that edge to the back, one at a time.
Before: make this moveAfter: compare your result
Why
The raised strip forms one rim; wrapping the extra corners keeps them from catching during opening.
Check
A front rim lies across the roof. Its two loose ends are behind the sloping sides; a second strip still hangs below.
Repair
If both strips came up, lower the back one. If a corner sticks out, wrap only the excess around the roof edge.
5Turn the whole model over
Turn the entire model from left to right like a page. Keep the roof point at the top. Hold the wrapped corners against the paper. Do not unfold anything.
Before: make this moveAfter: compare your result
Why
The remaining bottom strip must be folded on the opposite side.
Check
The unraised strip is now nearest you; the first rim is on the back.
Repair
If a wrapped corner opens, press it against the sloping edge again.
6Lift the other strip and wrap its corners
Fold the remaining strip upward along the base of the roof on this side. Wrap its two projecting corners around the sloping edges to the back. Smooth the rim. Keep the gap between the two rims free.
Before: make this moveAfter: compare your result
Why
The two rims make the mouth of a paper hat that can open.
Check
A flat triangular hat with a rim on each side and an opening between them at the bottom.
Repair
Do not tuck a rim into the opening. Reopen it and fold it onto the outside if the mouth is blocked.
7Open the hat and flatten a square
Hold the two bottom rims, one in each hand, and gently separate the front and back walls. Look into the pocket from below. Bring the left and right ends of the hat rim together. Flatten the opened pocket in this new direction. Place the resulting square like a diamond, with the opening at the bottom.
Before: make this moveAfter: compare your result
Why
Opening and flattening changes the direction of the fold without making a new outline by force.
Check
A diamond-shaped square with two separate bottom points. The rims overlap neatly along its lower edges.
Repair
If it stays triangular, separate the walls farther before bringing the rim ends together. Let the wrapped corners slide over one another; do not tear them.
8Raise only the front bottom point
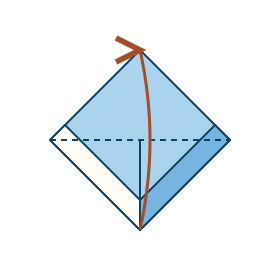
Find the two bottom points of the diamond. Lift only the front one to the top point and press along the horizontal line joining the side corners. Leave the back point down.
Before: make this moveAfter: compare your result
Why
Each side needs its own flap so the next pocket can open.
Check
A triangle lies in front of the diamond; one bottom point is still visible behind it.
Repair
If both points moved together, lower the back layer and refold only the front.
9Turn the diamond over
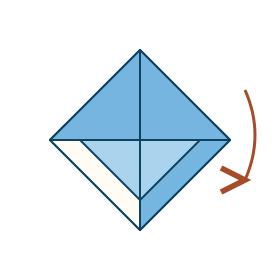
Turn the whole model from left to right. Keep the top point at the top. Hold the raised flap against the back.
Before: make this moveAfter: compare your result
Why
This exposes the second bottom point.
Check
A diamond is visible on this side; the first folded triangle is behind it.
Repair
If the first flap falls down, lift it back to the top without moving the remaining point.
10Raise the second bottom point
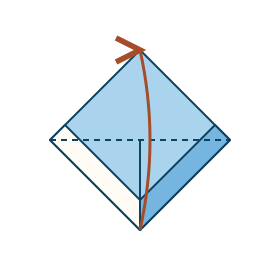
Bring the remaining bottom point up to the top point, folding along the line between the side corners. Press flat.
Before: make this moveAfter: compare your result
Why
Both sides now form a smaller hat with a mouth between the layers.
Check
A triangle with two separate top points and an opening at the long bottom edge.
Repair
If the top points do not meet, reopen this flap and match its point before pressing.
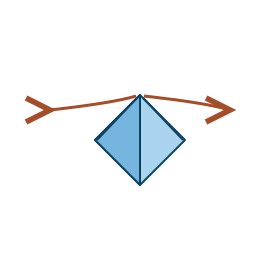
11Open and flatten once more
Separate the walls at the triangle’s long bottom edge. Bring the left and right bottom corners together, as you did with the first hat, and flatten in the new direction. Put the smaller square like a diamond with its loose outer tips at the top.
Before: make this moveAfter: compare your result
Why
Repeating the pocket opening prepares two ends that can pull apart into a hull.
Check
A smaller diamond. Two outer tips meet at the top; a crease divides the front down the middle.
Repair
If you see a triangle, the pocket is not open yet. Reopen the mouth and bring its two ends together gently.
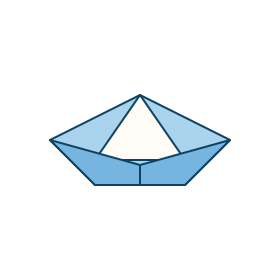
12Pull the two ends apart
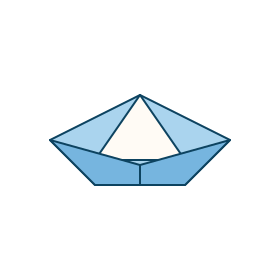
Pinch the two loose outer tips at the top, one in each hand. Pull them gently left and right. Stop when the inner triangular peak rises between them. Open the bottom of the hull slightly with your fingers and press the base gently so the boat can stand.
Before: make this moveAfter: compare your result
Why
Separating the outer layers opens the hull while the inner folds keep the central peak.
Check
A long hull with two pointed ends and a central triangular peak; the sides open a little.
Repair
If the whole diamond moves instead of opening, you are holding both tips together. Return to the small square and separate the two outer tips. Stop pulling if the paper resists.
Now try it on your own
Use a fresh, smaller rectangle with the same proportions. Fold another boat without following every diagram. Before each opening, predict where the pocket is and which two corners will meet. Compare the two boats: does the smaller one have the same peak and two open ends? If it stays flat, return to the small square and separate the outer tips.
For paper: choose Print lesson or use your browser’s print command. You can select Save as PDF. The print button loads all diagrams before opening the print dialog.
 kiduverse