kiduverse
How to draw a sailboat in pencil
Draw a sailboat in pencil, from a simple side view to an open cockpit and three-quarter hull. Illustrated steps, small repairs and A4 lesson PDFs.
- 3 detail levels
- Paper, HB/2B pencil, eraser
- 13 parts
Tap a drawing below to choose your level. The other levels hide and the “trial → after checking” pairs get bigger.
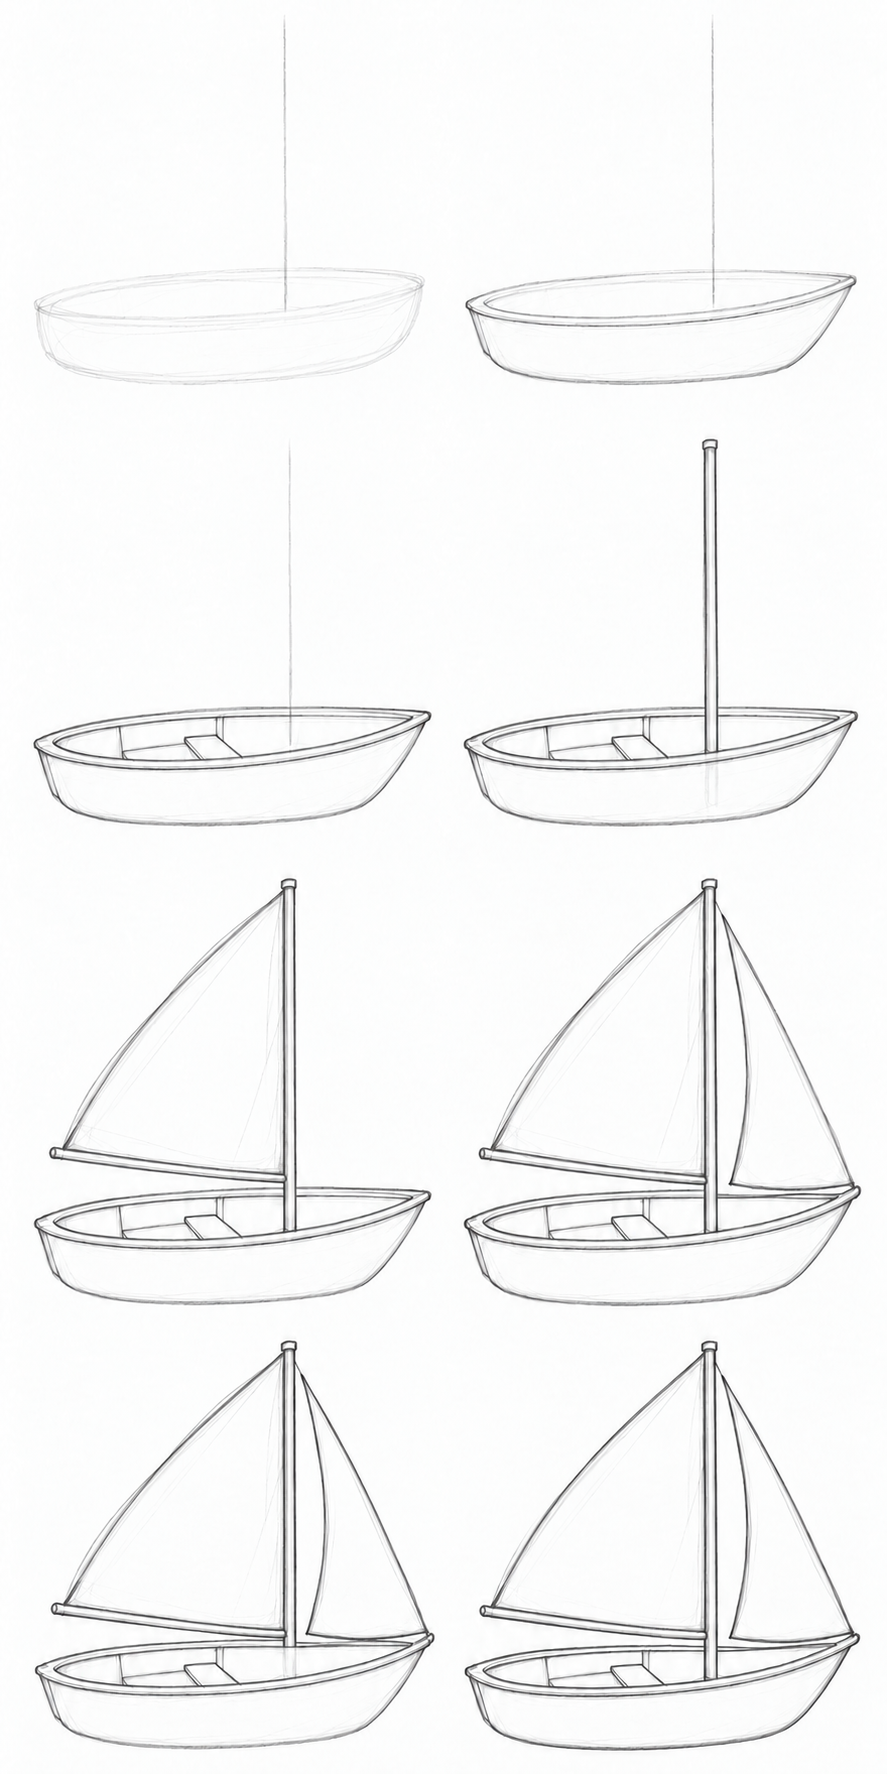
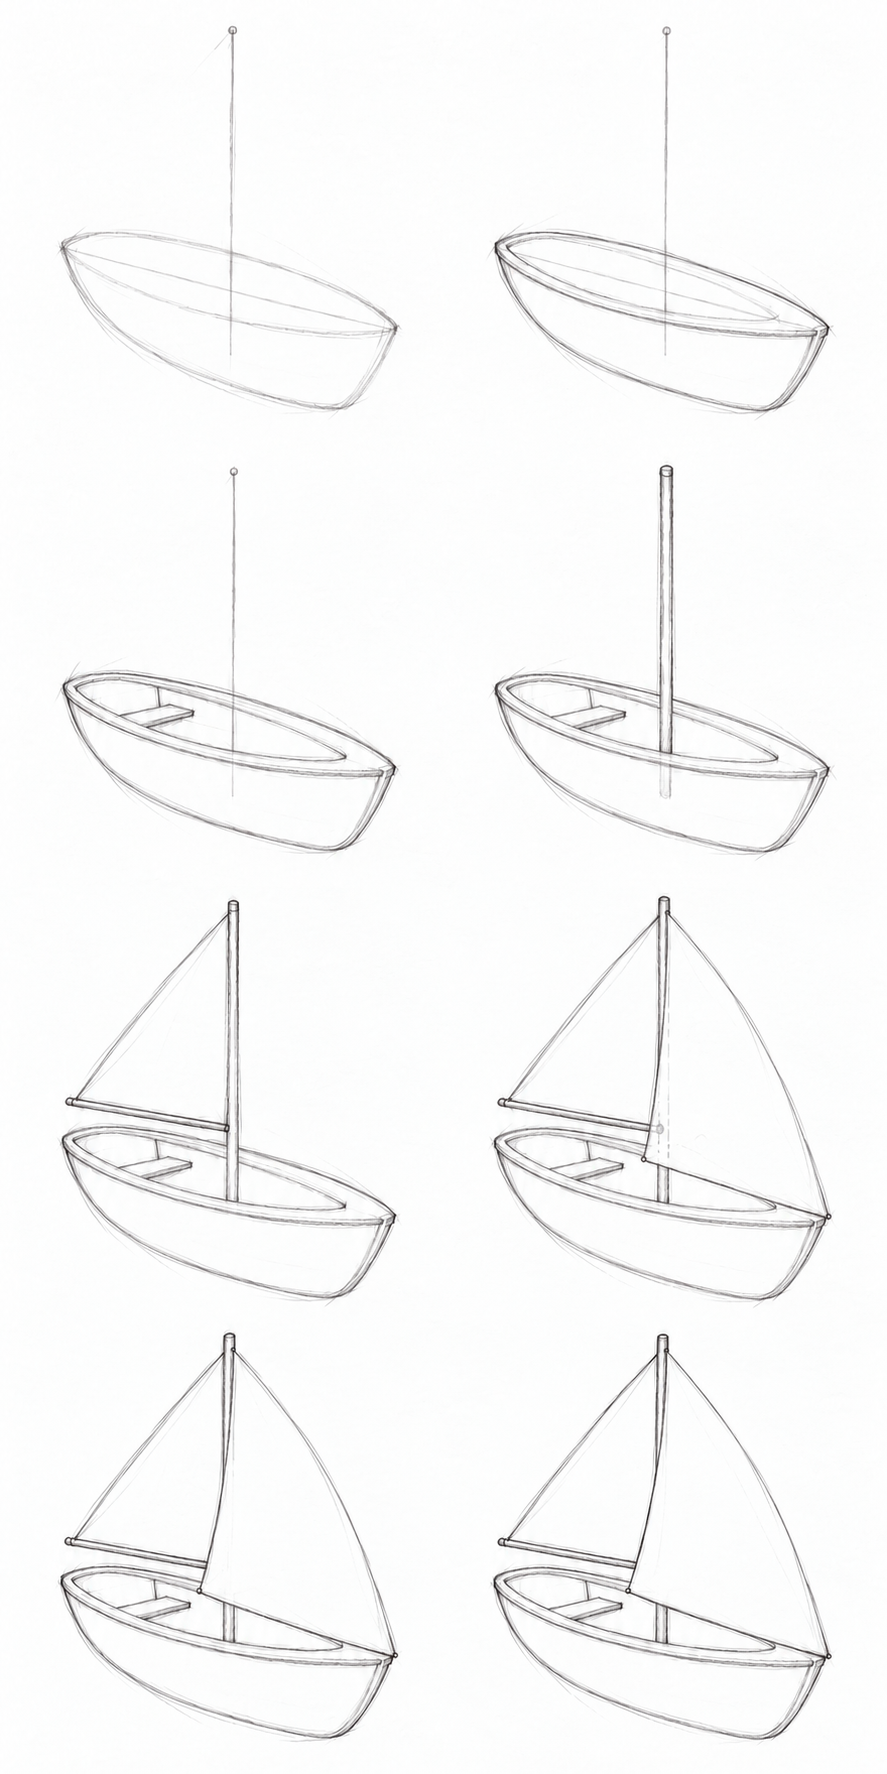
Start with a shallow hull and mast placement, then choose one of three routes. The first makes a side-view boat with one sail; the second opens the cockpit and adds a second sail; the third turns the hull into three-quarter view and puts one sail in front of another. This lesson draws a small sailing dinghy without complicated rigging or a sea scene.
Your goal and materials
Your goal is to refine a large form from light guides and show where one part hides another. Use ordinary paper, an HB or B pencil and a soft eraser. You only need a loose oval, triangle and flowing line; ruler-straight strokes are unnecessary. Allow roughly 25–45 minutes with breaks as a planning suggestion, not a tested completion time. Around age seven and up may be a starting recommendation with adult help; route choice matters more than age. No classroom trial has been performed.
Keep one route throughout your drawing. The first establishes the basics; the second adds rim thickness and an open interior; the third coordinates near and far edges before solving sail overlap. A line drawing is a complete result here; this lesson does not teach shading.
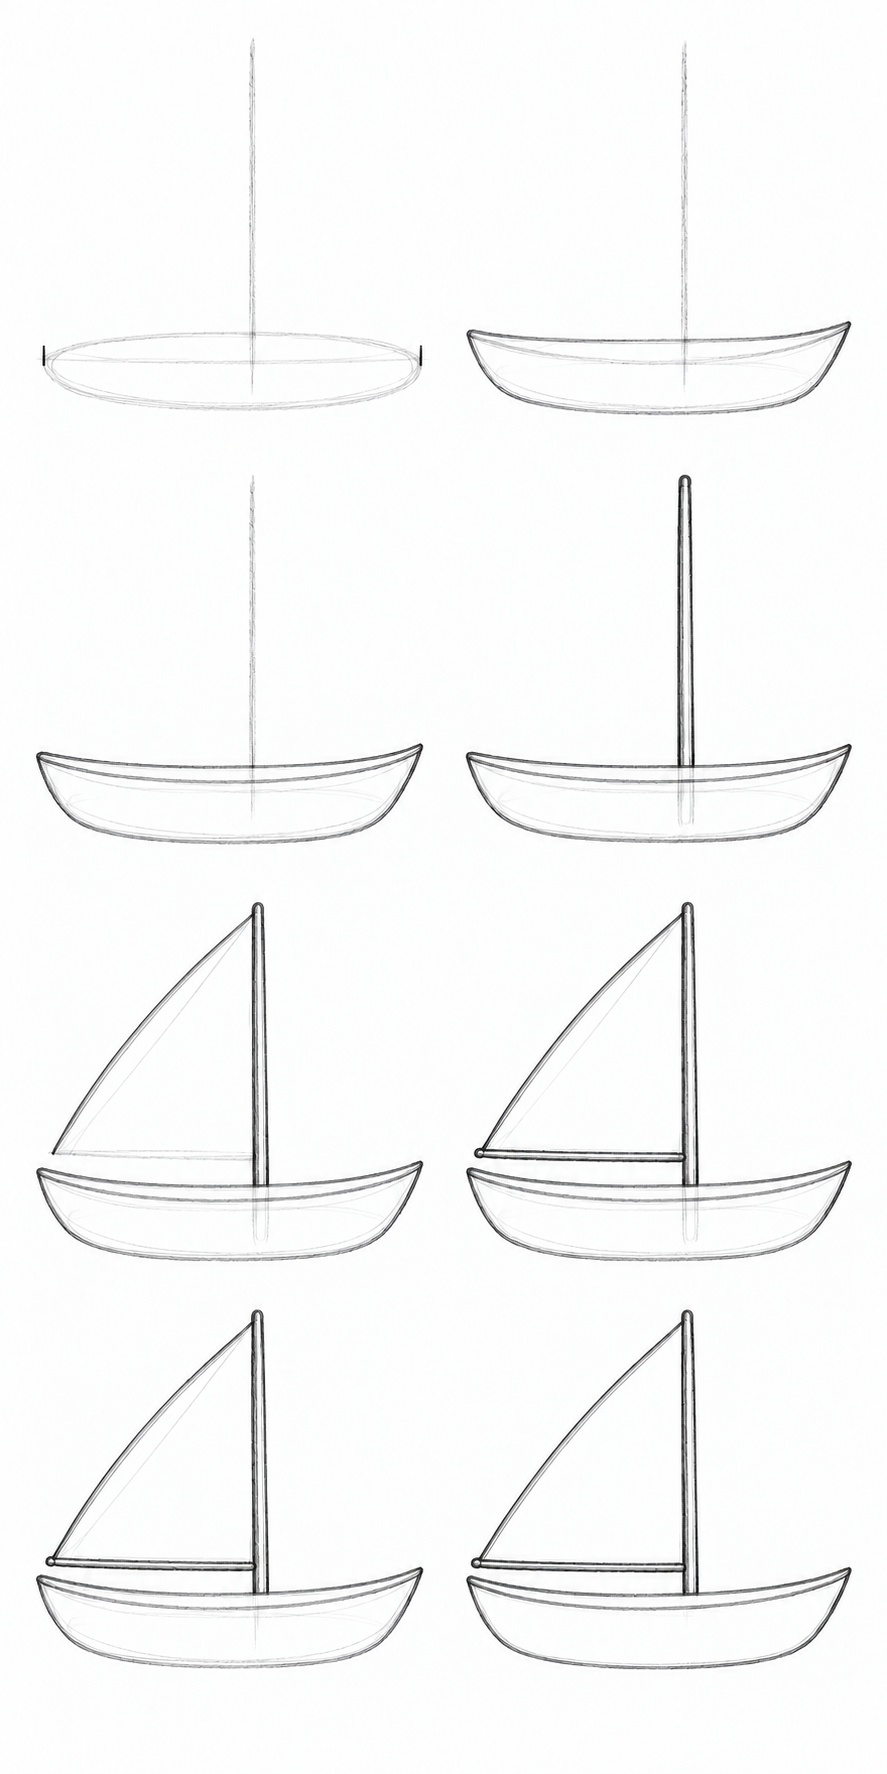
Mass and axis. A light oval occupies the future hull space; an axis gives its direction. Build two small hulls, one along the page and one diagonally. Refine bow and bottom over each guide. Check: is each one boat rather than an oval with an attached triangle? If needed, change only the junction.
Overlap and erasing. Choose the opaque front form, then trace the rear line. Its covered part disappears while its exposed part stays. Overlap two trial sails, then reverse the foreground. Question: should you erase the entire rear sail? No, only the section behind the front one; the remaining edge helps identify the rear shape.
Warm up: build, then remove what is hidden
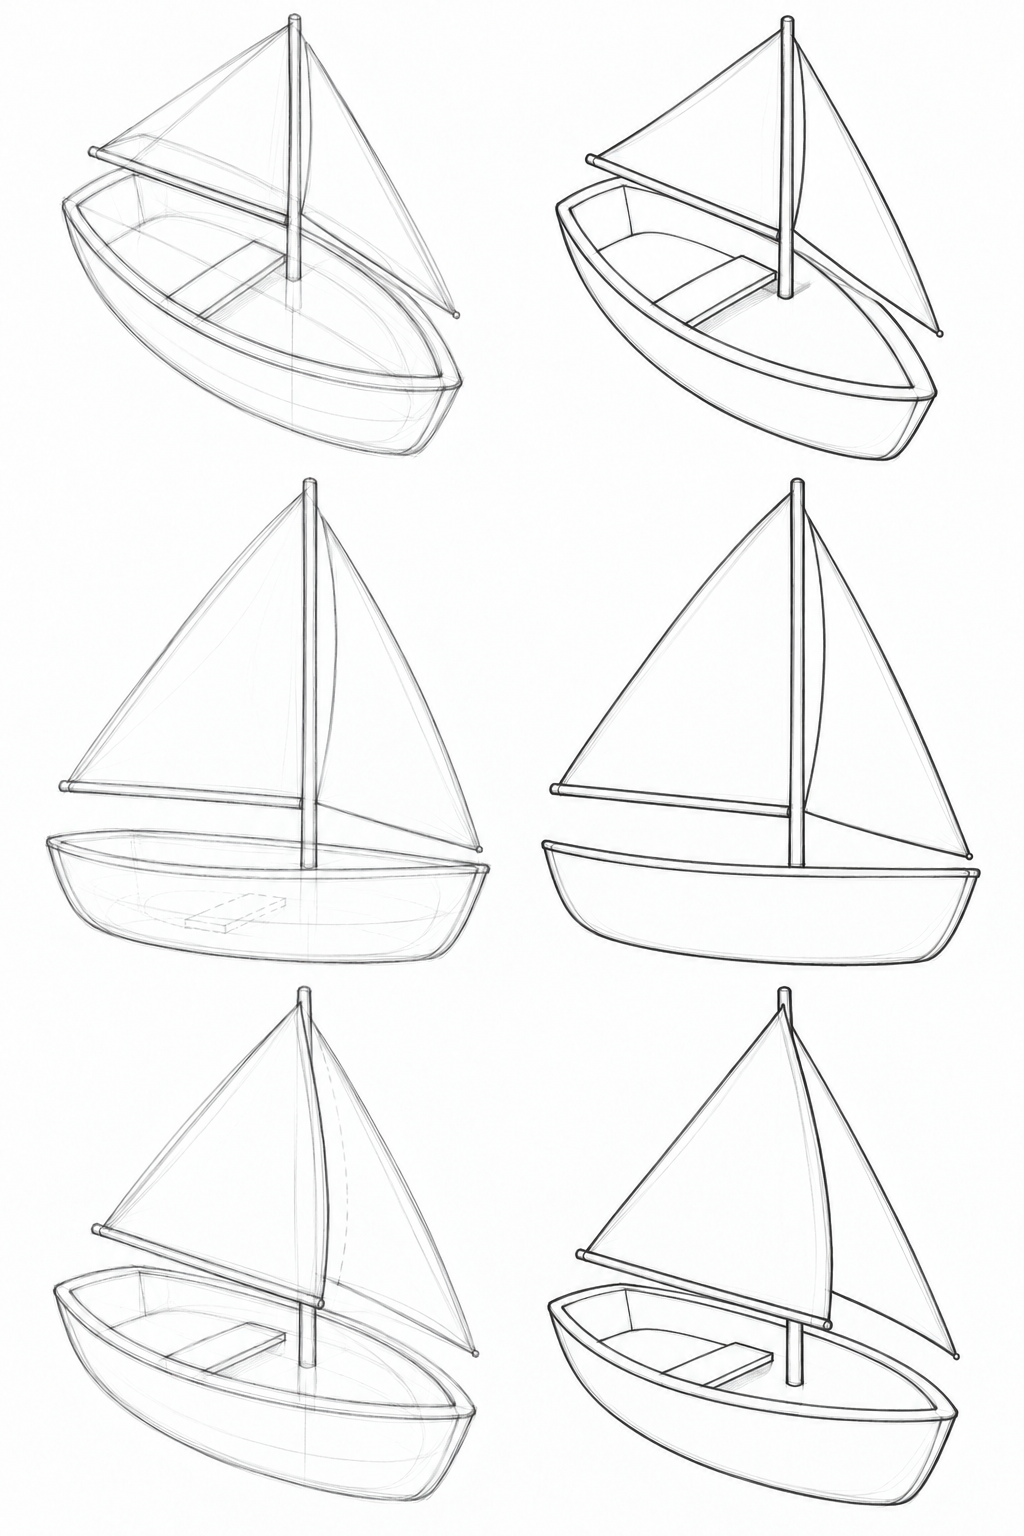
Try this yourself on a small part of the page first. In the top pair, compare the guide and refined hull; in the lower pair, find the rear edge inside the foreground sail. Remove the covered section and check its endpoints. The pictures show a checked example rather than a tracing template. Change hull width or foreground sail position in your own trial.
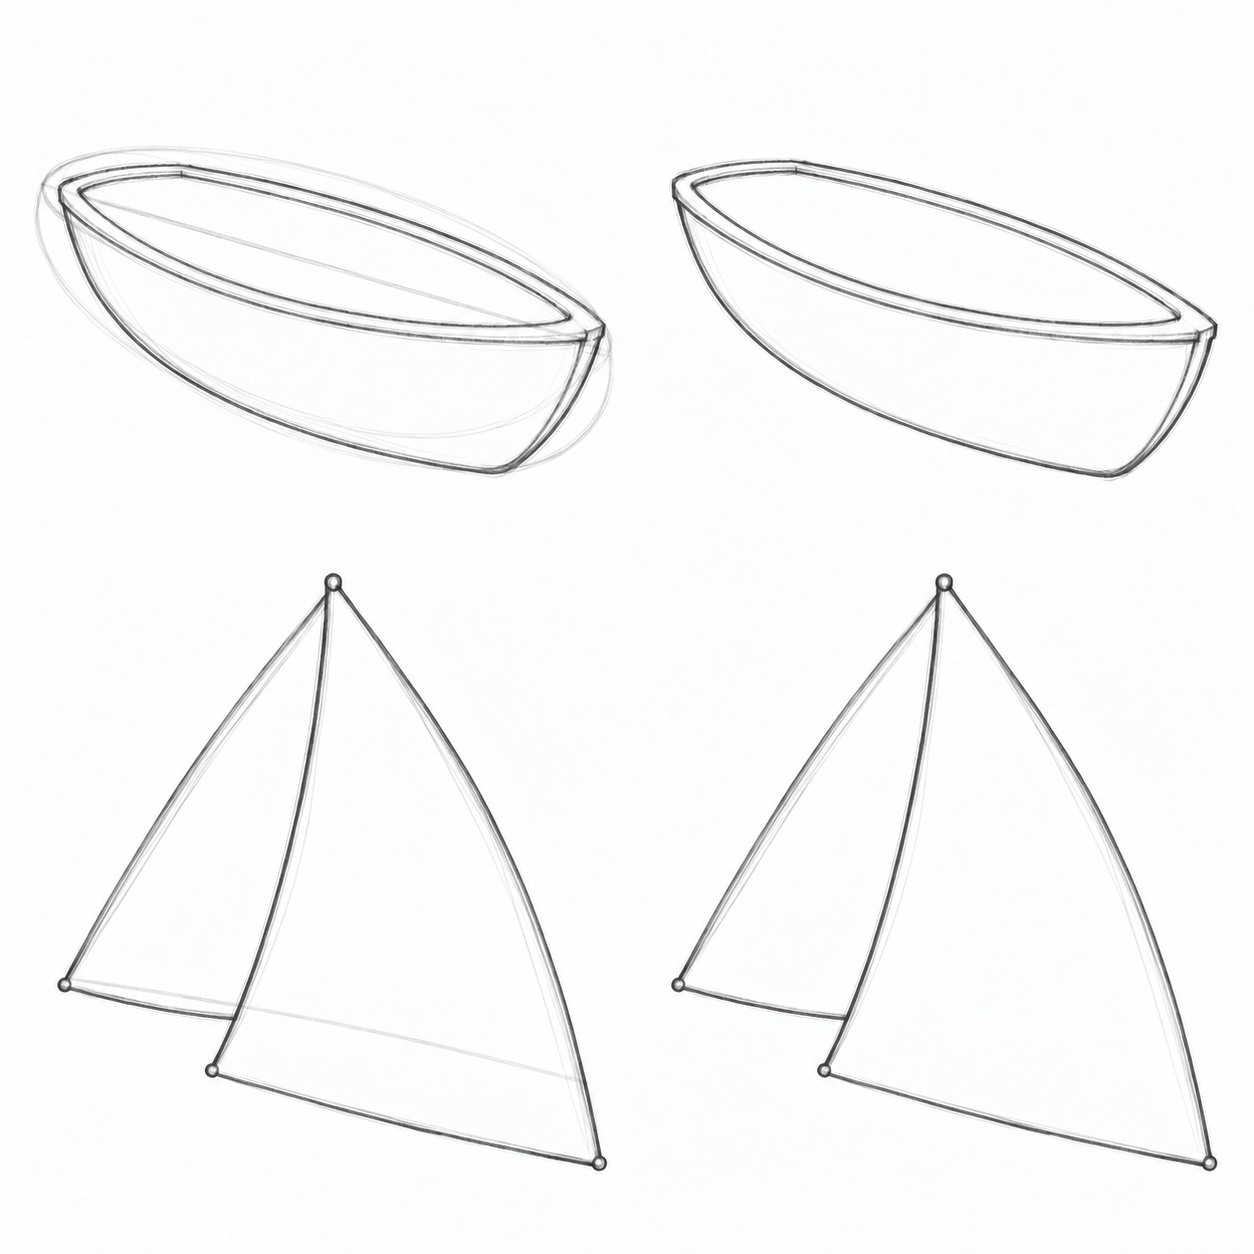
Now compare the hidden edge before and after erasing.
An opening trial for routes two and three. On a separate small oval, draw a smaller inner oval. Connect their edges with short walls and place one bench across the opening. Stop its ends at the inner wall. Make your own second trial with a broader opening instead of copying the outline. Check: is there a white strip between rims, without bench ends passing through a wall? If the strip merges, move only the inner curve.
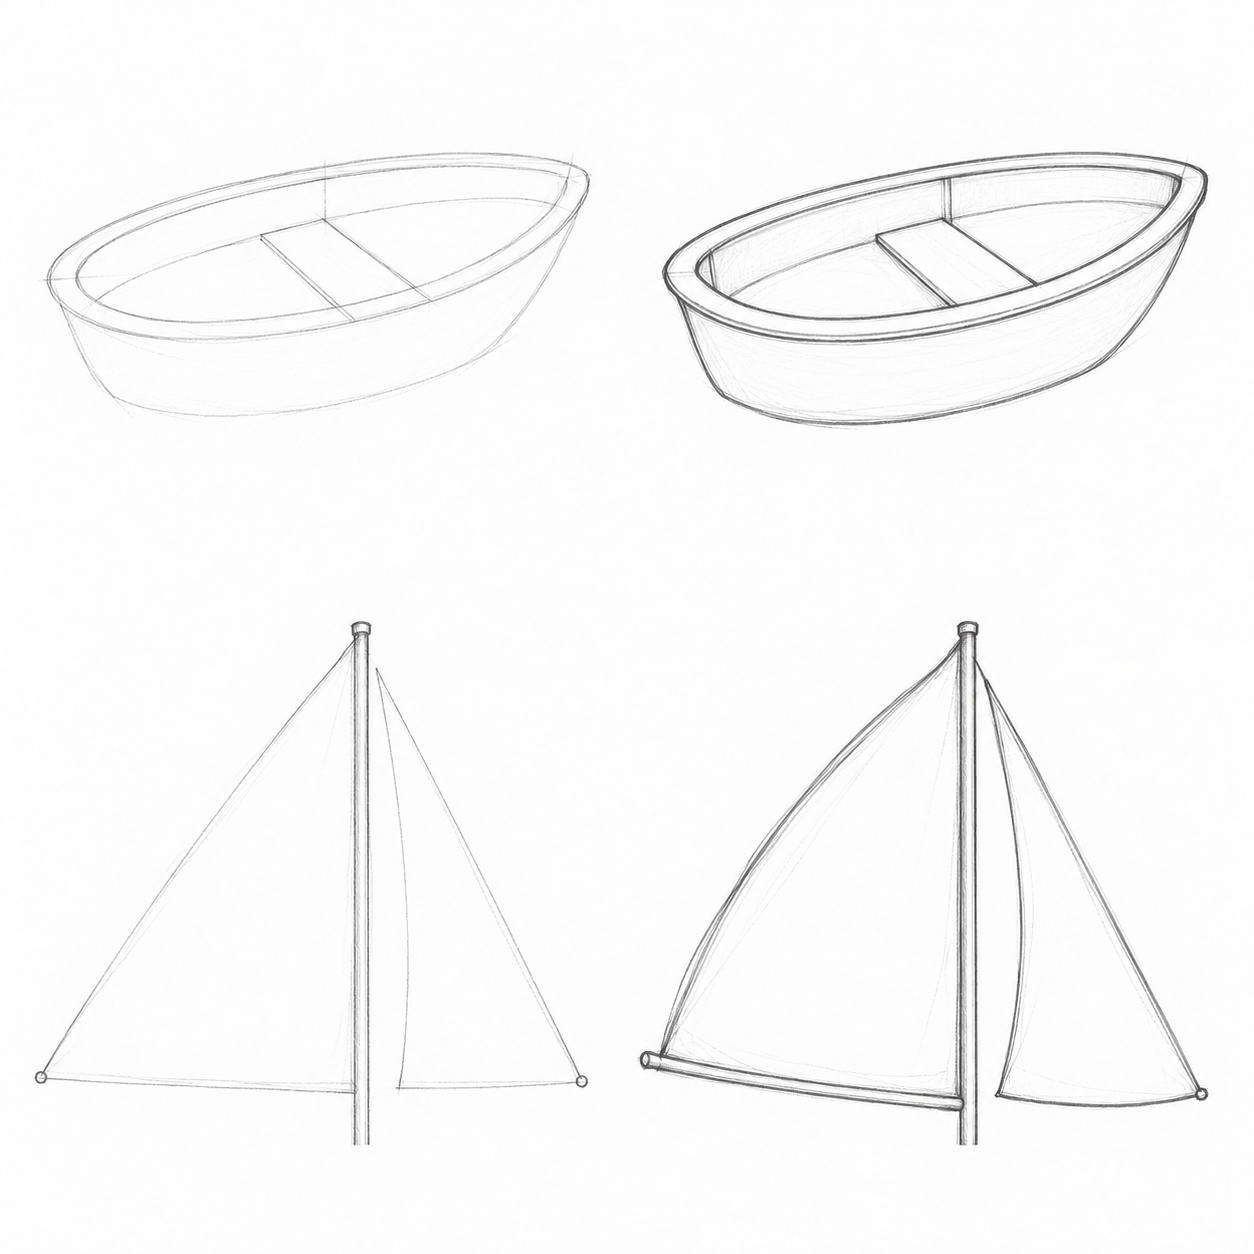
A two-sail trial. On fresh space, place a short mast and three attachment points each for a large left sail and narrow right sail. Refine the triangles with convex edges and curved feet; keep white separation between the right sail and mast for now. In your second trial, move its free corner slightly towards the bow. Check: are there two separate sails, each related to its own points? If the right shape becomes a slit, move only its free corner and redraw that curve. This prepares placement; overlap comes in route three.
Step 1. Place the hull and mast direction
Simplest. Lightly place a long shallow oval low on the page. Mark the right-hand bow. Raise a mast axis from just right of centre, leaving clear space above the hull for the mast and sail.
A little more detail. Place a long hull oval, slightly open towards the viewer. Mark the bow on the right and the mast position right of centre. These are pale guides, without sails or details.
Best version. Turn the long mass from the far stern at upper left towards the near bow at lower right. Add a lengthwise hull axis and a vertical mast guide.
Why: A large mass and axis reserve space before the sails arrive. You can change proportions without squeezing a finished sail against the page edge.
Check: Does the bow point in your chosen direction? Is there room above the mast and to its right?
Repair: Lighten the outer placement marks and move the whole pale mass if it crowds the sails. Avoid a dark first outline.
Step 2. Find the outside of the hull
Simplest. Use the oval to find a long shallow lower curve and a calmer upper edge. Join them with a rounded stern on the left and a pointed bow on the right. Keep the old oval pale.
A little more detail. Find the curved underside and raised bow. Leave enough height between them for the hull side. Do not turn the entire starting oval into a finished contour.
Best version. Build the pointed near bow and the broad visible side below it. The far end is shorter and narrower. Keep the axis turn instead of straightening the boat into side view.
Why: The guide sets size, but the real hull has a bow, a stern and changing curvature rather than one oval boundary.
Check: Does one coherent hull read without sails? In the third route, is the near hull side broader than the far edge?
Repair: Erase a short section of an overly round bow or sagging bottom. Reconnect its neighbours while keeping the rest of the hull.
Step 3. Show the rim and opening
Simplest. Add one close curve along the upper edge to suggest rim thickness. Leave the inside white, without benches or a deep opening.
A little more detail. Place a smaller inner edge inside the upper oval. Connect them with short inner walls to form an open cockpit. Add one bench across it; stop its ends at the inside wall.
Best version. Build a tapered opening inside the turned hull. Its near rim is broader and its far rim narrower. Add one transverse bench, aligning it with the short sides of the opening.
Why: Paired edges show thickness; an opening says we are looking slightly down. Interior lines stop where the near wall covers them.
Check: Is there white space between the rims? Do bench ends stay inside the hull? Has the simplest route remained shallow?
Repair: Shorten an end that crosses a wall. If the rims merge, lighten the inner one and move only the crowded section inward.
Step 4. Build the mast along its guide
Simplest. Draw two close mast edges beside the vertical axis, meeting the upper hull edge. The study temporarily shows a pale lower extension through the hull side; we will erase the covered section later.
A little more detail. Place a narrow mast towards the front of the cockpit. Compare its distances from bow and stern. Its pale trial bottom temporarily crosses the near rim.
Best version. Raise a narrow vertical mast from the turned opening. It stays vertical on the page even though the hull axis slopes. Its pale trial bottom still shows through the hull side.
Why: The axis positions a long part before sails surround it. The transparent trial checks placement; the finished hull will be opaque.
Check: Does the mast grow from the hull rather than float beside it? Is it much narrower than the opening, without leaning along the hull axis?
Repair: Lighten one misplaced mast edge and return it to the axis. Do not widen the whole mast to hide the mistake.
Step 5. Build the large sail from three points
Simplest. Choose a top attachment, a lower attachment and a free corner left of the mast. Refine their pale triangle with a gently curved outer edge. Keep the lower side light for now.
A little more detail. Mark three attachments left of the mast, then shape a full sail with a convex outer edge and gently sagging foot. Add a narrow boom below the foot. Keep the pale guide triangle visible.
Best version. Build the rear left sail and its narrow boom. For now, take the whole boom to the mast: the next sail will cover part of it. Leave the pale attachment triangle visible.
Why: Attachment points hold the size while the curved edge gives the sail its shape. We are solving large forms, without seams, ropes or creases.
Check: Is the sail top attached to the mast? Is the free corner clear of the hull? Does the convex edge remain one calm curve?
Repair: Move only the free corner if the sail is too narrow. Lighten an angular section and reconnect it with short flowing strokes.
Step 6. Complete the sails and identify hidden lines
Simplest. Draw a narrow boom beneath the sail foot, from its free corner towards the mast. This route needs no second sail. Find the pale trial bottom of the mast inside the hull side.
A little more detail. Add the forward sail, or jib, right of the mast. Give it a convex outer edge and curved foot. Its lower-right corner meets the bow at the upper hull edge: this is its attachment point. Keep a white gap between the jib left edge and the mast. Find the trial mast bottom.
Best version. Place the foreground right jib. Its curved left edge swings left of the mast; its lower-left corner sits below the rear boom. The whole view shows sail placement. The additional close-up intentionally retains a trial rear boom line inside the foreground sail: identify that covered section. You need not copy the error yourself.
Why: Name the front form and trace the rear line before erasing. This prevents removing a useful edge or leaving the sail transparent.
Check: Which line belongs to the rear part? In route three, does the boom cross the sail edge above the sail corner?
Repair: Do not darken the trial hidden line. If the edges are confusing, trace the boom from its free left end to the crossing.
Whole view
Close-up: trial boom
Step 7. Erase only the covered sections
Simplest. Erase the trial mast bottom inside the hull side. Keep the mast visible above the upper edge. Retain the pale hull oval and sail triangle for now.
A little more detail. Erase the mast bottom beneath the near rim and any bench ends crossing the wall. Keep visible parts inside the cockpit. Leave the construction guides pale.
Best version. Erase any trial rear boom and mast segments inside the foreground sail, plus the mast bottom behind the near hull side. Compare the close-ups: the trial boom line inside the sail has disappeared. The visible left boom ends at mid-curve of the near sail; its edge continues below this crossing to its own corner.
Why: An opaque front form covers a rear one. Stopping the rear contour creates depth without shading or an equally dark outline everywhere.
Check: Are rear lines absent inside the foreground sail or hull? Is the front edge continuous, with the visible rear section intact?
Repair: If you removed a needed edge, restore only its short exposed section. Do not redraw it through the entire front form.
Whole view
Close-up: after erasing
Step 8. Remove guides and check the finished drawing
Simplest. Remove the oval, axis and pale triangle edges. Keep one hull, upper curve, mast, sail and boom. Strengthen just a few junctions with slightly firmer pressure.
A little more detail. Erase the starting oval, mast axis and trial triangles. Keep visible cockpit edges, one bench and two sails. Let far edges stay lighter than near ones.
Best version. Remove axes and trial contours. Keep the tapered opening, broad near hull side and clear rear boom stop at the foreground sail. The jib lower-right corner attaches at the bow; white space remains between the rest of its foot and the hull rim.
Why: The guides have done their job. A few selected accents tie the drawing together; tracing every line equally would make it schematic again.
Check: Can you point to a removed guide and one hidden edge? Have hull and sails kept their chosen positions?
Repair: Lighten only an unwanted double contour or heavy accent. Correct the edge before adding anything; shading cannot repair its position.
Repair a small problem
The hull is still an oval. Its guides were all traced equally. Lighten the front and reconnect top and bottom into a bow. The opening has become a stripe. The rims have merged. Move a short inner curve inward while preserving the outside. The sail looks transparent. A rear boom remains visible through it. Trace it from its exposed end and erase only the covered section. If layer order is unclear, revisit the warm-up instead of restarting the whole boat.
Transfer the skill to a new position
Choose one task. First draw your own guides and name a hidden line, then compare with the construction/result pair. Different proportions are welcome; the example is not the only correct answer. Each task reuses construction and overlap under a changed spatial condition.
1. Look from much higher up
Build a new broad opening seen from above and shorten the apparent mast height. Place the bench across the inside along the short hull direction. Compare opening and hull-side widths before adding sails.
Why: A higher viewpoint reveals more interior; the old narrow oval cannot simply be reused.
Check: Is more interior visible than in side view? Has the mast stayed separate from the hull axis?
Repair: Widen only the inner curve and move the bench ends back to the walls.
Question: Why is the opening wider? Answer: Looking down reveals more of its upper plane.
2. Look almost level with the hull
Lower your viewpoint to the hull side. Sketch the opening only as a pale trial and decide what the near wall covers. Keep the upper gunwale in the finish, removing the hidden bench and far interior.
Why: A low viewpoint hides the inside; this changes visibility rather than merely shrinking the drawing.
Check: Is the hull opaque, without a bench or far wall showing through it?
Repair: Erase the covered inner curve while preserving the upper hull edge.
Question: Why has the bench disappeared even though it is still in the boat? Answer: The near hull side hides it at the low viewpoint.
3. Put the left sail in front
Keep the turned hull, but bring the large left sail in front of the right jib. Its right edge covers the rear sail foot. Before erasing, trace the rear line and choose the newly hidden section.
Why: The layer order has changed, so the previous erasure no longer works.
Check: Does the rear right edge stop at the foreground left sail, with its exposed tip preserved?
Repair: Restore the exposed rear section and remove only the part behind the new foreground sail.
Question: Can you keep the old erased section? Answer: No: a different foreground form covers a different part of the rear contour.
Self-check and printable practice
Self-check: point to a hull shape refined from a guide, a removed guide and one hidden edge. Question: why does the boom not cross the foreground sail? Answer: the opaque sail covers the rear spar, so its visible section ends at the sail contour.
The complete A4 PDF contains all three routes, warm-up and independent tasks. A separate two-page practice sheet leaves room for your trials and new drawing. Each language has its own files. A4 describes the printable page, not a required boat size. Use the download buttons on the page.
Do you need a ruler? No: the axis guides direction rather than a measured straight line. Are two sails required? No: the first route is complete with one. Must you draw the sea? No: check the hull and hidden edges first; you can invent a background separately after the lesson.
Self-check: point to a hull shape refined from a guide, a removed guide and one hidden edge. Question: why does the boom not cross the foreground sail? Answer: the opaque sail covers the rear spar, so its visible section ends at the sail contour.
What to draw next
All drawing lessons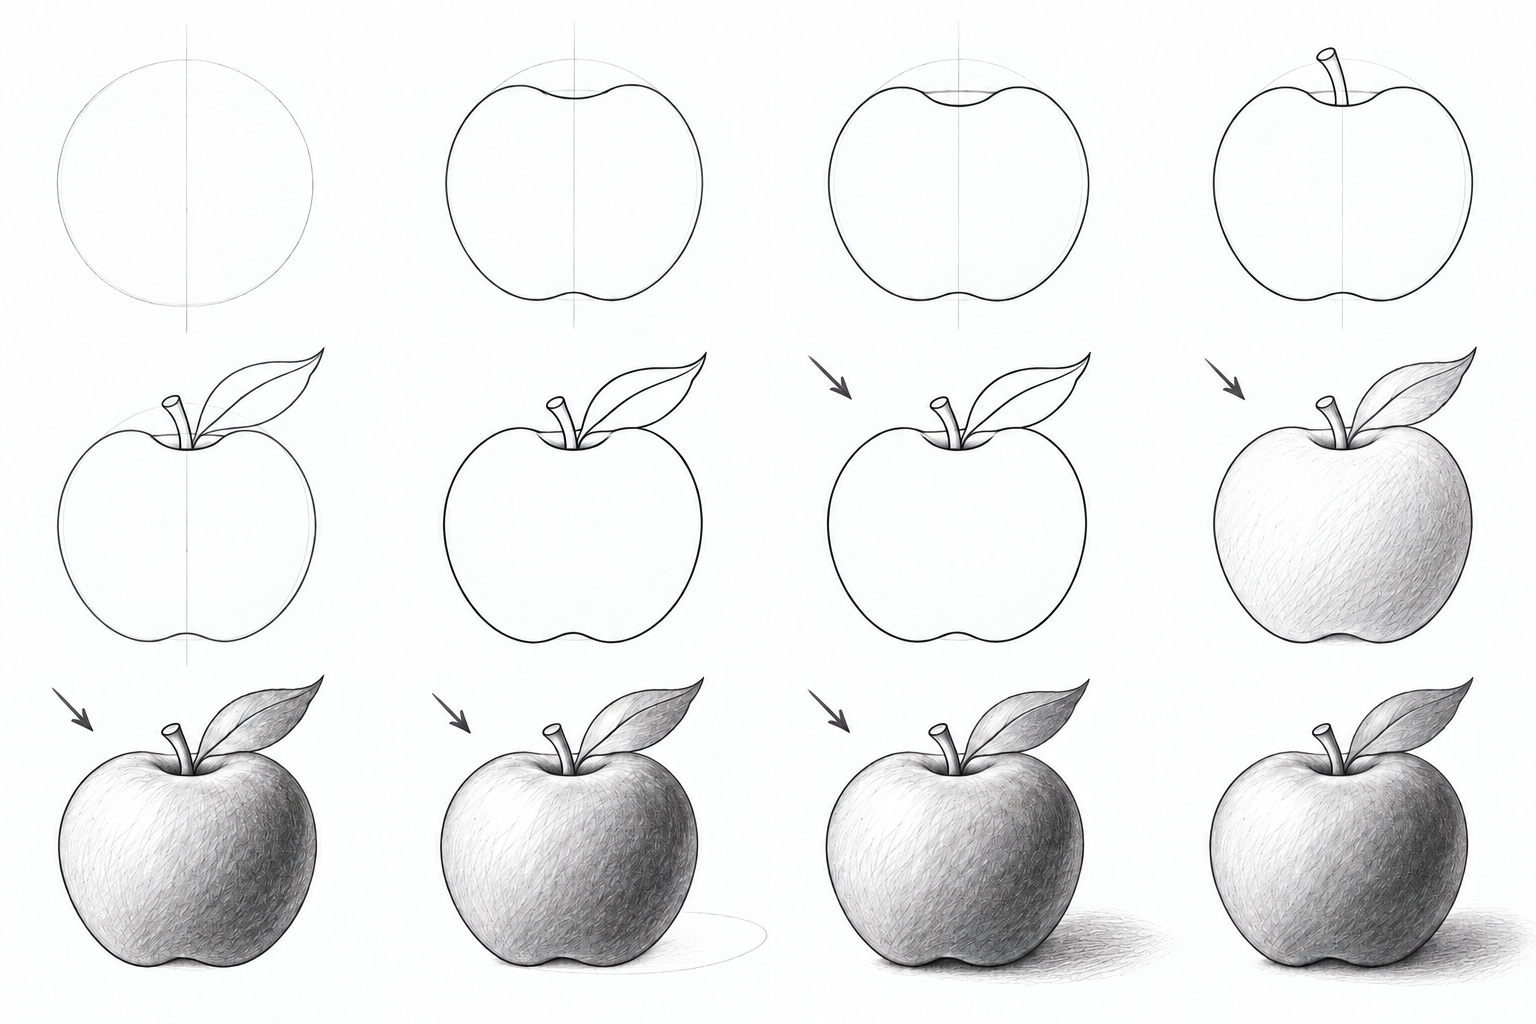 3 levels
How to draw an apple
Draw an apple at three levels: simple forms, a recessed top and bent leaf, then pencil light and shadow. Clear stages, small repairs and A4/Letter PDFs.
 3 levels
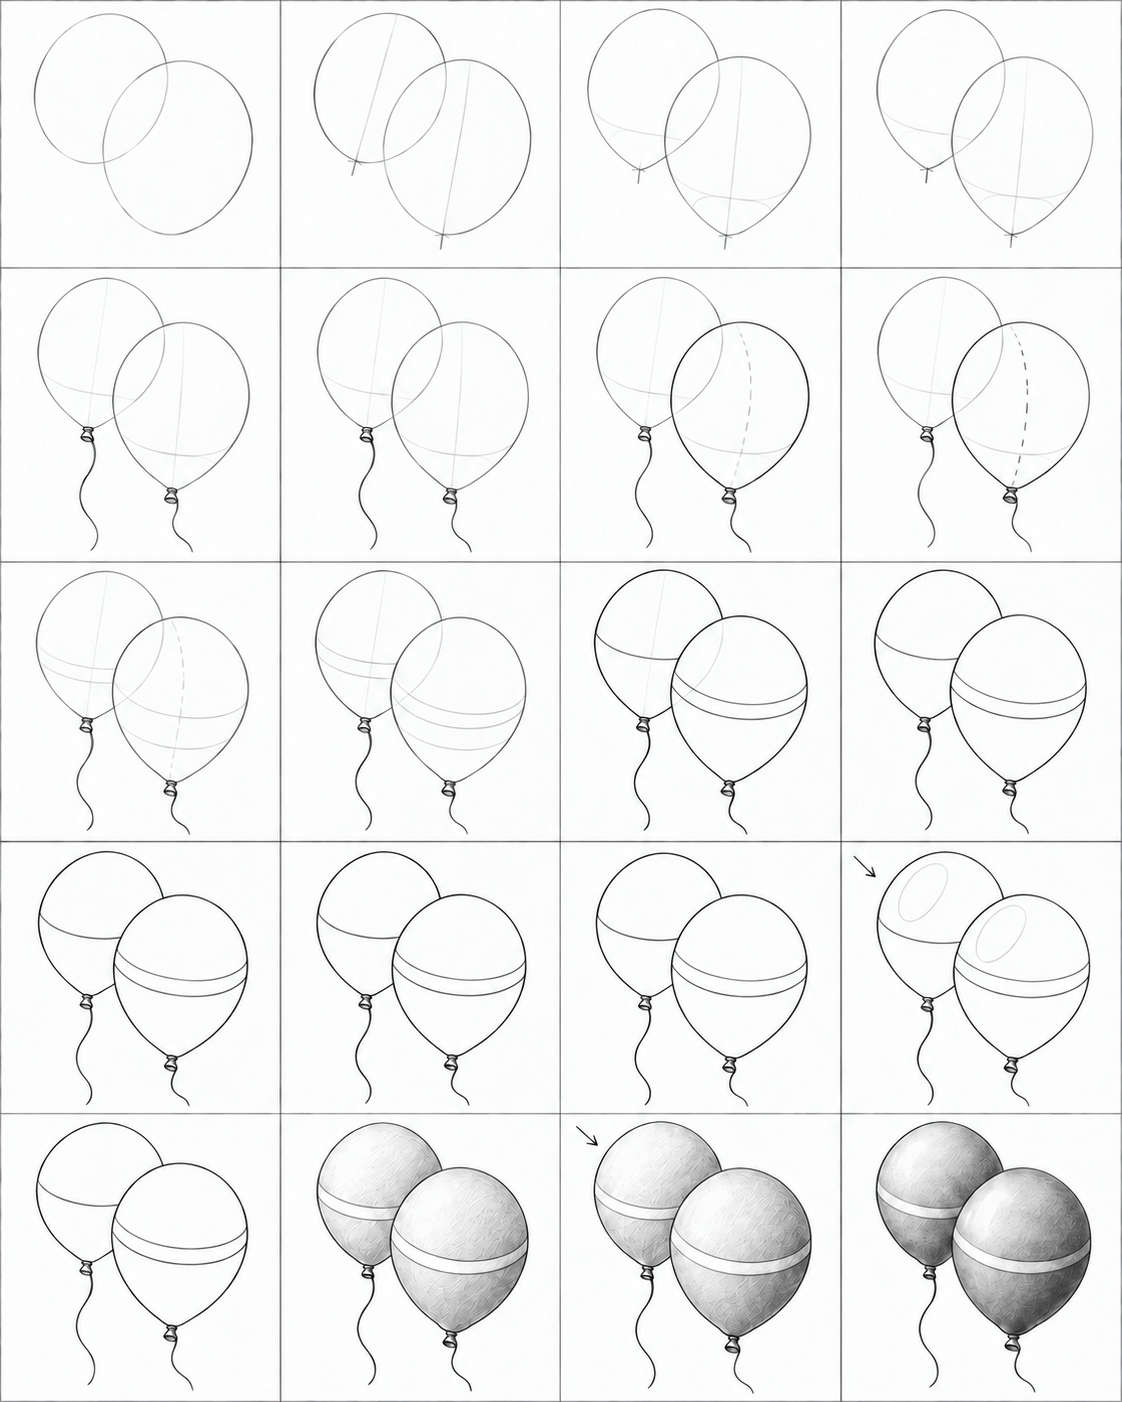
How to draw balloons
Three balloon drawing routes, from two simple ovals to tapered necks and pencil volume. Illustrated steps, checks, small repairs and practice PDFs.
 3 levels
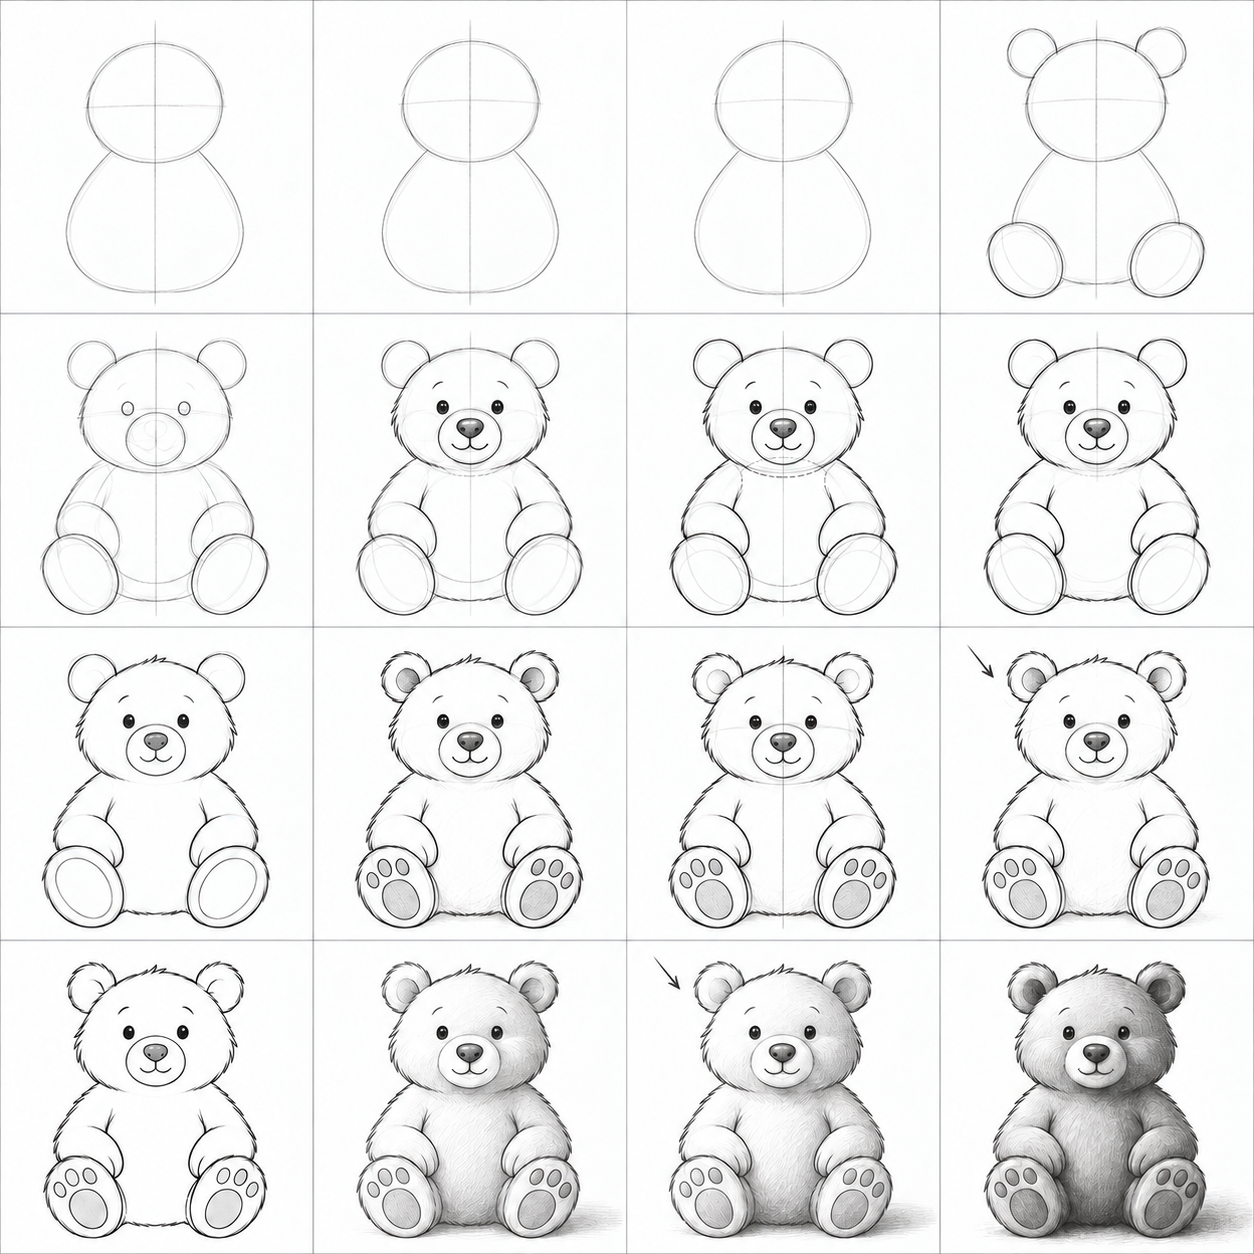
How to draw a bear in pencil
Draw a sitting bear from simple forms: paws, muzzle, overlaps and shading. Three levels, illustrated steps and A4 lesson and practice PDFs.